Advertisement
Cleaning 6m read
0

10 Items Around the House That Are Way Dirtier Than You Think

Our eyes can deceive us. You may think your home is spotless after your weekly cleaning routine, but in reality, microscopic germs are hiding in plain sight, and dust and dirt are collecting in places you don’t even realize. Here are 10 household items that are way dirtier than you think, and should be given some extra care and attention the next time you break out your cleaning caddy.

All featured products and deals are selected independently and objectively by the author. House Outlook may receive a share of sales via affiliate links in content.

Our eyes can deceive us. You may think your home is spotless after your weekly cleaning routine, but in reality, microscopic germs are hiding in plain sight, and dust and dirt are collecting in places you don’t even realize. Here are 10 household items that are way dirtier than you think, and should be given…
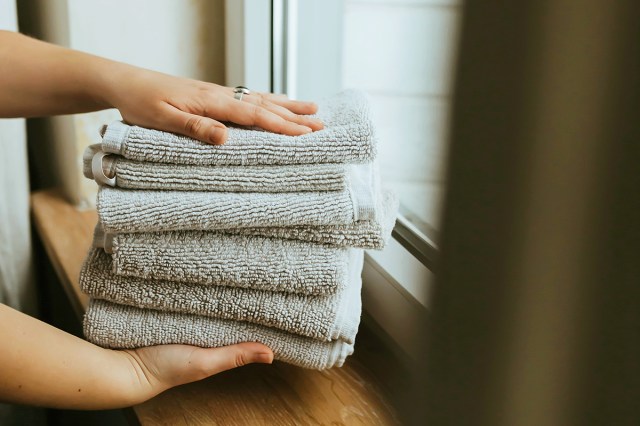
1. Pillows

While most people clean their pillowcases every few days or weeks, the same can’t be said for the pillows themselves. But sweat, drool, and oil can seep through the pillowcase and be absorbed into the pillow, creating a bacteria-rich environment. These invisible germs can lead to acne or eczema breakouts and other health issues such as allergies and breathing difficulties. WebMD suggests washing your pillows every three to six months to keep them clean — just consult the laundry tag for specific instructions.

Credit: Morgan Lane/ Unsplash+

2. Ceiling Fans

When you look up at a ceiling fan, you tend to see only the underside of the blades. But the tops are notorious for attracting dust. Anytime you turn on the fan, you’re unknowingly scattering tiny dust particles throughout the room. Thankfully, there’s a hack for cleaning those fan blades without getting dust all over the floor and furniture, and all you need is a pillowcase.

Advertisement

3. Remote Controls

At the end of a long day, many of us just want to turn on the television and decompress. But when you grab the remote, you’re transferring a day’s worth of bacteria from your hand to the buttons. This is especially troublesome if you live in a large household full of TV lovers, where everyone will be touching the remote at one point or another. To keep the remote control clean, remove the batteries, dampen a microfiber cloth with rubbing alcohol, and wipe down the device at least once a month.

Credit: Kaboompics/ Pexels

4. Dishcloths

Dishcloths, kitchen sponges, and other dishwashing tools trap bacteria in their pores and need to be cleaned themselves. If you don’t regularly do so, your dishwashing will be all for naught, as you’ll be spreading microscopic germs onto dishes that look clean to the naked eye. Wash your dishcloths in hot water with laundry detergent, just as you would wash any soiled item of clothing. As for soft sponges, Food Network suggests placing them in a microwave-safe bowl, filling the bowl with water, and running the appliance on high for one minute to sanitize the sponge. Warning: Never put anything metallic into the microwave, such as steel wool or a chain-link scrubber.

Related: 3 Household Cleaning Hacks With Toothpaste
Advertisement

5. Coffee Maker

Daily coffee drinkers may have no idea just how dirty their coffee makers truly are. It’s important to clean the machine every one to three months, depending on how often you use it. To flush out the device, fill the reservoir with white vinegar and run the coffee maker as you normally would — this removes any bacteria and dirt that’s been sitting in there. Then run the machine through two more brew cycles using plain water, which helps remove the vinegary taste.

Credit: valverdesupport/ Pexels

6. Doorknobs

Doorknobs are among the most common touchpoints in any home, and we often reach for them without thinking about the sneeze we just covered or the neighborhood cat we petted earlier in the day. At least once a week, take a damp, soapy cloth or disinfectant wipe and give the knob a thorough clean to help keep that bacteria at bay.
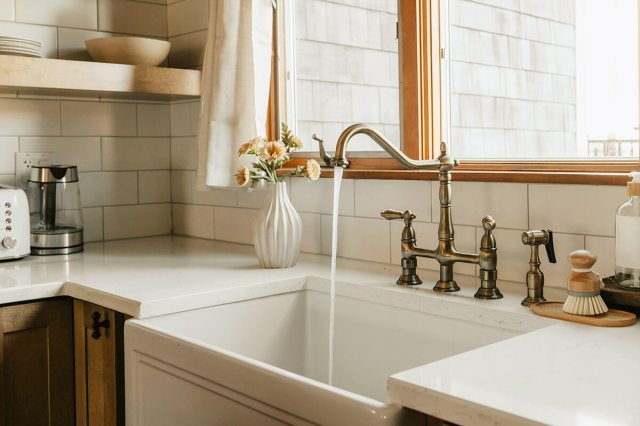
Advertisement

7. Kitchen Sink

This may be unpleasant to hear, but a CNN Health article warns that kitchen sinks contain more fecal bacteria than flushed toilets. In addition to that grotesque thought, think of all the raw poultry and other bacteria-ridden foods you may have prepared in the sink at one time or another. This is why it’s important to scrub your sink once a week with a disinfectant that contains bleach. You should also sanitize the drain once a month by pouring down a mixture of 1 teaspoon of bleach and 1 quart of water.
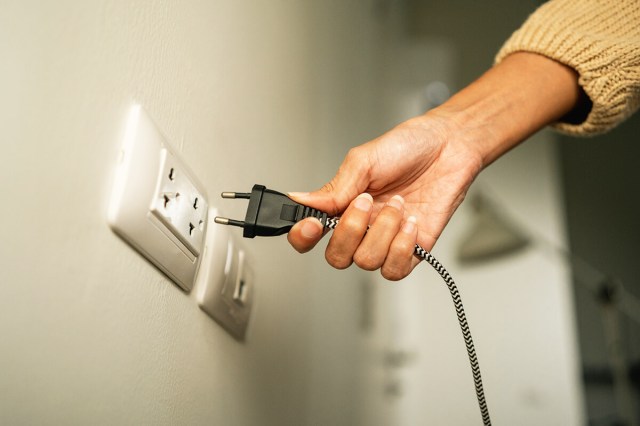
Credit: Clay Banks/ Unsplash+

8. Light Switches

Light switches are commonly overlooked when we’re cleaning, even though they’re touched several times a day. To make matters worse, Lancaster General Health notes that the heat emanating from light switches makes them a breeding ground for bacteria, and certain estimates have found they contain about 217 bacteria per square inch. Clean your light switches regularly using a disinfectant wipe or a microfiber cloth moistened with an all-purpose cleaner.
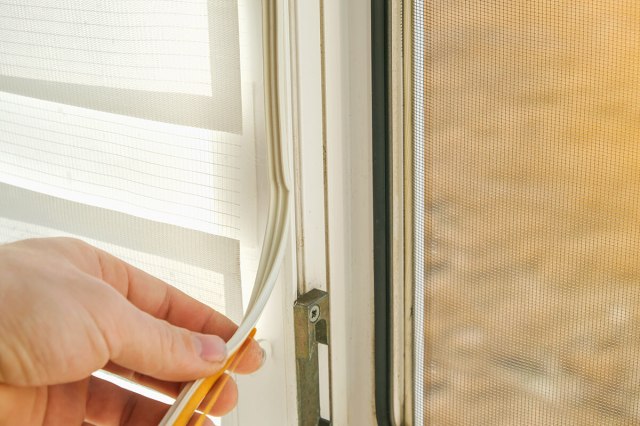
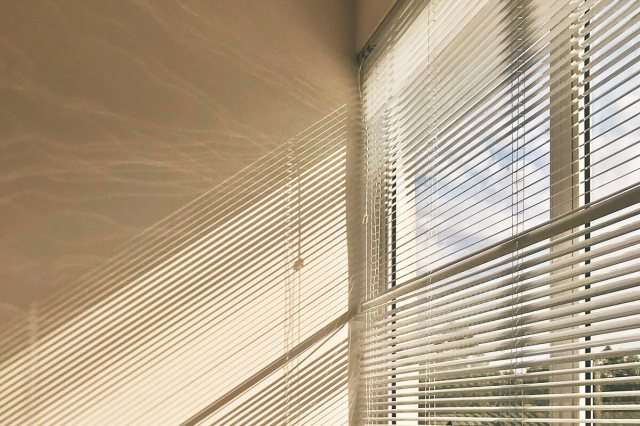
Related: 5 Essential Tips for Cleaning Smarter, Not Harder
Advertisement

9. Window Blinds

Window blinds attract dust and occasional stains, especially on the less visible, outward-facing side. If you have plastic blinds, use a clean microfiber cloth, warm water, and mild dish soap to wipe them down every week or two. Water can damage wooden blinds, so for those, use a feather duster or bristled brush to get rid of dust and dirt. For fabric blinds, vacuum with a brush attachment to remove any loose dirt or dust; for stubborn stains, dab gently with a clean rag dipped in warm water and dish soap.

Credit: Ruan Richard Rodrigues/ Unsplash

10. Dishwashers

Dishwashers may be able to clean your dishes, but they don’t always clean themselves as effectively as they should. WebMD notes that you can find up to 74 species of bacteria in the average dishwasher, including some that are drug-resistant. To thoroughly clean the inside of your dishwasher, here’s what Whirlpool recommends: First, remove and empty out the filter. Then add two cups of white vinegar to a dishwasher-safe bowl, place it on the lower rack, and run a normal cycle without detergent. Lastly, sprinkle one cup of baking soda on the bottom of the appliance and run a hot water cycle. 

Now that we’ve alerted you to these potential problem areas, try to incorporate them into your regular cleaning routine. The more you stay on top of these bacterial hot spots, the more confident you can be that your home is a clean and healthy space.

Advertisement
Bennett Kleinman
Staff Writer
Bennett Kleinman is a New York City-based staff writer for Optimism Media, covering topics for several brands including House Outlook and Better Report. He previously contributed to television programs such as "Late Show With David Letterman" and "Impractical Jokers," and digital publications like The Onion. Bennett is also a devoted New York Yankees and New Jersey Devils fan, and thinks plain seltzer is the best drink ever invented.
This article is for general informational purposes only.
Affiliate Disclaimer 
|
Financial Disclaimer
Featured Image Credit:  Pablo Merchán Montes/ Unsplash+ | Updated  Jan 7, 2025 |
Advertisement
Food & Drink 9m read
0

10 Chef-Approved Storage Hacks To Make Food Last Longer

Food prices have climbed 28% since 2019, squeezing household budgets and making saving money on groceries a top priority for many families. Buying less is an option, but making your food go further and last longer is a better one. Fortunately, there are numerous hacks to keep food fresh and reduce waste. As a trained chef and frugal home cook, I’m sharing 10 of my personal favorites.

All featured products and deals are selected independently and objectively by the author. House Outlook may receive a share of sales via affiliate links in content.

Food prices have climbed 28% since 2019, squeezing household budgets and making saving money on groceries a top priority for many families. Buying less is an option, but making your food go further and last longer is a better one. Fortunately, there are numerous hacks to keep food fresh and reduce waste. As a trained…

1. Keep Dry Herbs and Spices Out of the Light

Keeping your most-used herbs and spices close to the stove makes cooking more convenient, but unfortunately, it’s also the place where they’ll deteriorate most quickly. They’ll be exposed to frequent temperature changes, humidity from the foods you cook, and — most importantly — exposure to light.

Ground spices and dried herbs lose their oomph pretty quickly when they’re out in the open, especially in direct sunlight. If you aren’t going to use them up within four to six months, store them in a dark place such as a pantry or closed cupboard.

Credit: Pixabay/ Pexels

2. Get Airtight Containers for Lesser-Used Dry Goods

Many pantries are stocked with dry goods such as flour, rice, cereal, and crackers. But if these items are stored in open boxes or cartons, it won’t be long before they begin to lose freshness. They’ll become stale and lose flavor over time, and there’s always the risk of them attracting insects or rodents, too.

Packing dry goods into airtight containers can help prolong their shelf life, which is what pantry items are all about. Storage canister sets, plastic containers with tight-fitting lids, and Mason jars are all good options that will extend the life of your dry goods. Better yet, you can even get an inexpensive battery-operated vacuum sealer to suck the air out of the Mason jars.

Credit: cemagraphics/ iStock
Advertisement

3. Refrigerate Whole Grains

While most dry goods don’t require refrigeration, whole grains are an exception. They’re packed with nutrients and fiber, so kudos to you if you keep them on hand, but storing them in the pantry is not recommended long-term.

Related: 19 Items Professional Chefs Never Refrigerate

Whole grains, by definition, still contain their bran and germ, along with natural oils. Those oils will turn rancid if they’re allowed to sit in the open air at room temperature. So pack up your stone-ground cornmeal, cracked wheat, and even whole-wheat flour into bags or containers, and find room for them in the fridge. They’ll last longer, taste better, and won’t spoil. If you have space in your freezer, you can store whole grains for up to a year as long as they’re well packaged.

Credit: Elina Fairytale/ Pexels

4. Don’t Freeze Meats in Their Original Packaging

If you want your meat, fish, or poultry to last as long as possible in the freezer, rule No. 1 is not to freeze them in their retail packaging from the supermarket. Those plastic-wrapped trays contain excess air that draws moisture out of the frozen food and leads to freezer burn. The next time you return from the grocery store, open up those packages and transfer your meats into heavy-duty freezer bags, removing as much air as possible.

The only exception to this rule is meat that’s packed in airtight wrapping during the manufacturing process. Those cryo-packed meats are beautifully sealed, so they’re good to go straight into the freezer.

Credit: Qwart/ iStock
Advertisement

5. Refrigerate “Things You Don’t Refrigerate”

What do bananas and avocados have in common? Well, they both notoriously go from “not quite ready” to “past their prime” in the blink of an eye. Common wisdom says you shouldn’t refrigerate them, as it can interfere with the ripening process. But here’s the thing: If you refrigerate them once they hit that moment of perfect ripeness (however you define it, in the case of bananas), they will stay that way for a few extra days. The cold temperature slows the ripening process to a crawl, so instead of having your bananas and avocados turn to mush, you’ll have additional time to use them up. Bananas’ skins will indeed turn dark, but that’s deceptive. The fruit inside remains perfect.

Credit: perthstagedtosell/ Shutterstock

6. Refrigerate Your Citrus

Citrus fruits don’t need refrigeration, and many websites (us included) will tell you so. Citrus won’t go soft and dark like bananas, for example, or bruise like apples and pears. But if you eat only one or two a day, and buy them in bulk for the cost savings, you’ll run up against their shelf life pretty quickly.

Instead of leaving your citrus out on the counter, place them in nonporous bags (plastic if you must, but ideally something reusable) and store them in the fridge. The bags will protect them from the dry refrigerator air, and they’ll stay fresh and juicy for longer.

Credit: 4otogen/ Shutterstock
Advertisement

7. Treat Fresh Herbs Like Cut Flowers

Don’t you love it when recipes call for a tablespoon of minced fresh herbs, but stores only sell them in a bunch the size of your head? If groceries had high school yearbook superlatives, herbs would be crowned “Most Likely To Turn to Compost in the Crisper Drawer.”

Related: This Chef-Approved Trick Keeps Herbs Fresher for Longer

Instead of storing herbs in a produce bag in the crisper, trim the bottoms of the stems and place them in a glass of water on a sunny windowsill. They’ll continue to grow and stay fresh for days, especially if you cover them with a plastic bag to act as a mini-greenhouse and retain extra moisture. Just be sure to change the water every day or two to prevent mold growth.

Credit: gradyreese/ iStock

8. Puree Excess Herbs

I grow a lot of fresh herbs in my garden, dehydrating many of them for winter use. However, some herbs (such as dill and cilantro) lose a lot of flavor when dehydrated, while others (like sage) change flavor, so I puree those instead. Pureeing is another good way to get the most out of those oversized supermarket herb bundles after you’ve used what you need for a recipe.

I throw mine into a food processor (a high-power blender works, too) with just enough oil to help them puree to a paste. Then you can spoon the herb-and-oil mixture into ice cube trays for freezing. For larger quantities, scoop the puree into zipper storage bags, flatten and score it, and freeze the bags on a flat surface. Cubes give you a predictable amount every time, or with the flat-pack method, you can break off as big or as little a piece as you need. I do that with my extra garlic and garlic scapes, too.

Credit: Ahanov Michael/ Shutterstock
Advertisement

9. Keep Extra Ice Cube Trays on Hand for Leftovers

Ice cube trays are cheap at the dollar store, and you should have them in several sizes and shapes for preserving leftovers. Got a half-carton of chicken broth? Cube it. Leftover wine? (I know, I know.) Cube it. Herbs to salvage? Puree and cube them. That whole can of tomato paste, minus the one tablespoon your recipe called for? Cube it.

Once the cubes are frozen, transfer them to a freezer bag for storage and squeeze out as much air as possible. Pro tip: Separate the ice cube trays intended for savory uses to prevent your lemonade or bourbon from tasting like garlic and rosemary.

Credit: Ahanov Michael/ Shutterstock

10. Fluff Up Your Mesclun Mix

Those big packs of salad greens you buy at the supermarket are a pretty good value, as long as you use them before they become slimy. Here’s the trick to making them last longer: Give them some room to breathe. When they’re packed tightly in their original clamshell container, there’s no room for air circulation and they’ll quickly start to wilt and liquify. So dump the whole thing into a big bowl, toss the leaves so they’re nice and light, and then pack them loosely into a couple of containers.

Add a sheet of paper towel to each container to absorb any excess moisture. Or, if you eat salad every week, consider purchasing some vented produce containers, which are designed for optimal airflow. One final step that helps a lot (speaking as a former chef) is tossing the greens in a bowl every day, so you can spot and remove any leaves that are beginning to wilt. It’s the equivalent of removing the proverbial “one bad apple that spoils the barrel,” and restaurants do this all the time.

Credit: Ganna Zelinska/ Shutterstock
Advertisement

Final Quick Tips

These 10 hacks are just the tip of the iceberg. Here are a few other quick pieces of advice for longer-lasting food:

• Get a vacuum sealer, if you can. The bags aren’t cheap, but oxidation is the enemy of shelf life, and vacuum sealing helps extend the storage life of countless food items. 

• Learn how the pros organize a fridge for storage life and food safety. (Don’t put perishable stuff in the door!) Here’s a helpful chart for reference.

• Have a plan before you go shopping. Don’t buy that bulk pack of chicken breasts if you won’t have time to separate and freeze the extras, or if you’re currently out of storage bags.

• Put a couple of inexpensive thermometers in your fridge and freezer, so you can easily monitor their temperatures. If they aren’t cold enough, your groceries won’t last like they should and may not even be food-safe.

• Ask friends and family for their favorite food-saving frugality tips, or what they do with [food item you struggle with]. There’s a lot of accumulated wisdom to tap into, if you just ask.

Advertisement
Fred Decker
Writer
Fred Decker is a trained chef and former restaurateur. Since closing his restaurants over a decade ago he has been a prolific freelance writer, publishing several thousand articles on dozens of high-volume websites including Taste Of Home, Hunker, Tasting Table, Week&, eHow, and GOBankingRates. He lives on a rural acreage shared with a big garden, chickens, rabbits, and grandkids.
This article is for general informational purposes only.
Affiliate Disclaimer 
|
Financial Disclaimer
Featured Image Credit:  Ahanov Michael/ Shutterstock | Updated  Jan 7, 2025 |
Advertisement
Food & Drink 3m read
0

How To Make Any Cheese Melt Like American Cheese

Like pineapple on pizza or Coke versus Pepsi, American cheese elicits strong opinions. Cheese snobs might turn up their noses at it, but many people enjoy an individually wrapped slice or two. Why? Well, mostly because of how it melts. Nothing else offers that same oozy, melty texture, and sometimes that’s exactly what you’re looking for. Sure, it’d be great if we could get, say, Swiss or Jack or even plain ol’ cheddar to melt the same way, but that’s just not how cheese works. Except … sometimes it is. It turns out, the ingredient that makes American cheese melt so beautifully can be added to other cheeses to achieve the same effect. Here’s how it works.

All featured products and deals are selected independently and objectively by the author. House Outlook may receive a share of sales via affiliate links in content.

Like pineapple on pizza or Coke versus Pepsi, American cheese elicits strong opinions. Cheese snobs might turn up their noses at it, but many people enjoy an individually wrapped slice or two. Why? Well, mostly because of how it melts. Nothing else offers that same oozy, melty texture, and sometimes that’s exactly what you’re looking…

Why American Cheese Is So Melty

American cheese begins as ordinary cheese. It’s typically made from a blend of cheeses, all of them with different melting qualities. Most cheeses melt, and some have a nice pull, but in sauces, they have a bad habit of becoming grainy or not mixing properly.

The ingredient that makes the difference is sodium citrate (or alternative salts in the same broad family). Without wading too far into the science of meltiness, sodium citrate helps loosen the bonds that hold the cheese’s protein molecules together. So if you love the gooeyness of American cheese but want more real cheese flavor, adding sodium citrate to other cheeses can make it happen. You don’t even have to buy it (though you can, here) to give it a try — you can make your own with pantry ingredients.

Advertisement

Melting Cheese With DIY Sodium Citrate

All you need to make sodium citrate is baking soda and some citric acid from a big-box store (look for it with the canning supplies, if you don’t already have it). Mix five parts baking soda with four parts citric acid, and you’re done. Dissolve the amount you need in a tablespoon or two of water or other liquid, and then add it to your shredded cheese as it melts. Just like that, you have almost-instant cheese sauce. You can add water, beer, wine, or other liquid ingredients, as needed, to get the specific flavor and texture you want. There’s no need to worry about the sodium citrate affecting the cheese’s flavor as it’s practically undetectable.

Related: This 2-Step Method for Reviving Stale Bread Works Like a Charm

You can tweak this hack to achieve any texture from very firm (think Velveeta) to thin and runny, depending on how much cheese, liquid, and citrate you use. There is some math involved, but you can use a handy online calculator like this one to dial in the right proportions.

Advertisement
Fred Decker
Writer
Fred Decker is a trained chef and former restaurateur. Since closing his restaurants over a decade ago he has been a prolific freelance writer, publishing several thousand articles on dozens of high-volume websites including Taste Of Home, Hunker, Tasting Table, Week&, eHow, and GOBankingRates. He lives on a rural acreage shared with a big garden, chickens, rabbits, and grandkids.
This article is for general informational purposes only.
Affiliate Disclaimer 
|
Financial Disclaimer
Featured Image Credit:  Polina Tankilevitch/ Pexels | Updated  Jan 6, 2025 |
Advertisement
Decorating 5m read
0

Nostalgic Home Design Trends That Are Staging a Comeback in 2025

What’s old is new again. That adage can be applied to just about anything, including home design trends. Colors, patterns, materials, and little flourishes come in and out, marking specific periods of time. Rattan furniture was everywhere in the ’70s. Brass screams ’80s. Oak cabinets bring you back to the ’90s.

All featured products and deals are selected independently and objectively by the author. House Outlook may receive a share of sales via affiliate links in content.

What’s old is new again. That adage can be applied to just about anything, including home design trends. Colors, patterns, materials, and little flourishes come in and out, marking specific periods of time. Rattan furniture was everywhere in the ’70s. Brass screams ’80s. Oak cabinets bring you back to the ’90s.

Fortunately for all of us, interior design trends don’t move as fast as fashion — painting walls and buying furniture are (somewhat) long-term commitments, so trends change over the course of years and decades, not seasons. There are a handful of 2025 trends that are anchored in vintage appeal, though, and will surely remind you of another time. Try adding a few of the following new-again touches to your own home for a dose of nostalgia.

Dark Wood Kitchens

According to interior designer Aoife Maria of Style So Simple, a common kitchen style of the 1970s is back in a big way. Dark wood kitchens are expected to make a resurgence in 2025 renovations. 

Not only is dark wood beautiful, but it’s a refreshing alternative to the kitchen styles that are common today. It’s a richer take on white oak cabinetry, which has been oh-so-popular in recent years, and it stands in stark contrast to the all-white kitchens that have dominated the interior design world for the last decade.

Credit: BM_27/ Shutterstock
Advertisement

Grandma Style

Think back to going to your grandma’s house as a kid. Was there a plaid armchair set against a dusty floral wallpaper? Perhaps a woven tapestry hanging on the wall and a busy patterned rug on the floor? This nostalgic style, and perhaps an aching for simpler times, is back, according to Zillow. (If, that is, simple equates to decades-old details, such as floral patterns and antique furnishings.) Shop your local thrift store or flea market for vintage pieces with granny chic flair, whether they are crocheted throw blankets, framed needlepoint, traditional armoires, or pleated lampshades.

Credit: KatarzynaBialasiewicz/ iStock

Four-Post Beds

Now’s the time to pursue your childhood dream of a four-post bed worthy of royalty. The grand style, reminiscent of palatial historic homes, has seen a comeback in recent years. If you think of your bedroom as a sanctuary away from the hustle and bustle of day-to-day life, a four-poster bed creates an even more intimate spot within a larger space. There’s a sense of security while sleeping in one.

Related: This Is the Secret to Fluffy, Luxury Hotel-Style Bedding

No matter your current bedroom design, there’s a four-post bed to complement it. For a traditional style, drape fabric canopies over it and choose posts with ornate detailing. Simpler, streamlined interpretations are suited to a more contemporary space.

Credit: stock_studio/ Shutterstock
Advertisement

Cane Furniture

Cane furniture never truly goes out of style, but it’s particularly trendy at the moment. The same goes for rattan and wicker. It has warmth and casual appeal, all while adding an organic, textured look. Your living space doesn’t need to scream “Florida sunroom in the ’80s,” though. Instead, try adding small touches of cane furniture through side tables or dining chairs.

Credit: Deconovo/ Unsplash

Brown, Brown, and More Brown

Take a seat, black, white, and gray. Neutrals will always be a staple in home design, whether you’re choosing paint, upholstery, or decor. There’s one nostalgic shade that will dominate throughout 2025, though: brown. Its growing popularity has been seen in the last year through furniture, kitchens, bedroom textiles, paint colors, and beyond.

Brown goes way back — as in, 18th-century way back — and evokes a strong sense of nostalgia, Maria says. She imagines interiors being color-drenched floor to ceiling in this hue, with walls, ceilings, and built-ins all painted the comforting color.

Credit: Followtheflow/ Shutterstock
Color of the Year

Brown’s resurgence was solidified when Pantone named Mocha Mousse, a warm hue that shares the rich qualities of chocolate and coffee, its 2025 Color of the Year.

Advertisement

More Walled-Off Rooms

If you’ve watched one episode of any HGTV show in the last 15 years, you’ve likely heard homeowners requesting an open-concept floor plan. An easy flow from room to room, especially between kitchen, dining, and living spaces, has its upsides. However, there’s a growing preference for more defined rooms over cavernous, airy spaces.

Related: How To Use the Rule of Three To Decorate Like an Interior Designer

According to Zillow, home buyers are embracing a more intimate feel in their spaces, since listings mentioning “cozy” increased by 35% compared to last year. The want for one great open space has been replaced by a desire for smaller rooms that serve a specific purpose, such as a dedicated dining room or den.

Credit: Sheila Say/ Shutterstock
Advertisement
Megan McCarty
Writer
Megan McCarty is a Los Angeles-based writer who covers the fun stuff: design, travel, wellness, beauty, and fashion. She has written for publications including Domino, The Spruce, MyDomaine, Bustle, and Rue Magazine. Her life rules include, but are not limited to, zipper when merging, contribute to your IRA, and do the nice thing.
This article is for general informational purposes only.
Affiliate Disclaimer 
|
Financial Disclaimer
Featured Image Credit:  hemul75/ iStock | Updated  Jan 2, 2025 |
Advertisement
Food & Drink 3m read
0

Use the “Upside-Down” Method for Cutting Bell Peppers

Professional chefs have two main priorities when it comes to vegetable prep. The first is to be fast, and the second is to keep waste to a minimum. With grocery bills being what they are, and most of us struggling to find enough hours in the day, those are sensible priorities for home cooks, too. If you haven’t tried it yet, the “upside-down trick” for cutting bell peppers is a perfect example of this approach. It’s quick and easy and produces virtually no waste.

All featured products and deals are selected independently and objectively by the author. House Outlook may receive a share of sales via affiliate links in content.

Professional chefs have two main priorities when it comes to vegetable prep. The first is to be fast, and the second is to keep waste to a minimum. With grocery bills being what they are, and most of us struggling to find enough hours in the day, those are sensible priorities for home cooks, too.…

How To Cut Bell Peppers

The best way to cut bell peppers starts with a simple step, though it’s not entirely obvious or intuitive. That step? Turn the bell pepper upside down. We don’t usually think of that because the stem keeps it from sitting upright on the cutting board. So, actually, the first step in this life-changing preparation method is to … cut off the stem.

With that done, here are the next steps:

1. Turn the bell pepper upside down on your cutting board. This way the broad top is on the bottom, so it’s nice and stable for cutting. 

2. Place your knife’s tip at the top of the pepper. 

3. Make a curving cut down one side of the pepper, following its natural contours with the blade and cutting as close to the core as possible. Here’s a helpful video tutorial for visual learners.

4. Repeat with the remaining sides.

By following the natural curve of the pepper, your knife will leave behind the membrane, the core, and the seeds clinging to it. Once you discard the core and seeds, you’re ready to slice or chop the neat, fleshy pepper pieces, and toss them into whatever recipe you’re working on.

Advertisement

How Else Can I Minimize Waste With Bell Peppers?

The upside-down method offers the best balance of speed and low waste, but there’s another hack you can try if you want to keep waste to an absolute minimum and don’t mind taking a little more time.

Related: How To Slice Grapes and Cherry Tomatoes in Seconds Flat

Locate the core in the middle of the pepper where the stem is. If you push hard on it with your thumb or the handle of the knife, it will pop right out. You can easily remove the core and then shake out any stray seeds. Now you have a perfectly hollow pepper, ready for slicing. You’ll still need to pull out the “ribs” of membrane as you go, but this technique yields the least amount of waste possible.

Advertisement
Fred Decker
Writer
Fred Decker is a trained chef and former restaurateur. Since closing his restaurants over a decade ago he has been a prolific freelance writer, publishing several thousand articles on dozens of high-volume websites including Taste Of Home, Hunker, Tasting Table, Week&, eHow, and GOBankingRates. He lives on a rural acreage shared with a big garden, chickens, rabbits, and grandkids.
This article is for general informational purposes only.
Affiliate Disclaimer 
|
Financial Disclaimer
Featured Image Credit:  100pk/ iStock | Updated  Dec 21, 2024 |
Advertisement
Home Improvement 5m read
0

Little Changes To Help You Save Money on Household Expenses

It’s never too late to start making changes that will help you save money on your household expenses, especially if the changes are relatively easy and will add up over time. There are several ways to cut back on your electricity, gas, and energy usage at home without sacrificing your family’s comfort level. The goal is to pinpoint the changes that work best for your home and that you can DIY instead of hiring a professional to do.

All featured products and deals are selected independently and objectively by the author. House Outlook may receive a share of sales via affiliate links in content.

It’s never too late to start making changes that will help you save money on your household expenses, especially if the changes are relatively easy and will add up over time. There are several ways to cut back on your electricity, gas, and energy usage at home without sacrificing your family’s comfort level. The goal…

Tips To Save Money on Household Expenses

Energy efficiency is the most impactful step you can take when it comes to saving money at home. Even the smallest changes can pay off in the long run. Here are some ideas to get you started.

Switch To Energy-Efficient LED Lightbulbs

If you’re still using incandescent lightbulbs, switching to LED lighting can significantly lower your monthly electric bill. LED lightbulbs use less energy and last longer, with a typical lifespan of 25,000 to 50,000 hours, so they don’t need to be replaced as often as their incandescent counterparts. They’re a little more expensive than standard bulbs, but the cost is offset by utility savings: According to the Department of Energy, LED lighting saves the average household around $225 in energy costs per year.

Credit: Antoni Shkraba/ Pexels

Seal Drafty Doors and Windows

Drafts from doors and windows can cause warm air to escape from your home. This can result in higher heating costs in the winter and higher cooling costs in the summer. Adding weather stripping or caulk to seal gaps around doors and windows will keep your home better insulated.

Credit: Olya Detry/ Shutterstock
Advertisement

Use a Programmable or Smart Thermostat

Installing a programmable thermostat gives you control over the temperature in your home while you’re away or simply not paying attention. It can be set to turn down the heat when it isn’t needed or give your air conditioner a break, reducing the amount of energy used and saving you money on your utility bills. A smart thermostat like the Google Nest allows you to use an app to control your home’s temperature from anywhere and even learns your preferences, but it’ll cost more up front.  

Credit: Jigar Panchal/ Unsplash+
Related: Helpful Hacks To Lower Your Heating Costs During the Colder Months

Insulate Your Water Heater

After heating and cooling systems, water heaters are the second-largest consumers of electricity in an average household. Insulating yours can drastically improve heat retention, especially if it’s an older model. (It’s worth noting that newer water heaters often include built-in insulation.) According to the Department of Energy, insulating your water heater can “reduce standby heat losses by 25% to 45% and save you about 7% to 16% in water heating costs, and it should pay for itself in about a year.”

Credit: Tanya C Smith/ Alamy Stock Photo
Advertisement

Unplug Appliances and Devices When They Aren’t Being Used

“Phantom energy” is the term used to describe the energy consumed by appliances and electronics when they’re not in use. Yes, that means your TV, washing machine, and even your phone charger drain energy when they are inactive but still plugged in. When possible, unplug them — it could save an estimated 10% of your total energy costs. Another solution is to upgrade to an advanced power strip that automatically shuts off power to electronics when they’re not in use.

Credit: GBJSTOCK/ Shutterstock

Cancel Cable and Switch to a Streaming Service

If you haven’t yet canceled your cable and switched to a streaming service, now is a good time to do it. Not only will a streaming service like Netflix, Hulu, or Prime Video give you access to practically endless on-demand shows and movies, but some services also offer live TV for less money than cable.

If you’re looking to cut costs even further, consider using free, ad-supported streaming services such as Pluto TV, Tubi, Fawesome, and The Roku Channel. Many American libraries also offer cardholders free access to movies, TV shows, music, audiobooks, e-books, and more through platforms such as Kanopy and Hoopla.

Credit: Nicholas Derio Palacios/ Shutterstock
Related: This Paper Towel Hack Can Save You Money and Reduce Waste

Turn Off the Lights

This one might seem like a no-brainer, but you’d be surprised at how much you can save on your electric bill by simply turning off the lights when you leave a room. You don’t need to sit by candlelight, but consider upgrading to energy-saving dimmer switches or making a conscious effort to turn off the lights when vacating a room.

Credit: Southworks/ Shutterstock
Advertisement
Jill Layton
Writer
Jill Layton started writing professionally when she realized her emails and texts were kinda funny. She’s an affiliate shopping writer and lifestyle contributor for Scary Mommy, Bustle, Mic, and Best Products. She’s the mom of two alarmingly witty kids and the world’s most perfect dog.
This article is for general informational purposes only.
Affiliate Disclaimer 
|
Financial Disclaimer
Featured Image Credit:  GBJSTOCK/ Shutterstock | Updated  Dec 18, 2024 |
Advertisement
Organizing 6m read
0

Unexpected Uses for an Over-The-Door Shoe Organizer

Maximizing square footage and taking advantage of vertical space can be a game changer when it comes to keeping your space organized, especially for those of us who live in tight quarters. Over-the-door shoe organizers are among the best ways to use up vertical space in a functional way — but they aren’t just for shoes.

All featured products and deals are selected independently and objectively by the author. House Outlook may receive a share of sales via affiliate links in content.

Maximizing square footage and taking advantage of vertical space can be a game changer when it comes to keeping your space organized, especially for those of us who live in tight quarters. Over-the-door shoe organizers are among the best ways to use up vertical space in a functional way — but they aren’t just for…

As it turns out, storing shoes is just one of many ways to use an over-the-door shoe organizer (the kind with pockets, not metal racks). Depending on your home organization needs, you might find that adding a few more to the back of your closet, pantry, and garage doors can be the solution to a more functional space. We scoured the internet and asked around for the best ways to use an over-the-door shoe organizer, and these are some of our favorite unexpected purposes.

Credit: Ttatty/ Shutterstock
Advertisement

The Best Ways To Use an Over-the-Door Shoe Organizer

Pantry Storage

Make the most of a small pantry with an over-the-door shoe rack for extra storage and organization. The clear pockets are great for holding smaller items such as canned goods, packaged nuts, spice containers, and unopened sauce bottles. Or you can fill them with single-serve snacks, fruit, water bottles, juice boxes, and other items that are easy to grab on your way out the door.

Credit: AngelaMacario/ iStock

Art Supplies

Art supplies are notoriously tricky to keep organized — especially if you have little ones. To make cleanup easier and keep supplies tidy between uses, add a shoe organizer to your closet door to sort pens, markers, crayons, scissors, tape, and other essentials in the plastic pockets. You can also label the pockets so it’s easy to put everything back in its place when you’re cleaning up.

Advertisement

Gift Wrapping Essentials

Similar to art supplies, gift wrap loves to bust out of whatever storage solution it’s corralled in. Rather than tossing everything in a bin and calling it a day, add a shoe organizer to the door of your hall closet or mudroom and use it to organize your gift-wrapping essentials. From gift tags to tissue paper to spools of ribbon, the pockets are the perfect size to keep everything organized until your next gift-wrapping session. Tip: Standard-size wrapping paper rolls typically fit in three vertical rows. Simply cut out the bottom of the middle and top pockets to keep them in place.

Credit: Yuliia Mazurkevych/ Shutterstock
Related: How To Find and Fix Hidden Clutter Hot Spots

Cleaning Products

Cleaning supplies stored under a kitchen sink might seem convenient, but they can create a cluttered mess that makes it hard to see what you actually have — and an over-the-door shoe rack might be the best solution for your backstock. Whether it’s spray bottles, disinfecting wipes, or duster refills, you can store all sorts of cleaning essentials in an organizer’s pockets.

Advertisement

Office Supplies

If you have a lot of office supplies — think extra staples, notepads, pens, printer ink cartridges, etc. — and need a handy solution to see everything, use an over-the-door shoe organizer to store everything neatly. As with art supplies, you can even use a label maker to clearly mark where everything goes so that it all stays organized at the end of the workweek.

Credit: Georgijevic/ iStock

DIY Advent Calendar

Over-the-door shoe organizers have all sorts of uses that go beyond storage. For a fun DIY project, transform a canvas shoe holder into an advent calendar (just make sure it has 24 pockets). You can cut numbers out of felt and sew them on, or use a Cricut Joy Machine to cut vinyl and iron it onto the material. Then, fill each slot with a small gift to open on the days leading up to Christmas.

Advertisement

Sewing Notions

Sewing notions are usually small and hard to keep organized. If your sewing box is always in a state of chaos, swap it out for an over-the-door shoe organizer that can house everything from extra thread to scissors and snips, packets of needles and pins, and more. If you have any extra pockets, you can store your fabric scraps in them to keep an eye on what you have left over.

Credit: La Terase/ Shutterstock

Hair Accessories

Drawers can make it hard to see all of your hair accessories and tools. Instead, you can use an over-the-door shoe organizer to keep items such as hair ties, pins, clips, headbands, brushes, and even hot tools visible for when you need them.

Advertisement

Hanging Herb Garden

An over-the-door hanging herb garden might be one of the most unconventional uses for a shoe rack, but we think it’s pure genius. This hack works best on exterior doors such as sheds or garage side doors that get adequate sunlight and allow for water runoff when keeping your herbs nourished and hydrated. To ensure proper drainage, poke a few holes in the bottom of each pocket in your organizer.

Credit:  Jason Knott/ Alamy Stock Photo

Winter Accessories Storage

Add an over-the-door shoe rack to your coat closet and use it to store winter accessories. The smaller pockets are great for scarves, beanies, gloves, ear muffs, and other essentials (including extra hand warmers).

Related: 6 Often-Overlooked Spaces in Your Home To Declutter Right Now

Medicine Storage

You can also store medicine, supplements, and first-aid supplies in an over-the-door shoe rack. From pill bottles to bandages, the small pockets are the perfect size for keeping everything in order, so you can easily find what you need.

Credit: smartstock/ iStock
Advertisement
Jessie Quinn
Writer
Jessie Quinn is a Los Angeles-based lifestyle journalist with words published in PEOPLE, StyleCaster, Apartment Therapy, The Spruce, Byrdie, and more. She has a Bachelor's Degree in fashion journalism from Academy of Art University and her work spans across many categories, including style, beauty, home, health, crafts, and more.
This article is for general informational purposes only.
Affiliate Disclaimer 
|
Financial Disclaimer
Featured Image Credit:  Jason Knott/ Alamy Stock Photo | Updated  Jan 23, 2025 |
Advertisement
Gardening 9m read
0

Tips for Keeping Your Houseplants Healthy All Winter Long

I’ve been gardening for a long time but have a hit-or-miss history with houseplants. I’ve always had them around but seldom gave them as much attention as my outdoor beds. As I get older, and find myself with more houseplants of varying needs, I’ve had to up my indoor gardening game. Fine-tuning my plant care routine becomes even more essential in the winter, as I live in a cold climate where keeping greenery healthy can be a real challenge. Here are six important tips I’ve learned along the way.

All featured products and deals are selected independently and objectively by the author. House Outlook may receive a share of sales via affiliate links in content.

I’ve been gardening for a long time but have a hit-or-miss history with houseplants. I’ve always had them around but seldom gave them as much attention as my outdoor beds. As I get older, and find myself with more houseplants of varying needs, I’ve had to up my indoor gardening game. Fine-tuning my plant care…

Keep Temperatures Stable Around Your Plants

That prime spot near your window, where plants get the best possible light? It may actually be a bad spot, especially for sensitive plants. Unless your windows are well sealed, they’re prone to drafts and cold air. That goes double for any plant near an exterior door. The frequent temperature changes from opening and closing the door anytime you go outside or come back in can do a number on your greenery.

How To Keep Plants Warm in Winter

This isn’t the time of year to upgrade your windows, so check them for drafts with a lit candle or the smoke from a stick of incense. Position your plants so there are barriers between them and any sources of drafts. We recommend using weather-sealing tape or placing plants in a glass cabinet or tabletop greenhouse.

To complicate matters, baseboard and furnace vents are usually below windows as well. Rapid increases in heat are also a threat to your plants, so try to avoid putting them where they’ll get blasted by heat sources. Tropical plants are generally the most sensitive, so give them the safest locations and reserve the trouble spots for hardier greenery.

Credit: Luoxi/ Alamy Stock Photo
Advertisement

Provide Extra Humidity

Warm air “holds” more moisture than cool air because its faster-moving molecules create space for water vapor to fit in. In winter, the cold outside air becomes dry, and heating that dry air inside your house actually decreases its relative humidity (because you’re increasing its capacity to hold moisture, but not adding any).

Related: This Spice Is a Natural Fungicide for Houseplants

How To Raise Humidity for Your Winter Houseplants

Misting your plants just isn’t going to do the trick, and wetting the leaves can cause problems with mold and pests. So, what’s a better solution?

You can start by putting moisture-loving plants — again, tropicals often benefit from this — in high-humidity areas of your home, such as the bathroom or the area just outside it. Another option is to cluster sensitive plants around a humidifier. However, the simplest and most versatile option is a much more low-tech approach. Place some decorative pebbles in a shallow dish that can accommodate your plant’s pot, pour in enough water to almost cover the pebbles, and then stand your pot in the center.

As the water evaporates, it creates a small pocket of higher humidity around your plant, and the pebbles keep the plant’s roots out of the water. Top it up as needed to maintain the water level. 

Credit: Tatiana Terekhina/ iStock
Advertisement

Cut Back on Watering

This may sound counterintuitive, after what I just said about humidity, but it’s true. The simple fact is that plants aren’t as biologically active during the short winter days and long winter nights. That period of dormancy or semidormancy is hard-wired in their DNA, the same way hibernation is for a bear.

The goal is to conserve the plant’s energy for spring when the growing season arrives again. Your plant may even shed some leaves because it doesn’t need them to photosynthesize the reduced winter daylight and there’s a metabolic cost to carrying those extras.

How Often To Water Indoor Plants in Winter

If you scrolled to this point in search of a number, I’ll have to disappoint you. Watering frequency depends on several factors, including the size and type of plant and the potting soil you’ve used. The only meaningful answer is “when the plant needs it.” To find out if the plant does in fact need it, poke a finger into the soil. If the top inch or so has dried out completely, it’s time to water. If you don’t want to get your fingers dirty or have a small pot that’s difficult to check without damaging the roots, you can use a moisture meter to tell you when the soil is dry.

Underwatering is better than overwatering, which is a common reason houseplants die. Soggy soil can lead to root rot and pests, so be prudent. If you water a plant every week in summer, for example, start checking it around the 10-day mark and feel your way from there.

Credit: Lazaros Papandreou/ iStock
Advertisement

Be Mindful of the Light They’re Getting

Days are short and nights are long in wintertime. That means you may need to rethink your houseplants’ locations, so they can get the light they need. A lot of houseplants tolerate surprisingly low levels of light (pothos, for example), especially during the winter/dormant part of their growing cycle. But other plants will need your help to remain healthy and attractive during the colder months. That’s especially true of any plants you want to bloom in winter, because you’re encouraging them to expend extra energy at a time when it’s hard to come by.

Related: Winter-Blooming Houseplants To Brighten Up Your Space

Winter Light for Plants

Not all windows receive adequate sunlight, so place the most light-hungry plants near the ones that do. Plants that are happy with less light can be divided among the remaining windows. If you’re not able to arrange enough natural light for every plant, you’ll need to fall back on supplemental lighting. It can be low-tech, though: Placing a mirror on the wall where it can reflect light back toward your plants helps a lot, although you should avoid using a magnifying mirror or multiple mirrors directed at the same spot, as this could potentially start a fire. You could also make a DIY “sun box” with aluminum foil and cardboard. Otherwise, you’ll need grow lights.

The best grow lights for houseplants are usually LED-based. They’re available in all shapes and sizes, consume little electricity, and are readily available at major retailers. At my house, we use ring-shaped grow lights with telescoping arms that push right into the soil and can be extended to raise the light above the plant. Aside from helping the plants grow, they make the whole room brighter and more cheerful. That can be a real mood-booster on those dreary winter evenings.

One final tip: Take note of where you placed each plant and how well it flourished, so you can draw on this year’s experience when next winter rolls around.

Credit: Dima Berlin/ iStock
Advertisement

Keep Your Plants Clean

If you have forced-air heat or a heat pump, you may find that your plants get dusty more quickly in the winter. Dust on the plants’ leaves reduces the amount of light available for photosynthesis. If you let it build up, you’re effectively putting your houseplants on a diet. There’s a time for everything, and winter — when light is already scarce — is just not the time.

An additional benefit to regular cleanings is that you’ll get a close-up look at how your plants are doing. It’s a good time to carry out other routine “housekeeping” tasks like removing dead leaves, deadheading winter blossoms as needed, and checking for pests or diseases.

How To Clean Your Houseplants

Using a Swiffer or a similar electrostatic duster is a quick way to remove dust from plants with flat leaves, but it’s more of a temporary solution than a deep cleaning. Wiping down broad-leafed plants with a damp microfiber cloth is an effective option — I do this with our tree-sized dracaena. For plants with smaller leaves, you may need to use a cotton swab or twist your cloth to a point and use that.

This type of cleaning is a chore, but if you can block out time for it every couple of weeks, it will help a lot. The “ounce of prevention” option is using an air purifier in the room to suck excess dust out of the air before it lands on your plants. Just remember to position it so the filtered air isn’t blowing directly on your plants (because that’s a draft, and they don’t like drafts).

Credit: brizmaker/ Shutterstock
Advertisement

Don’t Let Pests Get a Foothold

It’s an unfortunate reality that winter presents an opportunity for pests and diseases to have a run at your houseplants. Spider mites are a major threat, since they can infest a wide range of houseplants; will be well established by the time you spot them; and like dry conditions, so dry winter air and reduced watering suit them just fine. 

If you bring plants in from the outside for the winter, there’s a high likelihood that you’re bringing pests along with them.

Related: Bobby Pins Are the Secret to Fuller, Healthier Houseplants

Winter Houseplant Pest Control

Keeping your soil wet deters spider mites but promotes root rot and fungus gnats, so that’s a no-go. Mites can be washed away with a spray bottle or wiped off with a damp cloth, and removing the top inch or so of soil can help as well. As for other common pests such as aphids, whiteflies, and mealybugs, physical removal and washing helps with those as well. 

Credit: Edwin Tan/ iStock
Advertisement
Fred Decker
Writer
Fred Decker is a trained chef and former restaurateur. Since closing his restaurants over a decade ago he has been a prolific freelance writer, publishing several thousand articles on dozens of high-volume websites including Taste Of Home, Hunker, Tasting Table, Week&, eHow, and GOBankingRates. He lives on a rural acreage shared with a big garden, chickens, rabbits, and grandkids.
This article is for general informational purposes only.
Affiliate Disclaimer 
|
Financial Disclaimer
Featured Image Credit:  Dima Berlin/ iStock | Updated  Dec 17, 2024 |
Advertisement
Cleaning 3m read
0

The Secret to Supersoft, Fluffy Towels

Few things feel better than stepping out of the shower and wrapping yourself in a soft, fluffy towel. But even if you buy the best, coziest towels, they can lose their softness over time, becoming stiff and rough, which results in a not-so-luxurious post-bathing experience.

All featured products and deals are selected independently and objectively by the author. House Outlook may receive a share of sales via affiliate links in content.

Few things feel better than stepping out of the shower and wrapping yourself in a soft, fluffy towel. But even if you buy the best, coziest towels, they can lose their softness over time, becoming stiff and rough, which results in a not-so-luxurious post-bathing experience.

Cotton towels feel the softest and perform as they should when the fibers can breathe. The buildup of residue from fabric softeners and dryer sheets, along with age and heat damage, can cause towels to become scratchy and less absorbent than when you first bought them.

Related: This Genius Laundry Hack Can Significantly Reduce Drying Time

There’s a hack, however, that makes even the dullest towels feel plush and brand-new again.

Advertisement

How To Get Your Towels Supersoft Again

Follow these simple steps to spruce up your towels in the washing machine.

Step 1: Load your washing machine with the towels that need refreshing. It doesn’t matter if they’re clean or dirty since softening is the ultimate goal. Avoid laundering the towels with other items or overloading your washing machine; the towels should have enough room to tumble freely during the cycle.

Step 2: Add laundry detergent as you normally would. Use the recommended amount, as adding too much can cause towels to stiffen. Never use a detergent containing bleach, as its reaction to vinegar produces dangerous chlorine gas.

Step 3: Add half a cup of baking soda directly into the rinse cycle. Baking soda helps to loosen fibers and remove grime, including old soap and mineral deposits.

Step 4: Instead of fabric softener, pour in half a cup of white vinegar. Vinegar naturally softens fabrics by removing residue buildup that makes towels feel rigid.

Step 5: Run the load with warm or hot water.

Step 6: When the cycle is complete, dry the towels on low to medium heat.

Advertisement

Other Tricks for Softening Your Towels

• Shake out wet towels before loading them into the dryer. This helps loosen the fibers while speeding up drying time.

• Throw in dryer balls or clean tennis balls to help fluff the towels during the drying cycle.

• Regularly clean your washing machine to remove detergent and fabric softener residue that can attach to the fabric and cause mold or mildew growth. 

• If you live in a region with hard water, use liquid detergent instead of powder because the minerals can prevent the powder from dissolving and lower its effectiveness.

Advertisement
Jill Layton
Writer
Jill Layton started writing professionally when she realized her emails and texts were kinda funny. She’s an affiliate shopping writer and lifestyle contributor for Scary Mommy, Bustle, Mic, and Best Products. She’s the mom of two alarmingly witty kids and the world’s most perfect dog.
This article is for general informational purposes only.
Affiliate Disclaimer 
|
Financial Disclaimer
Featured Image Credit:  Daiga Ellaby/ Unsplash+ | Updated  Dec 17, 2024 |
Advertisement
Food & Drink 3m read
0

How To Keep Brown Sugar From Clumping

Brown sugar is a key ingredient in many cookie and cake recipes, but its consistency can make or break the entire baking experience. Whether you’re preparing a make-ahead dessert for a dinner party or have a sudden craving for something sweet, cracking open the brown sugar container and finding a brick that you have to chisel back into crystals is the worst. But, before you toss it in the bin and make a late-night grocery store run for another bag that will likely meet the same fate, try this hack for rehydrating hardened brown sugar and keeping it soft.

All featured products and deals are selected independently and objectively by the author. House Outlook may receive a share of sales via affiliate links in content.

Brown sugar is a key ingredient in many cookie and cake recipes, but its consistency can make or break the entire baking experience. Whether you’re preparing a make-ahead dessert for a dinner party or have a sudden craving for something sweet, cracking open the brown sugar container and finding a brick that you have to…

Why Does Brown Sugar Harden?

First, let’s look at what causes those bricks to form. The reason brown sugar hardens is a lack of moisture. Brown sugar is a mix of molasses and white sugar crystals, and the molasses’ moisture tends to evaporate quickly, especially when exposed to air. This results in a dry, rock-hard block that’s so frustrating when it comes time to make your favorite chocolate chip cookie recipe. 

Related: An Easy Trick To Revive Carrots That Have Gone Limp

How To Keep Brown Sugar Soft

Brown sugar is prone to hardening, but keeping it soft is not as impossible as it seems — and the solution might already be hiding amid your other baking supplies. To keep brown sugar from clumping (and save your wrists from having to chip away at the brick of hardened crystals), place two or three marshmallows in the container with the sugar. We know it sounds bizarre, but it really works.

Advertisement

Marshmallows are effective because they contain a lot of moisture that’s gradually released into the air when stored in an enclosed container. By placing marshmallows in a container with brown sugar, you can rehydrate the sugar in a day or two, or keep a fresh bag scoopable for several months. Just be sure to replace the marshmallows when they begin to harden or dry out themselves.

Bonus Hack

If you don’t have marshmallows on hand, a slice of bread can also revive clumpy brown sugar. Bread has excellent moisture levels that can humidify your brown sugar without melting it. Let the slice of bread mingle with the brown sugar for eight to 24 hours before removing it. That brick will turn into soft, workable sugar. Alternatively, you can always pick up a brown sugar saver disc the next time you’re adding to your Amazon cart.

Advertisement
Jessie Quinn
Writer
Jessie Quinn is a Los Angeles-based lifestyle journalist with words published in PEOPLE, StyleCaster, Apartment Therapy, The Spruce, Byrdie, and more. She has a Bachelor's Degree in fashion journalism from Academy of Art University and her work spans across many categories, including style, beauty, home, health, crafts, and more.
This article is for general informational purposes only.
Affiliate Disclaimer 
|
Financial Disclaimer
Featured Image Credit:  CKP1001/ Shutterstock | Updated  Dec 13, 2024 |