Advertisement
Gardening 3m read
0

Why You Shouldn’t Throw Away Fireplace Ashes

There are plenty of good reasons to have a wood-burning fireplace. It can help cut your home heating costs in winter, it still works when the power goes out, and it’s just plain comforting to sit in front of a crackling fire on a cold evening.

There are plenty of good reasons to have a wood-burning fireplace. It can help cut your home heating costs in winter, it still works when the power goes out, and it’s just plain comforting to sit in front of a crackling fire on a cold evening.

If you’re a gardener, you have yet another reason to love your fireplace. Wood fires naturally create ash, and adding ash to your garden in moderation can be a cost-effective way to boost your plants’ growth. So, which plants like wood ash, and how can you use it?

Using Wood Ash as a Soil Amendment and Fertilizer

Wood ash isn’t as concentrated as commercial fertilizers, but it’s a good source of potassium (the second ingredient, after nitrogen, on fertilizer bags). Ash also contains useful quantities of calcium, phosphorus, and magnesium, as well as trace minerals such as boron, copper, molybdenum, and zinc.

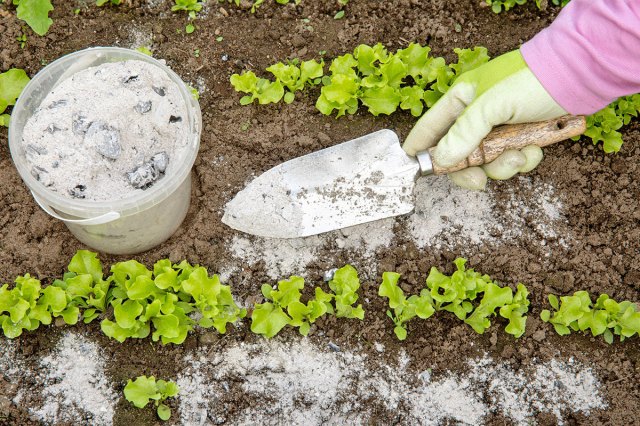
Ash’s high calcium content means it’s useful as a soil amendment to help raise the soil’s pH. Before applying wood ash to your soil, conduct a basic soil test to determine whether it needs these nutrients. A good rule of thumb is 5 pounds of wood ash (roughly what you’ll get from a cord of wood) per 100 square feet of soil, applied once a year. For example, if you have a raised garden bed that measures 4 feet by 8 feet (totaling 32 square feet) you would need just over 1.5 pounds of wood ash to treat the soil.

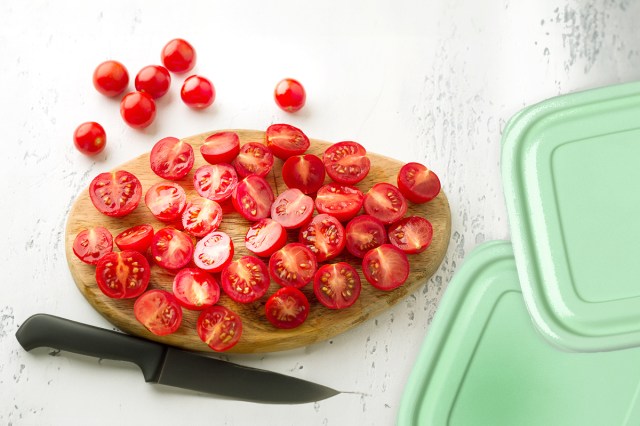
But is wood ash good for plants? It depends. Calcium deficiency in your soil can cause blossom-end rot in tomatoes, and the ash may be a helpful remedy. It’s also useful if the soil is too acidic for your plants’ liking.

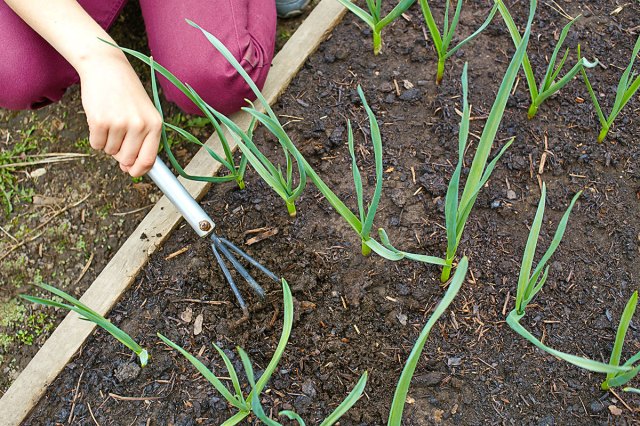
If you have acid-loving plants such as blueberries, rhododendrons, and holly, however, avoid using wood ash as fertilizer. Keep it away from potato patches, too, as wood ash can lead to scab, a soil-borne disease.

Advertisement

Adding Wood Ash to Compost

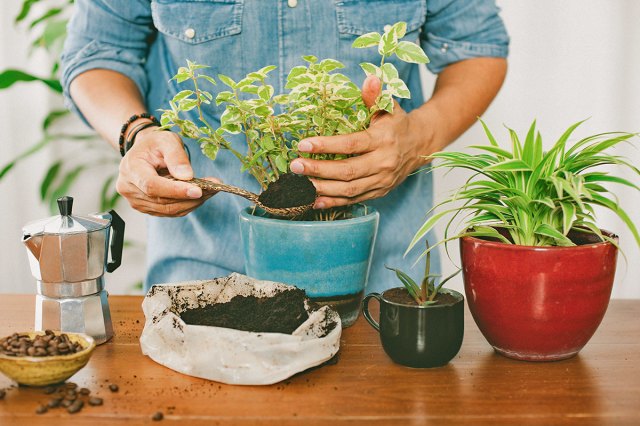
Another way to use wood ash in the garden, without worrying about which plants will or won’t benefit from it, is to put it in your compost instead of applying it directly to the soil. It can be chucked into the pile along with grass clippings, sawdust, leaves, coffee grounds, vegetable scraps, crushed eggshells, and cardboard.

A working compost pile is mildly acidic, so moderate amounts of wood ash can help keep it balanced. Anything up to 5% of your pile by volume is fine. Beyond that, your compost may become too alkaline, which will slow its decomposition.

There are a few other caveats as well: Don’t use ash from painted, stained, or pressure-treated wood, or charcoal ash from your grill, which can contain toxic chemicals. Additionally, never add hot ashes to your compost pile as it can catch fire. Within those limitations, wood ash can genuinely help your garden thrive.

Advertisement
Fred Decker
Writer
Fred Decker is a trained chef and former restaurateur. Since closing his restaurants over a decade ago he has been a prolific freelance writer, publishing several thousand articles on dozens of high-volume websites including Taste Of Home, Hunker, Tasting Table, Week&, eHow, and GOBankingRates. He lives on a rural acreage shared with a big garden, chickens, rabbits, and grandkids.
This article is for general informational purposes only.
Affiliate Disclaimer 
|
Financial Disclaimer
Featured Image Credit:  Helin Loik-Tomson/ iStock | Updated  Sep 18, 2024 |
Advertisement
Gardening 5m read
0

7 Vegetables To Plant This Fall for Early Spring Produce

Planning your spring garden in the fall is a gift to your future self. Sure, you might have to dedicate a crisp autumnal weekend to preparing the soil and planting hardy seeds, but there will be a delicious payoff come springtime. Although certain vegetables would struggle to survive the harsh winter months, others thrive when the temperature dips. Here are seven cold-tolerant vegetables you should plant in the fall for an abundant spring harvest.

Planning your spring garden in the fall is a gift to your future self. Sure, you might have to dedicate a crisp autumnal weekend to preparing the soil and planting hardy seeds, but there will be a delicious payoff come springtime. Although certain vegetables would struggle to survive the harsh winter months, others thrive when…

Kale

Kale is among the most resilient and cold-hardy vegetables out there, especially with varieties such as Winterbor, which can survive in subzero temperatures. The best part about planting kale in the autumn is that you can leave it unattended and it should overwinter just fine. The cold weather will kill harmful pests, and any snowfall should keep the kale well hydrated (although it may go dormant until the snow melts). Even when cold weather kills the leaves aboveground, the resilient roots underground should be protected, allowing the vegetable to sprout again in the spring. Kale also develops a sweeter taste if touched by a light frost, producing a particularly delicious flavor.

Credit: FootMade0525/ Shutterstock

Shallots

Onions are a lot like a four-door sedan — perfectly good, but kind of boring. If you’re looking for an interesting onion alternative, look no further than shallots, which can provide an added kick to homemade pasta sauce or serve as a crispy garnish for a chopped salad. Shallots generally take between 100 and 120 days to ripen, so if you plant them toward the end of autumn, they should be ready to go in April. Just make sure to plant them in light soil, as that allows the plant to grow and become swollen and supple. Shallots, like many other root vegetables, do quite well even as the mercury falls.

Credit: Alisadox/ Shutterstock
Advertisement

Carrots

The sooner you plant carrots in the fall, the plumper they’ll be in spring. Carrots are hardy root vegetables that can withstand the frigid temperatures of winter, but they do most of their growing during autumn. If you plant carrots in September or early October, they’ll grow while the soil is still warm. Once winter arrives, they’ll go dormant before starting to grow again when the soil thaws in the spring.

Credit: Unsplash+ via Getty Images

Brussels Sprouts

Not only can Brussels sprouts successfully grow if planted in the fall, but they actually thrive under the colder conditions of fall and winter. Brussels sprouts are a cool-weather crop and don’t often do well in hotter temps — in fact, their natural sugars act as protection against frost. If you plant Brussels sprouts in the early autumn, they will mature over the months to come. (Tip: Plant six to 10 weeks before the first frost for a successful harvest.) Although they won’t grow back as edible sprouts the following year, you can plant additional seeds in early spring for a second harvest.

Credit: VVVproduct/ Shutterstock
Advertisement

Cabbage

Whether you’re planning a St. Patrick’s Day feast or just enjoy having some crunchy fare for your salad, cabbage is a wonderful vegetable to have in the garden. It requires a ton of energy to grow, though, so plant it in nutrient-rich soil with added compost. Just be aware that cabbage typically doesn’t grow well in harsh winter conditions, so it’s best suited for climates with mild winters or gardens with frost protection, such as coverings or cold frames.

Credit: Lakshmi3/ iStock

Beets

Much like carrots, beets thrive in fluffier soil that grants them room to grow. (Spacing seeds 3 inches apart is a good rule of thumb to follow.) Just remember to cover the soil with a layer of mulch or hay to protect your beets from intense cold. Beets are cold tolerant and develop a particularly sweet flavor if grown under wintry conditions, which means fall is the perfect time to plant some in the garden. Dig the beets up if the ground is at risk of completely freezing, though, as that could damage the crop. Thankfully, beets are fast-growing and can be harvested once they reach the size of a Ping-Pong ball. So long as the roots don’t freeze, the beets should remain relatively dormant in cold weather and be harvest-ready come spring.

Credit: My Angel L.A. Images/ Shutterstock
Advertisement

Garlic

Dracula may disagree, but garlic is an essential ingredient in almost every home-cooked meal. Garlic does extremely well if planted in the early autumn and grown during the winter, as garlic bulbs need eight to 10 months before they’re ready to be harvested. Try to plant garlic in early September if possible, and it should be ready to go by mid-spring. Also be sure to plant garlic under at least 6 inches of mulch, giving it plenty of protection from potential frost.

Credit: gunsan gimbanjang/ Shutterstock

Whether you’re looking for a crop that can be harvested before the first frost or something that will start sprouting as early as March, there are plenty of cold-hardy options to choose from. To successfully overwinter your vegetables, be sure to protect them from the cold (mulch, garden covers, and cold frames are all solid options) and check on them from time to time to assess any pest damage. When spring finally arrives, you’ll have fresh salads and roasted veggies to look forward to.

Advertisement
Bennett Kleinman
Staff Writer
Bennett Kleinman is a New York City-based staff writer for Optimism Media, covering topics for several brands including House Outlook and Better Report. He previously contributed to television programs such as "Late Show With David Letterman" and "Impractical Jokers," and digital publications like The Onion. Bennett is also a devoted New York Yankees and New Jersey Devils fan, and thinks plain seltzer is the best drink ever invented.
This article is for general informational purposes only.
Affiliate Disclaimer 
|
Financial Disclaimer
Featured Image Credit:  Viktoriya Telminova/ iStock | Updated  Sep 18, 2024 |
Advertisement
Home Improvement 3m read
0

Dealing With a Stuck Zipper? The Solution Might Be in Your Pocket

Picture this: You’re on your way out the door, but the zipper on your wool chore coat won’t budge. You can’t imagine ever finding a suitable replacement — it’s vintage Hudson’s Bay, after all. Before you toss it in the donation pile or drop it off at the sewist, there’s a quick and easy fix you have to try. And the key to solving your zipper problem might be right in your pocket. All you need is a bit of lip balm. Here’s what to do:

All featured products and deals are selected independently and objectively by the author. House Outlook may receive a share of sales via affiliate links in content.

Picture this: You’re on your way out the door, but the zipper on your wool chore coat won’t budge. You can’t imagine ever finding a suitable replacement — it’s vintage Hudson’s Bay, after all. Before you toss it in the donation pile or drop it off at the sewist, there’s a quick and easy fix…

Step 1: Inspect the zipper for any fabric caught in the teeth. If you find any, make sure you have a firm grip on the fabric (you may want to use tweezers for this part), and pull it away from the zipper as you zip in the opposite direction. If that doesn’t solve the problem, move on to the next step.

Step 2: Reach for a tube of lip balm (or even better, a jar of petroleum jelly) and apply the product to both sides of the zipper teeth, using your finger to rub it in. Grab the pull and tug it toward the snag. The lip balm will act as a lubricant and should release the stuck zipper easily.

If you don’t have any lip balm or petroleum jelly on hand, you can employ the same method using a graphite pencil, olive oil, wax paper, or solid deodorant instead. This hack also works wonders on zippers that are stubborn but not completely stuck. (Looking at you, zip-up ankle boots.)

Advertisement

So, the next time you encounter a stuck zipper on a purse, pair of jeans, or throw pillow cover, remember this helpful hack and avoid the frustration. It works in seconds and creates minimal mess, especially if you apply the lip balm with a cotton swab or detail paintbrush.

Bonus Hack

If, in an effort to fix a stuck zipper, you pull too hard and it splits apart, there’s a simple way to repair it. Locate the slider, the part just below the pull that joins or separates the teeth — most often, the problem is simply that it has opened too wide and needs reshaping. Guide the slider toward the middle of the zipper, if possible, to give yourself more room to work. Take a pair of needle-nose pliers and clamp them around the slider, squeezing it gently to narrow the opening. Voilà — your favorite weekender bag is saved.

Advertisement
Kelsey Morrison
Staff Editor
Kelsey Morrison is the Staff Editor of House Outlook. She has been covering all things home-related for over a decade, including real estate, interior design, commerce, and a slew of other lifestyle topics. Kelsey previously worked as a commerce editor for World of Good Brands (eHow.com and Cuteness.com) and as an associate editor for Livabl.com. She describes her personal design style as 1970s ski chalet-chic and has a thing for latch-hook tapestries.
This article is for general informational purposes only.
Affiliate Disclaimer 
|
Financial Disclaimer
Featured Image Credit:  Honeybee49/ Shutterstock | Updated  Sep 24, 2024 |
Advertisement
Gardening 3m read
0

Plant Parents, Don’t Toss Your Used Coffee Grounds

Many of us find it difficult to get going in the morning without a cup (or three) of coffee. As it turns out, your plants might also benefit from an occasional jolt of java. Using coffee grounds as houseplant fertilizer goes viral periodically, and in truth, they can provide valuable nutrients when used judiciously.

Many of us find it difficult to get going in the morning without a cup (or three) of coffee. As it turns out, your plants might also benefit from an occasional jolt of java. Using coffee grounds as houseplant fertilizer goes viral periodically, and in truth, they can provide valuable nutrients when used judiciously.

How To Use Coffee Grounds on Your Plants

The simplest way to put those grounds to use is by watering your houseplants with them. Here’s how it works: 

Step 1: Save the grounds from your coffee maker. If you use a pod-style coffee maker (Nespresso, Keurig, Tassimo, and similar systems), keep a container handy to collect the used pods. Drip coffee users can just use the contents of this morning’s filter.

Step 2: Empty the grounds into a pitcher or large measuring cup. If you’ve been saving pods, carefully cut them open and shake or scoop the grounds into your pitcher. Add room-temperature water to the grounds, and give them a stir to make a slurry of water and coffee. The consistency should be relatively thin as the goal is to dilute the coffee grounds as much as possible.

Step 3: Water your houseplants (or your garden) with the slurry, no more than once a week. It’s ready to use right away, but if you let the slurry rest for 20 to 30 minutes, the coffee’s nutrients have more time to dissolve into the water.

Advertisement

What Used Coffee Grounds Do for Plants

The slurry is essentially weak coffee, infused with nutrients and beneficial grounds. Brewed coffee is slightly acidic, and causes acid-loving plants such as African violets, cyclamens, begonias, Christmas cactus, and jade plants to perk right up. Avoid giving coffee grounds to plants that prefer alkaline soil as too much acidity can harm them. These include lavender, lilacs, roses, tomato plants, thyme, and rosemary.

If you have an outdoor garden, you can use your slurry there as well. Researchers at Oregon State University found that a coffee drench applied to garden beds deterred slugs, and noted that caffeine could actually kill the garden pests in specific concentrations. An article published by Washington State University further suggests that coffee can protect plants from common soil-borne infections, including fungal rots and wilts, and certain bacterial pathogens.

Advertisement
Fred Decker
Writer
Fred Decker is a trained chef and former restaurateur. Since closing his restaurants over a decade ago he has been a prolific freelance writer, publishing several thousand articles on dozens of high-volume websites including Taste Of Home, Hunker, Tasting Table, Week&, eHow, and GOBankingRates. He lives on a rural acreage shared with a big garden, chickens, rabbits, and grandkids.
This article is for general informational purposes only.
Affiliate Disclaimer 
|
Financial Disclaimer
Featured Image Credit:  Nor Gal/ Shutterstock | Updated  Sep 18, 2024 |
Advertisement
Gardening 3m read
0

Make an All-Natural Bug-Repellent Spray Using This Spice Rack Staple

Cinnamon is one of the handiest things to keep in your spice rack, and not just for its role in cooking and baking — though it’s certainly good for both. Whole sticks lend a sweet, spicy flavor to curries and mulled wine, while ground cinnamon is essential for desserts such as snickerdoodles and apple pie. If you’re from Cincinnati, you may even put cinnamon in chili.

All featured products and deals are selected independently and objectively by the author. House Outlook may receive a share of sales via affiliate links in content.

Cinnamon is one of the handiest things to keep in your spice rack, and not just for its role in cooking and baking — though it’s certainly good for both. Whole sticks lend a sweet, spicy flavor to curries and mulled wine, while ground cinnamon is essential for desserts such as snickerdoodles and apple pie.…

Now cinnamon’s surprising versatility has it going viral on social media for another reason: its use as a DIY natural insect repellent. Here’s how you can create a cinnamon-based bug spray to keep the creepie-crawlies at bay around your home.

Four-Ingredient Cinnamon Bug Spray

Making your own natural insect repellent is as easy as making yourself a cup of instant coffee. The recipe calls for just four ingredients: ground cinnamon, water, rubbing alcohol, and dish soap. Keep in mind that natural bug sprays tend to lose their potency fairly quickly, as their volatile oils evaporate, so only make as much as you plan to use within the next week or so.

Step 1: Using a ratio of 1 teaspoon of ground cinnamon for every pint of water — so, 2 teaspoons for a 4-cup batch, or 8 teaspoons for a half gallon — stir the ground cinnamon into warm water and let it steep for at least an hour. Then pour it through a fine-mesh strainer right into your spray bottle. If you’re worried about spilling, line a funnel with a paper towel or cheesecloth and use that to strain your concoction.

Step 2: Once the cinnamon and water mixture is in the bottle, add a quarter teaspoon each of rubbing alcohol and dish soap for every pint of water you’ve used (so a half teaspoon per quart, or 1 teaspoon for a half gallon).

Step 3: Mist the bug spray liberally around doorways and windows to repel ants, or in your closets to discourage spiders and earwigs. You can even spritz yourself to keep pesky mosquitoes away.

Advertisement

Is There Some Science Behind This? 

Unlike a lot of viral DIYs, this one is well supported by research. Cornell University’s Integrated Pest Management program hosts a 16-page paper outlining cinnamon’s capabilities as an insect repellent. The short version is that it’s safe for humans and our pets, and it genuinely does repel a lot of pests. (It’s even used in commercial agricultural products.) So mix up a batch, and start spraying.

Advertisement
Fred Decker
Writer
Fred Decker is a trained chef and former restaurateur. Since closing his restaurants over a decade ago he has been a prolific freelance writer, publishing several thousand articles on dozens of high-volume websites including Taste Of Home, Hunker, Tasting Table, Week&, eHow, and GOBankingRates. He lives on a rural acreage shared with a big garden, chickens, rabbits, and grandkids.
This article is for general informational purposes only.
Affiliate Disclaimer 
|
Financial Disclaimer
Featured Image Credit:  Svetlana Popova/ Shutterstock | Updated  Apr 24, 2025 |
Advertisement
Food & Drink 2m read
0

How To Slice Grapes and Cherry Tomatoes in Seconds Flat

There are myriad reasons to cut grapes or cherry tomatoes in half, the most notable for parents being to protect their little ones from choking. Even if you aren’t a parent of toddlers, though, you probably find yourself halving grapes, cherry tomatoes, or pitted olives when preparing all kinds of recipes, from Waldorf salad to pasta puttanesca.

There are myriad reasons to cut grapes or cherry tomatoes in half, the most notable for parents being to protect their little ones from choking. Even if you aren’t a parent of toddlers, though, you probably find yourself halving grapes, cherry tomatoes, or pitted olives when preparing all kinds of recipes, from Waldorf salad to…

It isn’t terribly difficult to chop these things in half one at a time, but why do that when you can get the job done easier — and quicker — with a hack? And when we say “quicker,” we mean in just a few seconds for a handful or two of fruit.

The trick is to use two plastic lids and a serrated knife, things you probably already have in your kitchen drawers. Place the cherry tomatoes (or whichever small round food item you want to slice) between two matching, flat-rimmed plastic lids. Think: Tupperware lids or the tops of tubs for cottage cheese, sour cream, or yogurt. Place the bottom lid rim-up, and the top lid rim-down to create a sandwich situation. Then press the top lid down lightly to keep the tomatoes in place, and slice through the fruit using the serrated knife.

Advertisement

If you don’t have any plastic lids, you can employ the same method using two plates, placing the bottom plate right side up and the top plate upside down. Plates with steep slopes will not work, however, since they cause uneven cuts and often leave little to no space for the knife to pass through. Plastic lids tend to work better overall, so rifle through the recycling bin if you must (but make sure the lids are clean before you put food between them).

This hack will save you time in the kitchen by allowing you to slice anywhere from 10 to 20 grapes or cherry tomatoes at once, depending on the size of the plastic lids or plates. Which means you can get to the fun part — eating — much sooner.

Advertisement
Jill Layton
Writer
Jill Layton started writing professionally when she realized her emails and texts were kinda funny. She’s an affiliate shopping writer and lifestyle contributor for Scary Mommy, Bustle, Mic, and Best Products. She’s the mom of two alarmingly witty kids and the world’s most perfect dog.
This article is for general informational purposes only.
Affiliate Disclaimer 
|
Financial Disclaimer
Featured Image Credit:  olepeshkina/ Shutterstock | Updated  Sep 16, 2024 |
Advertisement
Food & Drink 3m read
0

How To Soften Butter in Minutes (No Microwave Required)

Picture this: You volunteered to bring dessert to a potluck tonight, and you’re on the hook for two dozen chocolate chip cookies. Facing a race against the clock that makes you feel like you’re in an episode of The Great British Bake Off, you suddenly realize you forgot to soften the butter.

Picture this: You volunteered to bring dessert to a potluck tonight, and you’re on the hook for two dozen chocolate chip cookies. Facing a race against the clock that makes you feel like you’re in an episode of The Great British Bake Off, you suddenly realize you forgot to soften the butter.

Instead of popping it in the microwave, which often results in a melted, oily mess, try this time-saving hack to take your butter from cold to room temperature in just a few minutes. To start, boil some water (approximately 2 cups) in a kettle, or simply run the sink until the temperature of the water is very hot. The tap water should be almost too hot to touch, even for those with hardened, heat-tolerant mom hands.

Fill up a drinking glass with the hot water — if you’re using boiling water from a kettle, make sure the glass is resistant to thermal shock — and let it sit for five minutes. A pint glass or a Mason jar works especially well.

While that sits, grab a cutting board or another flat surface and place the stick of butter on it vertically. Once you’ve reached the five-minute mark, dump the hot water in the sink, and put the empty but still-warm glass upside down over the butter like a cloche, letting it rest for an additional five minutes. (If your butter is very cold and firm, you may need to leave it under the glass for up to 10 minutes.)

Advertisement

If you’re attempting to soften a larger block of butter, like the kind you can buy at Costco or Sam’s Club, you can use this same method with a larger vessel, such as a ceramic or glass bowl. It also helps to cut the butter into smaller pieces, increasing the amount of surface area exposed to the steam. 

Now let’s say you’re working with frozen butter — how can you get it up to room temperature when it’s essentially a block of ice? In that case, reach for a box grater and use the larger holes to grate the butter onto a sheet of waxed or parchment paper. Let it sit for five to 10 minutes, and it should be soft enough to mix into your cookie dough. Consider the potluck saved!

Advertisement
Kelsey Morrison
Staff Editor
Kelsey Morrison is the Staff Editor of House Outlook. She has been covering all things home-related for over a decade, including real estate, interior design, commerce, and a slew of other lifestyle topics. Kelsey previously worked as a commerce editor for World of Good Brands (eHow.com and Cuteness.com) and as an associate editor for Livabl.com. She describes her personal design style as 1970s ski chalet-chic and has a thing for latch-hook tapestries.
This article is for general informational purposes only.
Affiliate Disclaimer 
|
Financial Disclaimer
Featured Image Credit:  Arina P Habich/ Shutterstock | Updated  Feb 13, 2025 |
Advertisement
Food & Drink 3m read
0

3 Ways To Chill Wine Fast When You’re in a Pinch

Your friends are coming over for dinner in 30 minutes, and you just got home from the grocery store with a bottle of sauvignon blanc to pair with the pasta you’re whipping up. One problem: The wine is room temperature, not chilled between 45 and 50 degrees Fahrenheit as it should be. Don’t fret — there are several ways to chill a bottle of wine in 15 minutes or less. Use one of these three methods and you’ll be ready to offer your guests an aperitif as soon as they walk through the door.

All featured products and deals are selected independently and objectively by the author. House Outlook may receive a share of sales via affiliate links in content.

Your friends are coming over for dinner in 30 minutes, and you just got home from the grocery store with a bottle of sauvignon blanc to pair with the pasta you’re whipping up. One problem: The wine is room temperature, not chilled between 45 and 50 degrees Fahrenheit as it should be. Don’t fret —…

1. Salted Ice Water

Slipping Champagne into a briny ice bath will chill it to perfection in just 10 minutes. (In short, salt lowers the freezing point of water by disrupting the formation of ice crystals.) Grab an ice bucket — if you don’t own one, any bucket, cooler, or stock pot will do — and fill it up one-third of the way with lukewarm water. Using cold water will make it more difficult to dissolve the salt. We recommend using a measuring cup for this step as the amount of water will dictate the amount of salt needed; the correct ratio is 1 cup of salt for every gallon of water. Next, pour in the salt and stir the water vigorously to dissolve it. Fill up the rest of the bucket with ice. Place the wine bottle in the ice bucket, hold it by the neck, and spin or stir it every couple of minutes to chill evenly. In only 10 minutes, you’ll be ready to imbibe some bubbly.

Related: The Fix for Unpleasant Upholstery Odors Is in Your Liquor Cabinet

2. Wet Dish Towel

If you don’t have an ice bucket on hand, you can use a clean dish towel or a few paper towels to chill wine to its ideal temperature. Run the towel under the faucet to get it wet, gently wring it out to make sure it’s not dripping, and wrap it around the body of the bottle. Then pop the wrapped bottle in the freezer for 15 minutes, and your rosé will be cool enough to serve.

3. Gallon Freezer Bag

This method requires you to decant the wine into a much less aesthetically pleasing vessel, but it works. Use any large container, such as a mixing bowl or stock pot, and prepare an ice bath. Two parts ice to one part water usually does the trick. Now, this is the part you probably don’t want your guests to see: Pour the bottle of wine into a leakproof gallon-size freezer bag, seal it tightly, and gently lower it into the ice bath. Try to keep the seal above the water line to prevent any ice water from seeping in. Your bag of wine should chill completely within five minutes. Whether you serve the wine right out of the bag or return it to the bottle is entirely up to you (we won’t judge).

Advertisement
Kelsey Morrison
Staff Editor
Kelsey Morrison is the Staff Editor of House Outlook. She has been covering all things home-related for over a decade, including real estate, interior design, commerce, and a slew of other lifestyle topics. Kelsey previously worked as a commerce editor for World of Good Brands (eHow.com and Cuteness.com) and as an associate editor for Livabl.com. She describes her personal design style as 1970s ski chalet-chic and has a thing for latch-hook tapestries.
This article is for general informational purposes only.
Affiliate Disclaimer 
|
Financial Disclaimer
Featured Image Credit:  Duntonggi/ Shutterstock | Updated  Sep 23, 2024 |
Advertisement
Home Improvement 3m read
0

Remove Water Stains From Wood Furniture With This One Ingredient

No matter how many drink coasters you leave out for houseguests, you’re bound to end up with a few water stains on your wooden coffee table or nightstand. This typically occurs when moisture on the outside of the drinking glass is absorbed by the wood, leaving behind an unsightly ring.

All featured products and deals are selected independently and objectively by the author. House Outlook may receive a share of sales via affiliate links in content.

No matter how many drink coasters you leave out for houseguests, you’re bound to end up with a few water stains on your wooden coffee table or nightstand. This typically occurs when moisture on the outside of the drinking glass is absorbed by the wood, leaving behind an unsightly ring.

You might be tempted to just throw the damaged piece of furniture to the curb, but instead, try this easy fix for removing water stains. All you need is something you probably already have in your fridge: mayonnaise. Be sure to use real mayonnaise, though. Look for ingredients including oil, egg yolks, vinegar, and lemon — these work together to replace the moisture and dissolve the stain. 

To get started, apply some mayonnaise directly to the water stain and rub it in using a paper towel or a dish rag. Repeat this step, but this time, dab the mayonnaise onto the stain instead of rubbing it in. If you’re worried the condiment will attract pets or pests, you can always keep it covered with a paper towel.

Let the mayonnaise sit overnight, and in the morning, wipe it away with a clean cloth. You also should use a wood cleaner and conditioner (we like this plant-based formula by Method) to remove any residue. Note that the mayo method works best on surface-level stains, so if you notice rings on your table after a dinner party, you should address them sooner rather than later.

Advertisement

If you’re dealing with a sizable, months-old water mark — perhaps from a potted plant seeping moisture — consider sanding down the wood surface and applying a slurry made of Bar Keepers Friend and water to the stain. Let that sit for 45 minutes, wipe it off, and allow the raw wood to dry completely. Then, sand the entire surface a second time until the water rings have vanished, and apply your preferred wood stain.

With a little elbow grease, and perhaps a glob of mayonnaise, your wood furniture will soon look as good as new.

Advertisement
Kelsey Morrison
Staff Editor
Kelsey Morrison is the Staff Editor of House Outlook. She has been covering all things home-related for over a decade, including real estate, interior design, commerce, and a slew of other lifestyle topics. Kelsey previously worked as a commerce editor for World of Good Brands (eHow.com and Cuteness.com) and as an associate editor for Livabl.com. She describes her personal design style as 1970s ski chalet-chic and has a thing for latch-hook tapestries.
This article is for general informational purposes only.
Affiliate Disclaimer 
|
Financial Disclaimer
Featured Image Credit:  umaruchan4678/ iStock | Updated  Sep 16, 2024 |
Advertisement
Home Improvement 2m read
0

Fix Carpet Dents Overnight With This $0 Hack

Rearranging furniture can give your space a whole new look without you spending a dime. But if you have wall-to-wall carpet or a plush area rug, it can also reveal unsightly dents. Indentations happen when furniture or other heavy objects compress your carpet’s fibers for long periods of time. You probably won’t notice them if your furniture stays where it is, but once uncovered, they’re impossible to miss. Want to move the sofa? Dents. Does the coffee table look better at a different angle? Dents. Is it time to get rid of the piano? So many dents.

Rearranging furniture can give your space a whole new look without you spending a dime. But if you have wall-to-wall carpet or a plush area rug, it can also reveal unsightly dents. Indentations happen when furniture or other heavy objects compress your carpet’s fibers for long periods of time. You probably won’t notice them if…

The good news is that while carpet dents are eyesores, they don’t have to be permanent. In fact, there’s an easy way to get rid of them, and you don’t even need to purchase anything. The ice cubes in your freezer can melt away the dents in your carpet so it looks like they were never there. The process is quick and easy — when the ice cubes melt, water is absorbed by the carpet, allowing the fibers to regain their fullness.

Five Steps To Bring Dented Carpet Back to Life

1. Place the ice cubes directly onto the carpet divot, using one ice cube for a small dented area or several ice cubes for a larger area.

2. Allow the ice to melt naturally. This should take 90 minutes for small dents and up to three hours for large ones. You may need to add more ice depending on the temperature in the room and the depth of the dents.

3. Once the ice has melted, gently blot up the excess water using a paper towel, sponge, or napkin. Be sure not to press too hard or you might cause more damage.

4. Use the back of a spoon or a coin to fluff the flattened carpet fibers that need adjusting.

5. Let the area dry completely over a couple of hours, and then marvel at your handiwork.

The next time you spot a carpet dent, don’t stress. With a couple of ice cubes, those stubborn dents will be gone by morning. 

Advertisement
Jill Layton
Writer
Jill Layton started writing professionally when she realized her emails and texts were kinda funny. She’s an affiliate shopping writer and lifestyle contributor for Scary Mommy, Bustle, Mic, and Best Products. She’s the mom of two alarmingly witty kids and the world’s most perfect dog.
This article is for general informational purposes only.
Affiliate Disclaimer 
|
Financial Disclaimer
Featured Image Credit:  Sasima/ Shutterstock | Updated  Nov 13, 2024 |