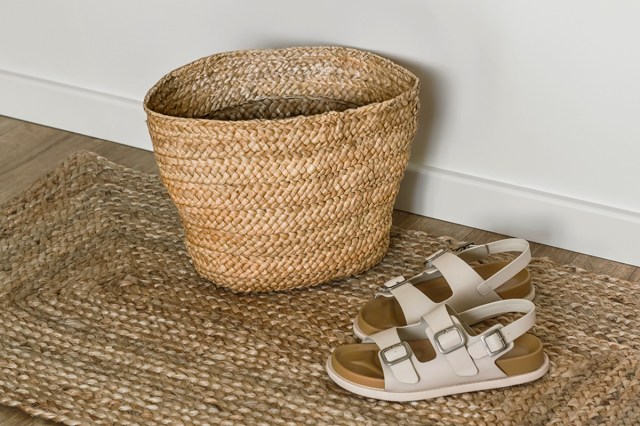
Banana peels are as versatile as a Swiss Army knife. They’re excellent for adding nutrients to your compost pile, make for great comedy when someone slips on one, and are a game-changing weapon in the world of Mario Kart. On top of that, banana peels are also an effective, natural tool for restoring scuffed leather.…
The Appeal of a Peel
There are two major reasons why banana peels are especially useful when it comes to treating worn leather. First, banana peels are naturally waxy, making them a powerful polish without harmful chemicals. Second, bananas are rich in potassium, a mineral often used in the tanning industry for treating hides and making leather more durable. This makes the peels ideal for buffing scuffs out of leather furniture, belts, bags, shoes, and other similar items showing their age.
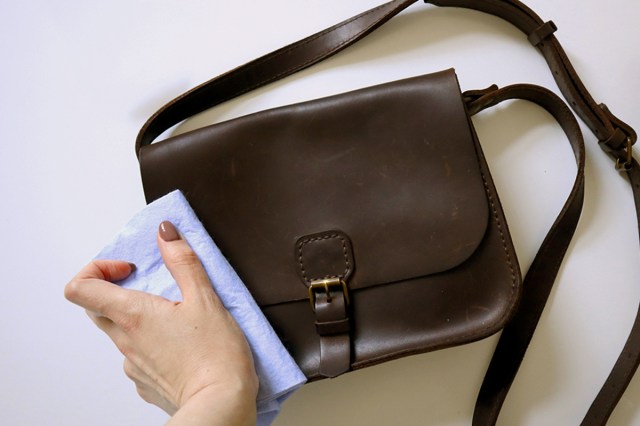
Here’s how it works: Rub the inside of the peel along damaged sections of the leather in smooth, circular motions to work it in. Next, take a clean, soft cloth and wipe away any visible residue. Finally, use a clean portion of that same cloth to rub the scuffed leather in vigorous circular motions. This should buff and shine the leather, leaving it looking as fresh as the day you got it.
More from our network
House Outlook is part of Optimism, which publishes content that uplifts, informs, and inspires.


But That’s Not All
In addition to removing scuffs from leather, the waxiness of banana peels makes them an excellent polish for wood and silver. Let’s say you have a wooden coffee table with scratches or water rings — simply follow the same steps outlined above, and you can buff out those unsightly blemishes.
If you have any tarnished silver (e.g., flatware, serving platters, picture frames), take a few banana peels, put them in a blender, and pulverize them into a paste. Peels from ripened bananas will be easier to blend, but you can add a little water (around 1/4 cup) if needed. Next, apply a thin layer of paste to the tarnished silver item in question. Take a clean cloth and buff the paste into the silver; this should remove or lessen the tarnish. Finally, wash off the residue with warm, soapy water, and dry the item thoroughly using another clean cloth. Your once-tarnished silver should gleam brightly again.