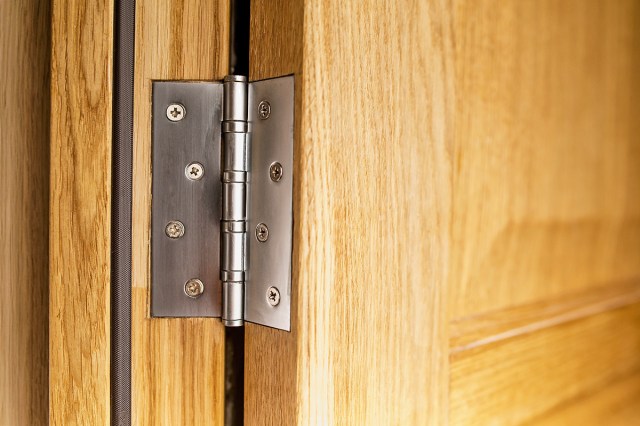
Heard a squeak? There are a few potential culprits to rule out. The best-case scenario is your dog playing enthusiastically with a plush toy; the worst (in our opinion) is a mouse problem. But there’s a third option, too, and it’s an annoying one that happens far too often — a squeaky door hinge. The…
Rub-A-Dub-Dub
When most people hear a creaky door, they reach for a canister of cooking spray or WD-40 and spray the hinge. While this usually silences the hinge, it leaves a greasy residue that can potentially damage wood or paint, or attract unwanted pests.
Instead of risking damage with spray-on oils, we turn to a solution brought to our attention by TikTok creator @ken.c.long, who recommends using a bar of soap. A dye-free, fragrance-free bar of soap, such as a Dove Beauty Bar, is an excellent tool for fixing creaky door hinges.
Simply rub the bar along the outside of any squeaky hinges; this pushes soap into the cracks, leaving them sufficiently lubricated. Once you’ve done that, use a clean rag to wipe away the excess soap. Finally, move the door back and forth several times to work the soap into the hinges. Follow these steps and the squeak should disappear in no time.
More from our network
House Outlook is part of Optimism, which publishes content that uplifts, informs, and inspires.


More Brilliant Bar Soap Hacks
You can also use a bar of soap to lubricate sliding drawers and keep them from jamming. Let’s say your junk drawer keeps getting caught every time you open it. Take the bar of soap and rub it along the sliding runners — just be careful not to cut yourself, as these runners can be sharp. Gently wipe off any extra soap, and the drawer should open and close smoothly.
Soap can even help lubricate a pesky clothing zipper that keeps getting caught on a pair of jeans or your favorite jacket. Glide the bar of soap over the zipper teeth to lubricate them, then brush away the excess. The soap should make the zipper slide much more easily, so you’ll no longer have to worry about getting it caught halfway.