Advertisement
Organizing 3m read
0

The Organizing Hack That Prevents Clutter Buildup

If clutter is a never-ending problem in your household, your first thought might be to invest in new storage solutions. You can buy everything from collapsible bins to large storage totes, but if those don’t seem to do the trick, you may need to take a step back and reconsider your storage systems. Not sure where to start? Let’s dive in.

All featured products and deals are selected independently and objectively by the author. House Outlook may receive a share of sales via affiliate links in content.

If clutter is a never-ending problem in your household, your first thought might be to invest in new storage solutions. You can buy everything from collapsible bins to large storage totes, but if those don’t seem to do the trick, you may need to take a step back and reconsider your storage systems. Not sure…

Prioritize Direct Access

The perfect storage system will vary based on your space and needs, but there’s one important thing you should keep in mind. According to TikTok creator @jenny.for.your.thoughts, the No. 1 rule for an efficient storage system is direct access. You should be able to find what you need without digging or disturbing other items. Jenny compares this to the smooth, “frictionless” action of pulling a book from a shelf.

Pinpoint the Problem Area

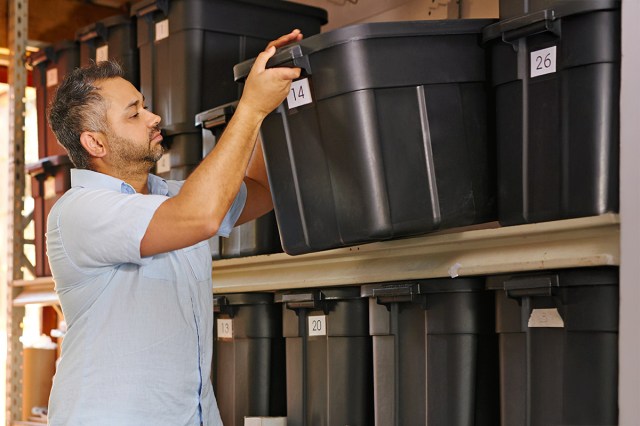
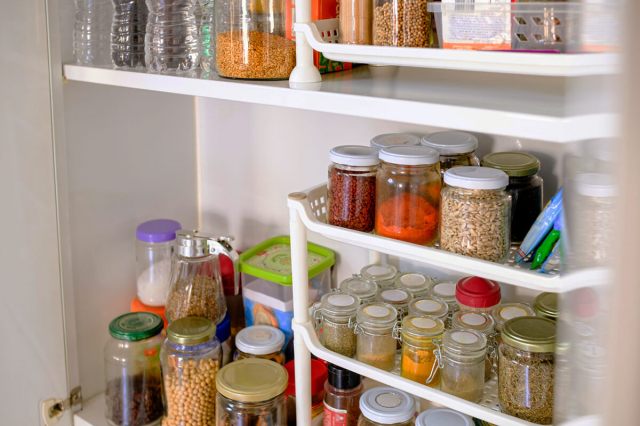
Now that you have an idea of what makes a good storage system, it’s time to focus on areas that need decluttering — what Jenny calls “points of friction.” For example, if shoes tend to pile up in your entryway or are tossed in a large storage bin, there’s likely a better way to organize them.

Optimize the Space With Organizers

Once you’ve assessed the problem area, find organizers that work with your space, budget constraints, and the items you want to organize. Sticking to the shoes example, you may want to find a shoe rack for your entryway to hold your most-worn pairs, such as this cabinet with divided cubbies and transparent flap doors. Your Crocs and Chucks will have designated spots, and you won’t have to rifle through a storage tote to find them.

Advertisement

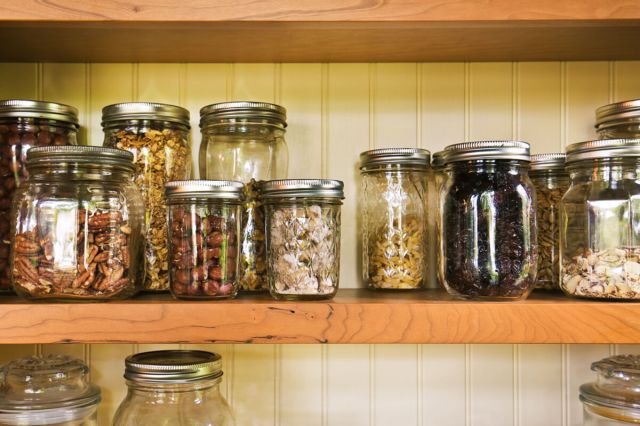
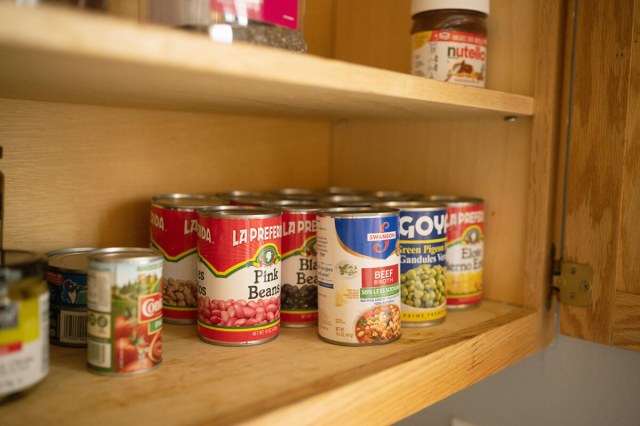
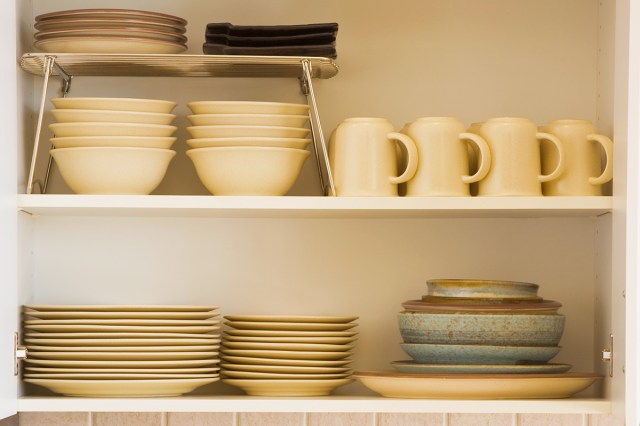
Organizers designed for direct access can improve other areas of your home as well. If you stack salad plates on top of dinner plates due to limited cabinet space, using a shelf riser will separate them and maximize vertical space. Or if your sock drawer is a jumbled mess, add honeycomb dividers to make each pair easily accessible.

Related: The ‘Five Things’ Method Is the Secret to Easy Cleaning

Finding the right storage solutions takes time. Start by identifying your home’s “points of friction,” and then shop for systems that offer direct access to each item. Don’t be afraid to regroup and try again if an organizer isn’t working out. According to Jenny, chaotic clutter often stems from faulty storage systems, not our personal failings.

Advertisement
Pauline Lacsamana
Writer
Pauline Lacsamana is a freelance writer and editor who specializes in commerce, home, design, and lifestyle. She has bylines in The Spruce, Business Insider, U.S. News & World Report, Hunker, MyDomaine, Parade, and more.
This article is for general informational purposes only.
Affiliate Disclaimer 
|
Financial Disclaimer
Featured Image Credit:  jmsilva/ iStock | Updated  May 2, 2025 |
Advertisement
Organizing 3m read
0

Finally, a Way To Find Anything in Your Storage Bins

Trying to locate a single item in a wall of storage bins is as difficult as searching for a needle in a haystack. Even worse, you may end up emptying all the bins before finally finding what you’re looking for, leaving you with the painstaking task of repacking everything.

All featured products and deals are selected independently and objectively by the author. House Outlook may receive a share of sales via affiliate links in content.

Trying to locate a single item in a wall of storage bins is as difficult as searching for a needle in a haystack. Even worse, you may end up emptying all the bins before finally finding what you’re looking for, leaving you with the painstaking task of repacking everything.

To borrow a catchphrase from TV infomercials — there’s got to be a better way! Well, thankfully, there is. Here’s how you can simplify storage and find exactly what you’re looking for at the click of a button.

Use Your Phone’s Notes App

A lot of people just use their notes app for writing grocery or to-do lists, but it can also serve as a simple and free organization tool for anyone with a smartphone. While this hack involves a little work up-front, it’ll make your life much easier in the long run.

First, gather your storage bins and clearly label each one with a large number on the outside. At the same time, create a new note on your phone, dividing it into sections that correspond to each of those numbered bins. As you place an item into a specific numbered bin, write it down in your notes app under the appropriate section.

Related: Create a Clutter-Free Home With These 10 Amazon Organizers

Once all the bins are full, you’ll have compiled a list of every item in each numbered box. When you need to track down one of those items in the future, just go into the notes app and use the search function to pull up that keyword. It will show you which numbered box the item is in, allowing you to easily retrieve it.

Advertisement

If you’d rather not use your smartphone, consider creating a similar document on your computer using a word processing program such as Microsoft Word or Google Docs. Alternatively, you can keep a running list by hand — but the major downside to this method is that you can’t easily search through the list at the click of a button.

Hopefully, this helpful numbering system makes home storage as easy as one, two, three.

What About QR Codes?

Instead of numbering your bins, consider affixing QR codes to their exteriors. These codes are easily generated using free online tools, and when scanned by a QR code reader (your smartphone’s camera, for example), they’ll take you directly to the webpage they’re connected to. You can even connect QR codes to a cloud service such as Google Docs, where you can write out lists of each bin’s contents for safekeeping. That way, whenever you’d like to know what items are in any given storage bin, just scan the code, and it’ll take you to the appropriate online document.

Advertisement
Bennett Kleinman
Staff Writer
Bennett Kleinman is a New York City-based staff writer for Optimism Media, covering topics for several brands including House Outlook and Better Report. He previously contributed to television programs such as "Late Show With David Letterman" and "Impractical Jokers," and digital publications like The Onion. Bennett is also a devoted New York Yankees and New Jersey Devils fan, and thinks plain seltzer is the best drink ever invented.
This article is for general informational purposes only.
Affiliate Disclaimer 
|
Financial Disclaimer
Featured Image Credit:  peopleimages/ Adobe Stock | Updated  May 2, 2025 |
Advertisement
Food & Drink 8m read
0

These Pantry Items Are Probably Past Their Prime

For any enthusiastic home cook, a well-stocked pantry is a source of both comfort and pride. It’s a great feeling to know that you’re equipped to whip up a tasty meal or dessert on the spur of the moment, whether for yourself or unexpected company. On the other hand, it’s all too easy to lose track of what’s in your pantry. Not only is that frustrating when you’re looking for a specific ingredient, but it also likely means that many of your pantry items are past their practical shelf life.

All featured products and deals are selected independently and objectively by the author. House Outlook may receive a share of sales via affiliate links in content.

For any enthusiastic home cook, a well-stocked pantry is a source of both comfort and pride. It’s a great feeling to know that you’re equipped to whip up a tasty meal or dessert on the spur of the moment, whether for yourself or unexpected company. On the other hand, it’s all too easy to lose…

From a trained chef and former restaurateur (and chronic ingredient hoarder), here are a dozen pantry items to check and potentially toss.

1. Spices and Herbs

Spices and herbs are often a trouble spot in pantries. Ground herbs and spices don’t hold their flavor for long, as those flavor molecules are volatile and tend to evaporate and oxidize pretty quickly. It’s best to replace them every six months or so. Whole spices retain flavor longer, lasting up to a few years, but of course, that means you’ll need to grind them yourself.

Credit: Roman Chekhovskoy/ iStock

2. Flour

Didn’t think flour could spoil? Well, surprise! Whole-grain flours are the quickest to spoil because they contain all of the grain’s bran and germ. Those are filled with healthy natural oils, but unfortunately, the oils become rancid over time. If you won’t use your whole-grain flour within a couple of months, it’s best to store it in the fridge. White all-purpose flour keeps better, but after a year, it’ll taste musty and stale (and may breed bugs).

Related: 9 Nutritious Nonperishable Foods To Stock for Emergencies

3. Oil and Shortening

Just like the oils in whole-grain flour, bottles of vegetable and olive oil can oxidize and become rancid over time. This is particularly problematic with premium olive oils or exotic nut oils, which we often deem “too good for everyday use.” Life is short, folks; use ’em up before they go bad. Rancidity can even affect solid fats such as shortening or lard. If you won’t use them quickly, refrigerate them to extend their shelf life.

Credit: idil toffolo/ iStock
Advertisement

4. Leavenings

Leavenings are the ingredients used to make baked goods rise, including baking soda, baking powder, and yeast. All three can lose their oomph in storage and need to be tested regularly or discarded. Six months to a year is about the limit for baking powder or soda (reduce that timeline to six months in humid climates). For yeast, check the “best by” date on the package. Larger jars or vacuum packs of yeast should be kept in the fridge once opened.

5. Nuts and Seeds

From the flax and chia seeds you toss in your smoothies to the walnuts, almonds, and pecans you bake with around the holidays, seeds and nuts have a fairly short shelf life. Ground flax, for example, goes rancid in as little as a month or two when stored at room temperature. If you routinely buy nuts or seeds in Costco-sized quantities, separate the amount you’ll use quickly and refrigerate or freeze the rest.

Credit: YinYang/ iStock

6. Oats and Other Whole Grains

Just like whole-grain flour, whole grains benefit from the same storage methods outlined above. Oats are relatively quick to spoil, for example, because they have a higher oil content than other grains. If you like to cook with alternative grains, they’ll also become musty-tasting and then rancid after a period of months. The timing varies by grain, so check the “use by” date on the packaging. (If you don’t have the original packaging, just “call it” after a year and discard what’s left over.) Rice varieties typically last for up to six months, while farro and amaranth last for up to a year, and quinoa lasts for two to three years.

Advertisement

7. Canned Goods

Canned goods are excellent pantry staples due to their long shelf life, but that doesn’t mean they last forever. The USDA estimates that low-acid canned goods (that’s most vegetables and prepared foods) are good for two to five years if they’re stored in a cool, dry area. Meanwhile, acidic foods (canned tomatoes, fruit, pickles, salsa, etc.) are good for 12 to 18 months. For home-canned foods, one year is the practical limit.

Credit: Boogich/ iStock

8. Opened Boxes

The pantry always seems to have opened but not-quite-finished boxes of snacks, crackers, cereal, and other dry goods. Ideally, the bags inside those boxes would be closed with a clip to keep them fresh, but that doesn’t always happen. Even if it does, moisture and air will eventually seep in, causing staleness. So check those boxes and discard anything that’s past its prime.

Related: The Best Costco Finds To Stock Your Freezer With

9. Specialty Coffee and Tea

The coffee or tea you depend on to kick-start your day probably gets used up pretty quickly. But what about specialty coffees, teas, and matcha powder? Unopened ground coffee retains its flavor for three to five months from the roast date but loses freshness within a month or two after opening. Whole-bean coffee is better than ground, lasting around a year in unopened, vacuum-sealed packaging, but it should be consumed within a few weeks once unsealed. Not sure if those beans are still good? Grind enough to make a cup, and see for yourself.

Opened teas (loose or bagged) don’t hold their best flavor for very long, either. Although the flavor will be slightly degraded, loose leaf tea is safe to consume within one to two years, and tea bags have a shelf life of about six to 12 months. Unopened matcha powder lasts for around one to two years, but once opened, it should be used within two to three months.

Credit: Maliflower73/ AdobeStock
Advertisement

10. Outdated Box Mixes and Side Dishes

When does a convenience product become an inconvenience? When it’s taking up unnecessary space in your pantry. Most of us have a handful of box mixes in the pantry for cakes, biscuits, or preseasoned side dishes such as instant pasta and rice, or prepared scalloped potatoes. If you use them regularly, that’s great, but if not, consider them space hogs. Examine those labels and toss anything beyond its “best by” date.

11. “Orphan” Ingredients

OK, I might need to explain this one. To me, orphan ingredients are mostly those you buy for a specific recipe and never use again. This category includes things you bought because they went viral and sounded interesting (a Trader Joe’s snack item, perhaps), or unused gifts from friends and family who know you love to cook or bake. If it’s been more than six months and you still haven’t found a recipe to work them into, well … they probably need to go.

Credit: Studio CJ/ iStock

12. “Mystery” Items

This is a catch-all category covering anything from unlabeled cans to bags and containers of random grains, and (this is especially relevant if you bake) bags of unidentifiable white powders. I frequently shop at bulk-food stores, so I’m often guilty of hanging on to these types of items for too long. If you can’t identify something, let alone remember when you bought it, it should be trashed.

Advertisement

The Flip Side: Pantry Items You Don’t Have To Discard

Credit: Candice Bell/ iStock

There are a handful of items a lot of people do toss from their pantries that represent the opposite issue. Properly stored honey never expires, but it does crystallize. Don’t throw it away — you can easily turn it back into a free-flowing liquid.

Peanut butter and natural nut butters separate, but there’s an easy fix for that. (Discard them if they smell rancid, though.) Brown sugar tends to harden into a lump, but it’s easy to keep that from happening or reverse it when it does.

And what’s more tragic than wasting chocolate? Chocolate with a white film on the surface isn’t moldy or spoiled — that’s just the cocoa butter crystals “blooming.” It’s still completely safe to eat the chocolate and its flavor will be unaffected. Generally, dark chocolate lasts about two years, milk chocolate one year, and white chocolate six months.

Advertisement
Fred Decker
Writer
Fred Decker is a trained chef and former restaurateur. Since closing his restaurants over a decade ago he has been a prolific freelance writer, publishing several thousand articles on dozens of high-volume websites including Taste Of Home, Hunker, Tasting Table, Week&, eHow, and GOBankingRates. He lives on a rural acreage shared with a big garden, chickens, rabbits, and grandkids.
This article is for general informational purposes only.
Affiliate Disclaimer 
|
Financial Disclaimer
Featured Image Credit:  pundapanda/ Adobe Stock | Updated  Apr 8, 2025 |
Advertisement
Cleaning 4m read
0

A Step-By-Step Guide To Deep Cleaning Your Hair Tools

Hollywood-worthy hair requires multiple steps: shampooing, conditioning, brushing, drying, styling, and setting. One dirty hair brush can undo all that effort, though. Over time, hair tools accumulate oil, product buildup, dust, and bacteria — all of which can negatively impact your scalp health and luscious locks. That’s why knowing how to clean brushes, combs, and styling tools is a crucial part of any healthy hair routine.

All featured products and deals are selected independently and objectively by the author. House Outlook may receive a share of sales via affiliate links in content.

Hollywood-worthy hair requires multiple steps: shampooing, conditioning, brushing, drying, styling, and setting. One dirty hair brush can undo all that effort, though. Over time, hair tools accumulate oil, product buildup, dust, and bacteria — all of which can negatively impact your scalp health and luscious locks. That’s why knowing how to clean brushes, combs, and styling tools…

If you’re not regularly cleaning your styling tools, now’s the time to start. It’s quick, easy, and essential to helping your hair look and feel its best. Read on to learn why, when, and how to clean your hair tools properly.

Why Should You Clean Your Hair Tools?

Credit: Mathilde Langevin/ Unsplash+

Just like your strands themselves, hair tools accumulate dirt, oil, product buildup, and dead skin cells. Regularly cleaning them not only maintains healthy hair but also helps prevent bacterial and fungal growth, which can irritate the scalp and be a culprit of dandruff or breakouts along your hairline. Plus, a brush filled with oil and product buildup won’t glide through your hair as easily, leading to unnecessary tugging and breakage.

Related: 10 Items Around the House That Are Way Dirtier Than You Think

Routine cleaning also optimizes tool performance. Hair dryers collect dust and lint in their vents, reducing airflow and efficiency. A clogged hair dryer can overheat, potentially damaging both your locks and the tool itself. By keeping your styling tools in tip-top shape, you’ll extend their lifespan and save money in the long run.

Advertisement

How Often Should You Clean Your Hair Tools?

Your cleaning routine will depend on a few factors, including the types of tools you use, how often you use them, and how much product you add to your hair. Follow these general guidelines:

• Hair brushes: Clean every two weeks, or weekly if you use heavy styling products or have oily hair or dandruff.

• Hot tools, such as curling irons and straighteners: Wipe down weekly or biweekly to prevent residue buildup.

• Hair dryers: Clean vents monthly to help prevent overheating.

How Do You Clean Hair Brushes and Combs?

Start by removing any hair you’ve shed with your fingers or a comb. (It’s good practice to do this daily.) The next step depends on the material of your brush.

Credit: sisterspro/ iStock
Advertisement

Plastic or Metal Brushes With Synthetic Bristles

1. Fill a bowl or sink with warm water, mixing in a few drops of shampoo or mild soap, such as dish soap or gentle hand soap.

2. Swirl the brush in the soapy water, letting it soak for 10 to 15 minutes.

3. Got an extra grimy brush? Use an old toothbrush to scrub between the bristles.

4. Rinse thoroughly.

5. Let the brush air-dry on a clean towel with the bristles facing down.

Credit: nastya_ph/ iStock

Brushes With Natural Bristles or Wooden Handles

Since soaking these brushes in water can damage the bristles or warp the wood, follow these instructions instead.

1. Mix warm water and a few drops of shampoo in a spray bottle.

2. Spritz the mixture on the bristles.

3. Use your fingers to massage the bristles, loosening any residue.

4. Rinse with a clean, damp cloth.

5. Lay it out to dry with the bristles facing down.

Bonus Tip

A common kitchen staple can also help clean your hair brushes. White vinegar is a natural degreaser with antibacterial properties, perfect for breaking down heavy oils without damaging your brush.

Advertisement

How Do You Clean Hair Dryers and Hot Tools?

Credit: splitov27/ AdobeStock

Hair Dryers

1. Unplug the device.

2. Take off the lint filter. (It’s usually located at the back.)

3. Use an old toothbrush or your vacuum’s crevice tool or brush attachment to clear away dust and debris.

4. Wipe the exterior with a damp microfiber cloth to remove product buildup.

Related: 8 Things You Should Never Store in Your Bathroom

Flat Irons and Curling Irons

1. Unplug the tool and let it cool completely.

2. Dampen a cleaning cloth with rubbing alcohol or a mixture of water and mild shampoo to wipe the plates.

3. For stubborn residue, use a cotton swab dipped in alcohol to clean the edges.

Keeping your tools clean prevents overheating, ensures even heat distribution, and reduces the risk of heat damage to your hair.

Advertisement
Megan McCarty
Writer
Megan McCarty is a Los Angeles-based writer who covers the fun stuff: design, travel, wellness, beauty, and fashion. She has written for publications including Domino, The Spruce, MyDomaine, Bustle, and Rue Magazine. Her life rules include, but are not limited to, zipper when merging, contribute to your IRA, and do the nice thing.
This article is for general informational purposes only.
Affiliate Disclaimer 
|
Financial Disclaimer
Featured Image Credit:  Anete Lusina/ Pexels | Updated  Apr 8, 2025 |
Advertisement
Home Improvement 5m read
0

A Seasonal Thermostat Guide for Maximum Comfort and Savings

If the dads of the world were writing this article, it would be a short and easy read: Put on a sweater and turn the thermostat way down, as close to “off” as possible. For many of us, however, embracing such a spartan lifestyle simply isn’t how we wish to spend our time at home. We say “in the comfort of our own homes” for a reason, right? So, how do we keep indoor temperatures comfortable without those heating and cooling bills costing us a small fortune each month?

All featured products and deals are selected independently and objectively by the author. House Outlook may receive a share of sales via affiliate links in content.

If the dads of the world were writing this article, it would be a short and easy read: Put on a sweater and turn the thermostat way down, as close to “off” as possible. For many of us, however, embracing such a spartan lifestyle simply isn’t how we wish to spend our time at home.…

Remembering just a couple of numbers will go a long way in making your home comfortable and cost-effective, all year long.

Credit: monkeybusinessimages/ iStock

Money-Saving Thermostat Settings for Summer

Whether you’re in a sticky, humid climate or a dry, dusty desert, the summer months likely come with high temperatures wherever you live. An air conditioner can help keep the internal temperature of your home closer to your comfort level. In the summer, it’s recommended that your thermostat be set to 78 degrees Fahrenheit during the day. Raising it by seven to 10 degrees for eight hours a day can reduce your cooling bill by as much as 10%. Try to incorporate an eight-hour stretch where the temperature rests at 85 to 88 degrees Fahrenheit once per day. You can do this without sacrificing comfort by adjusting the dial while you’re away at work or sleeping at night.

Related: Helpful Hacks To Lower Your Heating Costs During the Colder Months

Reducing Costs With the Right Winter Settings

Spending hundreds of dollars on a monthly heating bill isn’t preferred either, or even possible for some households, but most people don’t want to spend their evenings at home bundled up in layers and blankets. To keep your home comfortable on a budget, set your winter thermostat to 68 degrees Fahrenheit during the day. To cut your heating bill by 10%, turn the dial to about 60 degrees Fahrenheit while you’re sleeping or away for more than four hours at a time.

Advertisement

To Keep Running, or Not To Keep Running?

Credit: fstop123/ iStock

This is an age-old question and a subject of much debate. Some argue that maintaining a consistent thermostat temperature will lower your bill in the long run because your HVAC system won’t have to work as hard to heat up or cool down after the temperature has fluctuated. Others say turning it off while you’re away is more cost-effective since you won’t be running your system while no one’s home to feel it. According to Pacific Gas & Electric, the latter point is correct: The only thing that will cause a spike in your bill after you’ve returned home from a day out is adjusting the thermostat to a much colder or warmer setting than usual.

Related: Little Changes To Help You Save Money on Household Expenses

Other Tips for Lowering Your Energy Bill

Credit: Nikolaeva Elena/ iStock

Does sleeping in an 88-degree bedroom sound like a recipe for a sweaty night? You can make simple changes around the house to keep things comfortable and energy-efficient without touching the thermostat.

Advertisement

Window Maintenance

Our top recommendation is to properly maintain your windows. According to the U.S. Department of Energy, windows can account for a whopping 30% of home heating and cooling energy loss. Seal gaps and cracks around your window frames with caulk, spray foam, or weather sealing tape. Consider upgrading single-pane windows (especially those with metal or aluminum frames) to double- or triple-pane windows with energy-efficient features such as low-emissivity (low-E) coatings or gas fills.

Window Treatments

For a quick, easy way to lower your bill, use window treatments strategically. They’re not just for decoration and privacy; they also can help manage heating and cooling costs. If you have a window that sunlight pours into, draw the shades during summer days to prevent your home from heating up. In the winter, do the opposite, and take advantage of any available sunlight to naturally warm your home at no extra cost. You can also swap out your regular curtains for thermal ones; these are made of thicker material, adding another layer of protection during the colder months.

Window Coverings

Film coverings can eliminate or drastically reduce wintery drafts that may be lowering your home’s temperature. What’s more, the trapped air between the film and window provides additional insulation. When the summer sun beats down, cover windows with reflective insulation to block solar radiation and keep rooms nice and cool.

Fans

Fans can carry a lot of cooling weight in the summer, especially if the outside temperature dips enough to crack a window while you sleep. Ceiling and portable fans consume significantly less energy than AC units — in fact, their electricity usage is estimated to be only about 1% of what a typical air conditioner requires. However, fans cannot lower humidity or room temperature; for that, you’ll need to switch on the AC.

Advertisement
Krissy Howard
Writer
Krissy Howard is a New Mexico-based writer. Her work has appeared in Byrdie, Hunker, and Simplemost, and she is the former managing editor of music satire website, The Hard Times.
This article is for general informational purposes only.
Affiliate Disclaimer 
|
Financial Disclaimer
Featured Image Credit:  O2O CREATIVE/ iStock | Updated  Apr 8, 2025 |
Advertisement
Organizing 3m read
0

The ‘Five Things’ Method Is the Secret to Easy Cleaning

If you find yourself feeling overwhelmed when there’s a messy room to clean, the “Five Things” tidying method by KC Davis will be a total game changer.

All featured products and deals are selected independently and objectively by the author. House Outlook may receive a share of sales via affiliate links in content.

If you find yourself feeling overwhelmed when there’s a messy room to clean, the “Five Things” tidying method by KC Davis will be a total game changer.

Davis is a licensed professional therapist, author of “How To Keep House While Drowning,” and founder of the mental health platform Struggle Care. She posted a helpful video to TikTok explaining her method, and it’s truly the secret to easy cleaning, especially for those with ADHD, depression, anxiety, or other mental health struggles.  

The Method      

Davis says that when cleaning a room, think of it as if there are only five categories in the space: trash, laundry, dishes, things that have a home, and things that don’t. To ease those overwhelming feelings when faced with a mess, focus on one category at a time, picking up only the items within that category.

How It’s Done

Let’s say you can barely see the floor in your bedroom due to dirty clothes, bath towels, dishes, and trash strewn about. Decide what you want to focus on first. If it’s clothes, walk around the room, pick up everything in the laundry category, and put it in a hamper or directly in the washing machine to get it out of the way. You don’t need to start the load unless that helps make you feel more productive. Ignore everything else until this part is done.

Advertisement

Then you can move on to the next category with less stuff in the way. Maybe the next category you choose is dishes. Collect any water cups, coffee mugs, and bowls of unpopped popcorn kernels, and put them in the kitchen sink.

Related: How To Find and Fix Hidden Clutter Hot Spots

While you’re in the kitchen, grab a trash bag for the next category and pick up any wrappers, price tags, or facial tissues cluttering your bedroom’s surfaces. Then, focus on putting away items that have a home; if you uncover anything that doesn’t, add it to a pile. 

Once your space is clear, you can decide where the miscellaneous items should go in a much calmer environment. You’ll be left with a livable space and a clearer mindset.

Advertisement
Jill Layton
Writer
Jill Layton started writing professionally when she realized her emails and texts were kinda funny. She’s an affiliate shopping writer and lifestyle contributor for Scary Mommy, Bustle, Mic, and Best Products. She’s the mom of two alarmingly witty kids and the world’s most perfect dog.
This article is for general informational purposes only.
Affiliate Disclaimer 
|
Financial Disclaimer
Featured Image Credit:  Karolina Grabowska/ Unsplash+ | Updated  May 2, 2025 |
Advertisement
Food & Drink 2m read
0

The Secret to a Stable Cutting Board

An unstable cutting board is no cutting board at all, as anyone who’s ever had a mishap just as they began slicing a bell pepper can attest. At best, this is a minor inconvenience, while at worst, it can result in injury.

All featured products and deals are selected independently and objectively by the author. House Outlook may receive a share of sales via affiliate links in content.

An unstable cutting board is no cutting board at all, as anyone who’s ever had a mishap just as they began slicing a bell pepper can attest. At best, this is a minor inconvenience, while at worst, it can result in injury.

Whether the cutting board has been warped by normal wear and tear, a manufacturing error, or lack of maintenance is ultimately beside the point when you’re attempting to prep dinner and finding it far more difficult than it should be.

The good news is that there’s an easy fix to prevent your cutting board from slipping and sliding — one that doesn’t require anything you don’t already have in your kitchen. Though you could simply buy a new nonslip cutting board, it’s possible (if not likely) that the universe has conspired against you in such a way that will ensure the problem recurs.

Stop the Slide

All you need for this hack is a kitchen towel or paper towel, both of which will be equally effective. If you opt for the former, a flour sack kitchen towel is best. These are made from thin, tightly woven cotton or linen and are a nod to the flour sacks of the past, which people often reused as towels.

Advertisement

Whichever towel you choose, ensure that it’s thin and smaller than your cutting board. This prevents the towel from adding unwanted height or sticking out, which could affect the board’s balance.

Related: How a Chef Removes Stubborn Stains From Wooden Cutting Boards

Thoroughly wet your towel, wring out the excess water, and place it under the board. The moisture creates a gentle suction, preventing the board from sliding or wobbling as you chop, slice, or dice — some much-needed stability that even your onions, carrots, and potatoes will celebrate as their form is forever changed. Once you’re finished, use the same towel to clean your countertop and celebrate this simple tool’s multifaceted usefulness.

Advertisement
Michael Nordine
Staff Writer and Editor
Michael Nordine is a writer and editor living in Los Angeles. He has two cats and wishes he had more. His film criticism has appeared in Variety, The Los Angeles Times, and The Village Voice, among others.
This article is for general informational purposes only.
Affiliate Disclaimer 
|
Financial Disclaimer
Featured Image Credit:  KucherAV/ iStock | Updated  Apr 4, 2025 |
Advertisement
Decorating 2m read
0

Follow This Design Rule for Better Flow in Your Space

While finding the right furniture is important, it’s the styling that truly makes a room feel like home. There are endless design tips and tricks for creating a more “aesthetic” home, whether it’s using the triangle method to style your bookshelves or making vignettes look more cohesive. However, there’s one design rule that any space can benefit from, and it’s all about flow.

All featured products and deals are selected independently and objectively by the author. House Outlook may receive a share of sales via affiliate links in content.

While finding the right furniture is important, it’s the styling that truly makes a room feel like home. There are endless design tips and tricks for creating a more “aesthetic” home, whether it’s using the triangle method to style your bookshelves or making vignettes look more cohesive. However, there’s one design rule that any space…

Go With the Flow

Don’t underestimate the importance of good flow when designing your space. Not only does it look good, but it also makes a home feel more harmonious. So, what is it exactly? A key part of good flow is a layout that allows for unrestricted movement, which can be achieved through thoughtful furniture arrangement.

How To Arrange Furniture for Better Flow

As much as we may love the look of certain furniture — be it an oversized sectional sofa or a vintage coffee table you spotted at the thrift store — you’ll want to make sure it fits comfortably in your space. Keeping proportions in mind is key. Then, carefully consider your furniture placement.

Awkwardly placed furniture can overcrowd rooms and block pathways, while spacing it out to create walkways will improve foot traffic. When arranging larger furniture in an open layout — for example, a sofa and dining table — try to leave a few feet of space or enough room to comfortably walk between them.

Advertisement

When it comes to smaller furniture, you have more flexibility. Place pieces a few inches to about a foot apart for better visual appeal. The goal is to create breathing room between furniture to prevent a cluttered look.

Related: The Interior Design Trick That Makes Any Room Look Bigger

While the exact measurements will vary depending on the size of the room, a good rule of thumb is to leave 4 feet of space between large furniture pieces and 14 to 18 inches between smaller pieces. This negative space allows for free movement and creates a balanced feel that’s pleasing to the eye.

Advertisement
Pauline Lacsamana
Writer
Pauline Lacsamana is a freelance writer and editor who specializes in commerce, home, design, and lifestyle. She has bylines in The Spruce, Business Insider, U.S. News & World Report, Hunker, MyDomaine, Parade, and more.
This article is for general informational purposes only.
Affiliate Disclaimer 
|
Financial Disclaimer
Featured Image Credit:  KOTO/ AdobeStock | Updated  Apr 4, 2025 |
Advertisement
Gardening 2m read
0

Save This Kitchen Scrap for Pest-Free Plants

Oranges aren’t just juicy and delicious; as it turns out, their peels can help you naturally maintain pest-free plants. Citrus peels contain limonene, a chemical compound that most insects dislike. The strong citrus scent disrupts pests that use their olfactory receptors to locate food, such as mosquitoes, flies, ants, aphids, and slugs. Harmless to plants and animals, limonene offers a safe and cost-effective alternative to commercial insecticides, which can be toxic.

All featured products and deals are selected independently and objectively by the author. House Outlook may receive a share of sales via affiliate links in content.

Oranges aren’t just juicy and delicious; as it turns out, their peels can help you naturally maintain pest-free plants. Citrus peels contain limonene, a chemical compound that most insects dislike. The strong citrus scent disrupts pests that use their olfactory receptors to locate food, such as mosquitoes, flies, ants, aphids, and slugs. Harmless to plants…

What To Do With the Orange Peels

When you have enough orange peels saved, chop or grind them to disperse around your patio, garden, or wherever there are problem areas. The peels can be fresh or dried, or you can create a natural formula by boiling them in a cup of water for 10 minutes, then straining the cooled mixture into a spray bottle. The spray formula can be used in gardens and on houseplants; for best results, give the affected greenery a spritz every three to four days.

Related: This Spice Is a Natural Fungicide for Houseplants

How To Properly Store Orange Peels

It only takes around two to three days for orange peels to mold and start decomposing. To keep the peels fresh for about a week, store them in a sealed container in the refrigerator. For longer storage, save and freeze peels in a Ziploc bag and scatter them around your garden in the spring.

Advertisement

Tips To Keep in Mind

While biodegradable, orange peels take longer to decompose than you probably have patience for. It’s important to replace the orange peels regularly so they don’t get moldy or lose that strong limonene smell. Use only the peels, not the orange flesh, to avoid attracting rodents and other unwanted animals.

Advertisement
Jill Layton
Writer
Jill Layton started writing professionally when she realized her emails and texts were kinda funny. She’s an affiliate shopping writer and lifestyle contributor for Scary Mommy, Bustle, Mic, and Best Products. She’s the mom of two alarmingly witty kids and the world’s most perfect dog.
This article is for general informational purposes only.
Affiliate Disclaimer 
|
Financial Disclaimer
Featured Image Credit:  astrall232/ iStock | Updated  Apr 4, 2025 |
Advertisement
Cleaning 2m read
0

The $1 Tool That Removes Hair From Your Vacuum Roller

Vacuums are a quick and effective way to remove pet and human hair from carpets. But so much of that hair doesn’t reach the vacuum chamber — it instead wraps tightly around the brush roller, which can lead to jams if you don’t clean it out regularly.

All featured products and deals are selected independently and objectively by the author. House Outlook may receive a share of sales via affiliate links in content.

Vacuums are a quick and effective way to remove pet and human hair from carpets. But so much of that hair doesn’t reach the vacuum chamber — it instead wraps tightly around the brush roller, which can lead to jams if you don’t clean it out regularly.

If you’ve ever flipped over your vacuum and tried to remove the wound-up strands of hair yourself, you know how tricky it can be to cut through it all without damaging the roller brush. Scissors are usually too big (and can accidentally cut the brush bristles), a knife is too dangerous, and pulling it out with your hands is too tedious. The best tool for removing hair from a vacuum brush is hidden in your sewing kit — or, if you don’t have one, is just $1 a pop on Amazon.

The Best Way To Remove Hair From a Vacuum Roller

The tool in question? A seam ripper. This small sewing notion, typically used for ripping out seams and fixing stitching mistakes, can also be used in other fiber art — it’s excellent for cutting out stitches in a needlepoint project, for example. But aside from that, the inexpensive tool has several home uses, including cutting out the pesky tangled hair wreaking havoc on your vacuum cleaner.

Advertisement

All you have to do is place the seam ripper at one end of the brush and push it through the wound-up hair, slicing the strands like thread. Since it’s such a small tool, it gets the job done without causing damage to the brush, cleanly cutting through the hair buildup for easy removal.

Related: Get Into Tight Spaces With This Clever Vacuuming Hack

Its compact size and needlelike tip are also ideal for removing other stuck debris from a vacuum roller, such as loose threads from rugs or hang tag ends.

Advertisement
Jessie Quinn
Writer
Jessie Quinn is a Los Angeles-based lifestyle journalist with words published in PEOPLE, StyleCaster, Apartment Therapy, The Spruce, Byrdie, and more. She has a Bachelor's Degree in fashion journalism from Academy of Art University and her work spans across many categories, including style, beauty, home, health, crafts, and more.
This article is for general informational purposes only.
Affiliate Disclaimer 
|
Financial Disclaimer
Featured Image Credit:  Matilda Wormwood/ Pexels | Updated  Apr 4, 2025 |