Advertisement
Decorating 3m read
0

The Interior Design Trick That Makes Any Room Look Bigger

It can be tricky to arrange all your furniture when you live in a small space or are decorating a compact room. While you might be inclined to push everything against a wall to form a larger central area, some designers say you should do the opposite. They argue that “wallflowering” your furniture doesn’t create the illusion of more space. Instead, it boxes everything in and makes the room look smaller.

All featured products and deals are selected independently and objectively by the author. House Outlook may receive a share of sales via affiliate links in content.

It can be tricky to arrange all your furniture when you live in a small space or are decorating a compact room. While you might be inclined to push everything against a wall to form a larger central area, some designers say you should do the opposite. They argue that “wallflowering” your furniture doesn’t create…

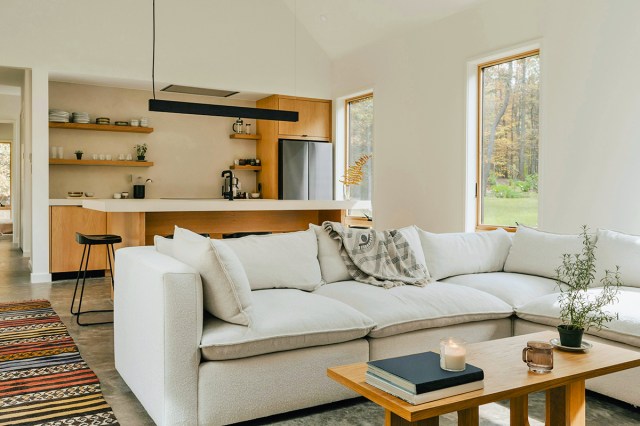
This also holds true for open floor plans, where wall space is often limited. Instead of cramming everything into the corners and along the perimeters, try a technique known as floating your furniture to open things up and make the space feel bigger.

How To Float Furniture

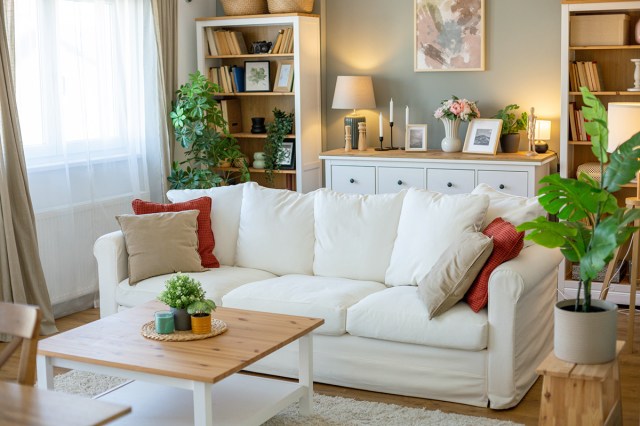
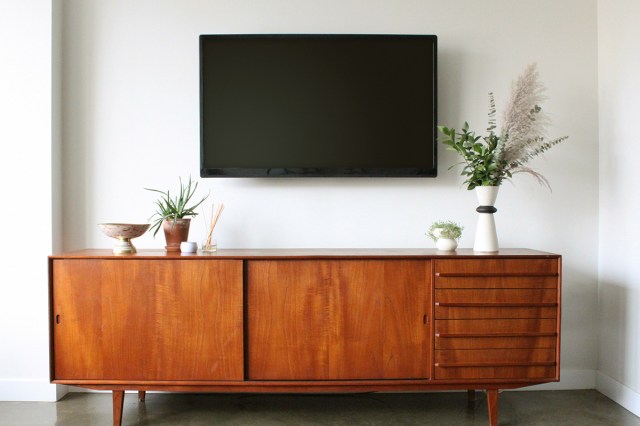
When you’re decorating your living room, certain furniture pieces — such as bookshelves or TV stands — may need to sit snugly against a wall, but items like sofas and side tables can be floated.

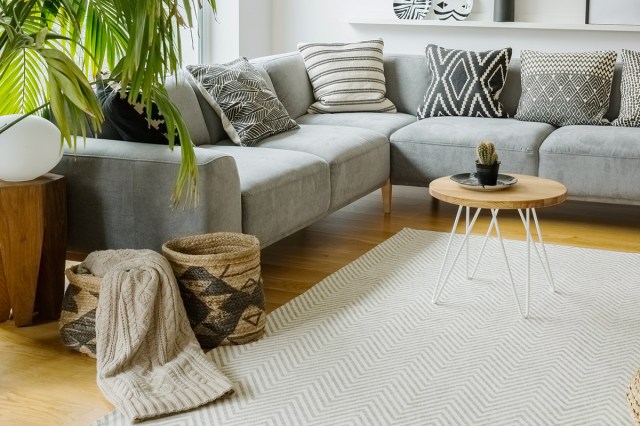
In an open floor plan, use your couch to create a designated seating area by pulling it away from the wall and anchoring it on a rug, about two and a half times the length of your TV screen. You can even add an L-shaped console to give yourself some extra storage.

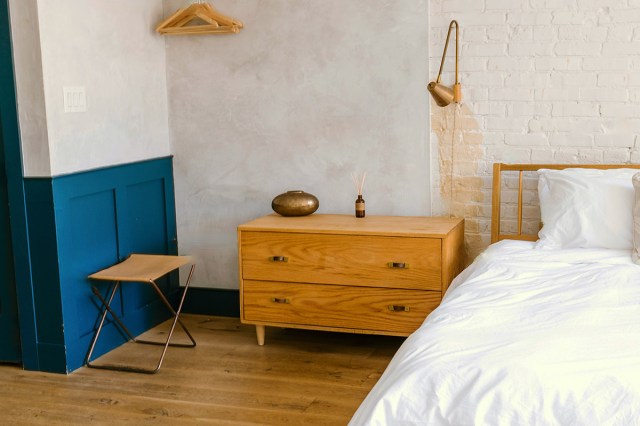
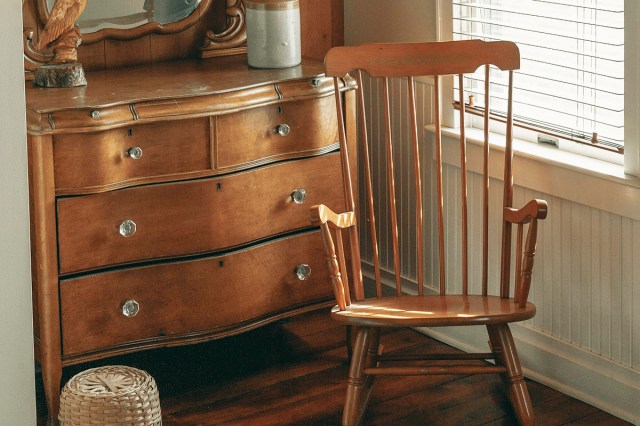
In small spaces, positioning the couch slightly off the wall and incorporating a narrow console can give you a usable surface. Accent furniture, such as armchairs and side tables, should also float to give your space some wiggle room.

Advertisement

You can achieve the floating furniture effect in other rooms, too, including your kitchen, office, and bedroom. In small kitchens, for example, placing the table in the center, instead of against a wall, not only maximizes seating but also frees up wall space and makes the room appear larger.

Related: Use This Designer Paint Trick To Fake Higher Ceilings

Even if you only have a few inches to spare, pulling your furniture away from the walls offers some breathing room and might even give your space more dimension, depending on how you decorate. You can also use this technique to define zones and walkways in an open floor plan, which can create a more purposeful layout.

Advertisement
Jessie Quinn
Writer
Jessie Quinn is a Los Angeles-based lifestyle journalist with words published in PEOPLE, StyleCaster, Apartment Therapy, The Spruce, Byrdie, and more. She has a Bachelor's Degree in fashion journalism from Academy of Art University and her work spans across many categories, including style, beauty, home, health, crafts, and more.
This article is for general informational purposes only.
Affiliate Disclaimer 
|
Financial Disclaimer
Featured Image Credit:  Clay Banks/ Unsplash+ | Updated  Apr 4, 2025 |
Advertisement
Food & Drink 6m read
0

Fruits and Vegetables You Should Never Store Together

Saving money on groceries isn’t all about how well or how aggressively you shop. Sure, clipping coupons and shopping sales offer upfront savings, but you can also save a lot of money simply by reducing food waste. Meal planning helps, but it’s not the only solution. Knowing how to store produce, for example, can prevent fruits and vegetables from spoiling or becoming overripe before you can use them. One common mistake is grouping fruits and vegetables that negatively affect each other. Here are a few examples you should know about.

All featured products and deals are selected independently and objectively by the author. House Outlook may receive a share of sales via affiliate links in content.

Saving money on groceries isn’t all about how well or how aggressively you shop. Sure, clipping coupons and shopping sales offer upfront savings, but you can also save a lot of money simply by reducing food waste. Meal planning helps, but it’s not the only solution. Knowing how to store produce, for example, can prevent…

Ethylene Gas and Produce Storage

Credit: Baloncici/ iStock

In most cases, the problems that arise from storing fruits and vegetables together are related to ethylene gas. You may know it as the substance “Big Ag” uses to ripen tomatoes for the supermarket, but that’s not the whole picture. Ethylene gas is produced naturally by a lot of fruits and vegetables; it jump-starts their ripening process. Using it commercially isn’t an example of chemical engineering gone wild — it’s just a smart way of harnessing and controlling a natural process.

Related: 5 Tips for Ripening Your Favorite Fruits Faster

This same process occurs naturally in your kitchen, whether you want it to or not. To control it, you need to know which fruits and vegetables produce ethylene and which are sensitive to it. If you know that, you can keep them separated (or not, when ripening fruit in a hurry is your goal).

Advertisement

How To Store Produce To Reduce Waste

Credit: ezza116/ iStock

The key, then, is to know which fruits and vegetables will ripen with ethylene, and which ones won’t — if you like to know these things, they’re called “climacteric” and “nonclimacteric,” respectively. Broadly speaking, most fruits are climacteric, while most berries are nonclimacteric. Vegetables are tougher to categorize because fewer are susceptible to ethylene, but some surprising ones are. This might seem like a lot to memorize, but don’t worry: You can source produce storage lists such as this one from your local extension service, and you’ll quickly learn which combinations to avoid.

To get you started, and to illustrate some of the principles involved, let’s talk about a few pairings to steer clear of.

Advertisement

1. Apples and Bananas

The only fruit storage issue many of us consider is whether they need refrigeration. Some fruits, such as apples and bananas, can go into a fruit bowl — but not together. Apples produce a lot of ethylene, and bananas are really sensitive to it (in fact, that’s how fruit companies first figured out the role of ethylene).

Storing them together can work in your favor if you want to ripen bananas quickly, but otherwise, they should be kept apart. Consider buying a banana hanger, which gets your bananas out of the bowl and protects them from bruising.

2. Melons and Potatoes

Here’s another pair of room-temperature produce items to avoid. Potatoes do best outside of the fridge (they convert some of their starches to sugars when chilled), as do melons such as cantaloupe or honeydew. If you leave a melon in the same bin or cupboard with your bag of russets while it ripens, though, the ethylene it produces will encourage the potatoes to sprout.

3. Pears and Avocados

Avocados are sometimes called “alligator pears” for their green and textured skin, and both pears and avocados need to be ripened off the tree. So it’s ironic, in a way, that these two don’t play nicely together. Both are ethylene producers, and sensitive to the gas, so storing them together doubles the effect. That’s a problem, given that they notoriously have a “blink and you’ll miss it” moment of peak ripeness.

It’s best to keep them separate, refrigerating as soon as they hit that perfect moment of ripeness. This will keep them from over-ripening before you can use them up.

Advertisement

4. Tomatoes and Eggplant

Like avocados, tomatoes and eggplants are fruits that we think of as vegetables. In fact, they’re close cousins, belonging to the nightshade family, which also includes potatoes. Eggplant can be refrigerated but doesn’t need to be; tomatoes, on the other hand, won’t fully ripen under refrigeration, so many cooks prefer to leave them on the counter. The tomatoes’ vivid red and the eggplants’ intense purple look great in a bowl together, which makes them a downright decorative pairing.

Unfortunately, similar to pears and avocados, both are ethylene-sensitive as well as ethylene producers. Putting them together will take them past their peak in a hurry, leaving you less time for that ratatouille recipe you were contemplating.

5. Bell Peppers and Broccoli

Bell peppers are another “vegetable” that’s technically a fruit. They don’t really need refrigeration but it does help them last longer, so they often end up in the crisper drawer alongside your broccoli. Broccoli is part of the cabbage family, so you might think of it as a durable vegetable, but it’s actually a cluster of delicate flower buds. If it’s stored alongside bell peppers, ethylene from the peppers will prompt the broccoli to blossom. You can still eat the florets as they open into flowers, but it spoils the broccoli’s look, and its texture suffers.  (Brussels sprouts are also sensitive to ethylene.)

Related: 10 Chef-Approved Storage Hacks To Make Food Last Longer

Mastering Fruit and Vegetable Storage Is a Money-Saving Skill

Credit: ArtMarie/ iStock

This is just one, albeit important, part of minimizing food waste. Produce storage is also strongly affected by temperature and humidity levels (those crisper drawers can make a real difference), but knowing which items to keep separate is a good place to start. When it comes to improving your food storage habits, this is — if you’ll forgive a “dad joke” — the low-hanging fruit.

Advertisement
Fred Decker
Writer
Fred Decker is a trained chef and former restaurateur. Since closing his restaurants over a decade ago he has been a prolific freelance writer, publishing several thousand articles on dozens of high-volume websites including Taste Of Home, Hunker, Tasting Table, Week&, eHow, and GOBankingRates. He lives on a rural acreage shared with a big garden, chickens, rabbits, and grandkids.
This article is for general informational purposes only.
Affiliate Disclaimer 
|
Financial Disclaimer
Featured Image Credit:  Liudmila Chernetska/ iStock | Updated  Apr 1, 2025 |
Advertisement
Gardening 3m read
0

This Natural Method Kills Weeds Instantly

Weeds are the bane of any home gardener’s existence. They’re annoyingly persistent — like a telemarketer who won’t take no for an answer — and as unsightly as an inflamed pimple that shows up the morning of a big event. Some gardeners may think that weeds are inevitable, but we have a helpful hack for easy eradication. Best of all, it doesn’t involve any harsh chemicals and costs nothing at all.

All featured products and deals are selected independently and objectively by the author. House Outlook may receive a share of sales via affiliate links in content.

Weeds are the bane of any home gardener’s existence. They’re annoyingly persistent — like a telemarketer who won’t take no for an answer — and as unsightly as an inflamed pimple that shows up the morning of a big event. Some gardeners may think that weeds are inevitable, but we have a helpful hack for…

Getting Out of the Weeds

Whenever you boil with rage at the sight of a new weed, boil up some water, too. Boiling water acts as a chemical-free contact herbicide, scalding the foliage and killing it without the use of any harmful additives. This tip is best applied to newer weeds with shallow root systems — picture those tiny weeds that form between paving stones or along gravel pathways.

We recommend using a kettle over a saucepan for a more precise pour — let’s save the burns for those intrusive plants. Pour the boiling water directly onto the weeds, using about ½ cup of water per plant. In 24 hours, the weeds should change color from green to brown. Digging out the weeds will also be much easier, if you’re willing to take that extra step.

Unfortunately, this method isn’t as effective on older weeds with deep root systems, as the boiling water loses its effectiveness as it seeps into the soil. Although a scalded weed might look dead, its roots can survive, allowing it to regrow. Instead, you should use this method to inhibit any new weed growth. So long as you stay on top of it, you can prevent young weeds from becoming established.

Advertisement

Safety First

While this method is entirely natural and chemical-free, it still comes with its own set of risks. The boiling water can easily kill other plants in your garden if you’re not careful. Always take extra caution when using this method to avoid any boiling water splashing onto other plants or, worse, your hand, which could result in a burn.

Related: Why Every Gardener Should Practice Companion Planting

To play it safe, we suggest using a kettle with a narrow spout for targeted pouring. Also, be sure to position the spout as close to the weeds as possible, lessening the risk of potential splashback.

Advertisement
Bennett Kleinman
Staff Writer
Bennett Kleinman is a New York City-based staff writer for Optimism Media, covering topics for several brands including House Outlook and Better Report. He previously contributed to television programs such as "Late Show With David Letterman" and "Impractical Jokers," and digital publications like The Onion. Bennett is also a devoted New York Yankees and New Jersey Devils fan, and thinks plain seltzer is the best drink ever invented.
This article is for general informational purposes only.
Affiliate Disclaimer 
|
Financial Disclaimer
Featured Image Credit:  Iryna/ Adobe Stock | Updated  Apr 1, 2025 |
Advertisement
Gardening 5m read
0

Why Every Gardener Should Practice Companion Planting

Gardening is a widely enjoyed hobby today, but for most of the past 12,000 years, it was less about leisure and more about survival. Not growing enough food meant hunger, or worse; needless to say, this was a strong motivator for understanding plant growth.

Gardening is a widely enjoyed hobby today, but for most of the past 12,000 years, it was less about leisure and more about survival. Not growing enough food meant hunger, or worse; needless to say, this was a strong motivator for understanding plant growth.

Because of this, our ancestors developed practices such as crop rotation and the use of manure as fertilizer. They also came to realize that some plants simply grow better when paired together. Today, we call that companion planting, and it’s something that every gardener should know. If you’re not already familiar with companion planting, here’s a brief introduction.

What Is Companion Planting?

Credit: Lily Kimei/ iStock

In school, many of us learned about the Native American practice of growing “the Three Sisters” — corn, beans, and squash — together. It’s a classic example of companion planting. The tall, straight cornstalks support the beans’ vines as they grow, the sprawling squash’s broad leaves choke out weeds, and the beans’ ability to enrich the soil with nitrogen helps nourish the corn and squash.

That’s what companion planting is all about: identifying mutually beneficial plants and growing them together. There are a number of ways that plants can help each other out. A few examples include:

“Fixing” nitrogen in the soil; select crops form a symbiotic relationship with Rhizobium bacteria to pull nitrogen from the air and turn it into natural fertilizer.

• Loosening and aerating your soil.

• Deterring common pests.

• Luring pests away from prized garden plants by offering alternatives that are even more attractive to them (this is called trap cropping).

• Attracting pest predators.

• Weed suppression, as squash does in the “Three Sisters” example.

Advertisement

A Beginner’s Companion Planting Guide

Credit: Queen/ Adobe Stock

There are a lot of plants that are known to work well in companion planting. You can get more detailed lists from your local extension service, nurseries, and garden centers, or in gardening magazines and seed catalogs.

Let’s look at a few of the most popular things gardeners grow and which plants are good companions for them.

Companion Plants for Tomatoes

Nothing beats the taste of a homegrown tomato, which is why so many of us tend to them. Common companion plantings for tomatoes include basil, sunflowers, carrots, chile peppers, dill, and onions. One important tip: Sunflowers draw stink bugs away from tomatoes, but you’ll need to plant them early enough that they bloom when protection is needed.

Companion Plants for Strawberries

Strawberries pair well with beans, lettuce, onions, and spinach. They also thrive alongside herbs such as thyme and borage, which deter pests and attract pollinators.

Related: Are Your Old Seeds Still Viable? Here’s How To Tell

Companion Plants for Peppers

All peppers, from sweet, fleshy bell peppers to the most searing-hot chiles, benefit from the same set of companion plants. These include basil, cilantro, onions, spinach, and tomatoes.

Advertisement

Companion Plants for Cucumbers

Appropriate companion plantings for cucumbers include beans, peas, corn, lettuce, radishes, sunflowers, and brassicas such as broccoli and cabbage.

Companion Plants for Brassicas (Broccoli, Cauliflower, Cabbage, etc.)

Most of the brassicas — the family that includes broccoli, cauliflower, kale, Brussels sprouts, and cabbage — do well when planted near beans, onions, lettuce, and herbs such as dill and sage. Because it’s such a broad family, not all of these pairings are compatible with every brassica, so double-check which ones are best for your specific situation.

Companion Plants for Carrots

Carrots work happily with companion crops including beans, lettuce, onions, peas, and tomatoes, as well as rosemary and sage. Because they’re slow-growing and a relatively late crop, it makes sense to pair them with early-yielding plants such as peas.

Advertisement

A Few Final Tips About Companion Planting

Credit: Regine Ruedinger/ iStock

Before you start digging, there are a few other things you need to know about companion planting. One is that not all companions are necessarily herbs or vegetables. While sunflowers have been the only flower mentioned thus far, many others effectively deter pests or attract predators. For example, strong-scented marigolds can be planted around broccoli and kale to help keep cabbage worms and other pests away, while nasturtiums and zinnias attract beneficial insects that eat harmful ones.

Related: Why You Shouldn’t Throw Away Fireplace Ashes

Something else to keep in mind is that companion planting can also have negative effects. Some popular crops (corn and tomatoes, for example) don’t pair well together at all. As a general rule, it’s beneficial to separate closely related crops, such as broccoli and cabbage, or carrots and dill or parsley. Their similarities lead to high competition, and planting them too closely can also create a “target-rich environment” for pests — that’s the opposite of what you want.

Advertisement
Fred Decker
Writer
Fred Decker is a trained chef and former restaurateur. Since closing his restaurants over a decade ago he has been a prolific freelance writer, publishing several thousand articles on dozens of high-volume websites including Taste Of Home, Hunker, Tasting Table, Week&, eHow, and GOBankingRates. He lives on a rural acreage shared with a big garden, chickens, rabbits, and grandkids.
This article is for general informational purposes only.
Affiliate Disclaimer 
|
Financial Disclaimer
Featured Image Credit:  Jeanette Fellows/ Adobe Stock | Updated  Apr 1, 2025 |
Advertisement
Food & Drink 3m read
0

This Kitchen Staple Helps Your Cheese Last Longer

Cheese is a prime example of food-related human ingenuity. It takes a highly perishable protein source (milk) and turns it into a longer-lasting, tastier, and more versatile product. That’s a neat trick, even before you consider the thousands of different cheeses developed throughout history.

All featured products and deals are selected independently and objectively by the author. House Outlook may receive a share of sales via affiliate links in content.

Cheese is a prime example of food-related human ingenuity. It takes a highly perishable protein source (milk) and turns it into a longer-lasting, tastier, and more versatile product. That’s a neat trick, even before you consider the thousands of different cheeses developed throughout history.

One thing most cheeses have in common is that they need proper storage to stay at their best. Storing cheese is easy if you keep cheese bags or cheese paper on hand, but not everyone does. If you want to do it right, ordinary parchment paper, an everyday kitchen staple, works surprisingly well.

Why Keeping Cheese Can Be Difficult

It’s important to remember that cheese isn’t simply a product like potato chips. Think of it as a complete ecosystem in miniature — a complex alchemy of proteins, acidity, salt, and microbiology. Although cheese is commonly sold shrink-wrapped in plastic, it keeps best when there’s just a bit of air flow. Cheese “respires,” or sheds moisture, as it ages, and proper air circulation prevents it from becoming too moist and spoiling. To put it simply, cheese needs to breathe.

Using Parchment Paper as Cheese Paper

This explains why high-end cheese shops, or fromageries, wrap their products in paper. It’s a practice you should adopt as well, though pricey, specialized cheese paper isn’t necessary. The paper you choose needs to protect the cheese from both drying out and mold-promoting moisture buildup. Ordinary parchment paper does both of those jobs perfectly well.

Advertisement

The kitchen staple works best with straight-edged cuts of cheese, whether blocks or wedges. Cut a piece of parchment that’s big enough to wrap around the cheese, and then place the cheese in the middle of it. Fold the parchment around it, sharply creasing the edges to form neat corners, ensuring the paper is pressed against the sides of the cheese. Then fold the edges over the wrapped cheese to make a neat bundle, and secure the end with a piece of tape.

Related: You’re Grating Cheese All Wrong

After you take it out and cut off a slice or two, rewrap the cheese in the same piece of parchment, refolding it so it’s a snug fit for the now-smaller cheese. It’ll keep much better than it would in plastic.

Advertisement
Fred Decker
Writer
Fred Decker is a trained chef and former restaurateur. Since closing his restaurants over a decade ago he has been a prolific freelance writer, publishing several thousand articles on dozens of high-volume websites including Taste Of Home, Hunker, Tasting Table, Week&, eHow, and GOBankingRates. He lives on a rural acreage shared with a big garden, chickens, rabbits, and grandkids.
This article is for general informational purposes only.
Affiliate Disclaimer 
|
Financial Disclaimer
Featured Image Credit:  deniskarpenkov/ Adobe Stock | Updated  Apr 1, 2025 |
Advertisement
Decorating 3m read
0

This Design Trick Makes Any ‘Flaw’ Look Intentional

Every home has its quirks. Unless you built your house from the ground up, chances are, it has a few features you wouldn’t have chosen for yourself. Perhaps you’re glancing around the room you’re in right now, glaring at an outdated brass light fixture or an orangey finish of your hardwood floors. If updating these features isn’t in the budget, try an unexpected decorating trick that interior designers and stylists swear by. The secret? Add more of the finish you don’t like.

All featured products and deals are selected independently and objectively by the author. House Outlook may receive a share of sales via affiliate links in content.

Every home has its quirks. Unless you built your house from the ground up, chances are, it has a few features you wouldn’t have chosen for yourself. Perhaps you’re glancing around the room you’re in right now, glaring at an outdated brass light fixture or an orangey finish of your hardwood floors. If updating these…

It sounds counterintuitive, but as stylist Kristen McGowan explains on her YouTube channel, it really works. Rather than hide unsightly details, embrace them. This ensures an intentional appearance, making the finish part of a cohesive design. When a finish pops up sporadically, it stands out. Alternatively, when that element is repeated throughout a space, it feels purposeful. It should look intentional, not like an afterthought.

For example, if your home has cherry-toned flooring that’s too red for your style, don’t hide it under an area rug and hope no one notices. Instead, pair it with a wooden coffee table in a similar warm tone. This approach can be applied to a dining table with the same wood finish, open shelving in a kitchen, or a mirror with a matching frame. Suddenly, that cherry floor — which you once despised — looks like a deliberate design choice. 

Bonus Hack

This decorating trick works for wall colors, too. If a room in your home has a paint color you’re unsure about, instead of rushing to repaint, first bring in inexpensive decor — such as throw pillows or artwork — that complements the hue.

Advertisement

Maybe your entryway is outfitted with an ornate brass light fixture that gives off ’90s vibes. Try bringing more brass accents into the space. A small brass catchall for your keys is a good start. Then, add a warm, metallic-framed mirror or switch out the pulls on a credenza to beautiful brass ones. Alone, the light fixture is an outdated eyesore. With other similarly toned elements, it’s a stylish, coordinated feature.

Related: The Mirror-Hanging Mistake Almost Everyone Makes

By embracing existing elements, you can transform any space into a designer-approved room that feels thoughtfully curated and uniquely yours.

Advertisement
Megan McCarty
Writer
Megan McCarty is a Los Angeles-based writer who covers the fun stuff: design, travel, wellness, beauty, and fashion. She has written for publications including Domino, The Spruce, MyDomaine, Bustle, and Rue Magazine. Her life rules include, but are not limited to, zipper when merging, contribute to your IRA, and do the nice thing.
This article is for general informational purposes only.
Affiliate Disclaimer 
|
Financial Disclaimer
Featured Image Credit:  Brooke Cagle/ Unsplash+ | Updated  Apr 1, 2025 |
Advertisement
Cleaning 3m read
0

Your Cleaning Routine Is Missing This Toiletry Item

Shaving cream has many applications, from minimizing razor burn to pranking your sleeping friend with a face full of foam. It’s also a versatile cleaning tool that easily gets rid of pesky odors and stains. This includes dirt and grime in the bathroom, living room, and bedroom — essentially, wherever there’s a mess, shaving cream might be the solution. Here are three problem areas that shaving cream cleans surprisingly well.

All featured products and deals are selected independently and objectively by the author. House Outlook may receive a share of sales via affiliate links in content.

Shaving cream has many applications, from minimizing razor burn to pranking your sleeping friend with a face full of foam. It’s also a versatile cleaning tool that easily gets rid of pesky odors and stains. This includes dirt and grime in the bathroom, living room, and bedroom — essentially, wherever there’s a mess, shaving cream…

The Best Shaving Cream To Use

Before you put on your rubber cleaning gloves and get to work, you’ll need the right type of shaving cream. A basic, inexpensive foaming cream will do just fine — just make sure there are no added gels, dyes, or moisturizers, as those may damage delicate surfaces. We suggest Gillette’s classic formula or any similar bare-bones product that’s white and foamy.

A Few Words of Caution

Always spot test shaving cream before cleaning an entire area to ensure it won’t cause discoloration, leave a sticky residue, or damage delicate fabrics.

1. Tackle Tainted Toilets

Just as the inside of a toilet bowl gets dirty, the exterior can develop stains and odors, especially in the porous grout along its base. Take some shaving cream and spread a thin layer around the base of the toilet, the surrounding floor, and along the crease where the toilet meets the floor. Let the shaving cream sit for 10 to 15 minutes, then wipe away as much as possible using a microfiber cloth and mop the surface with warm, clean water. This will eliminate odors and restore some of the toilet’s natural whiteness.

Advertisement

2. Clean Cruddy Carpets

Shaving cream is the perfect spot cleaner for removing dirt and grime from carpet fibers — especially pesky grease and oil stains. Squirt a glob onto the stain and rub it in using a clean cloth. Let it sit for 30 minutes, then softly blot the area to remove any excess shaving cream. The grease stain should be less noticeable, if not entirely gone. If the stain persists, repeat the process.

Related: Cleaning Your Mirrors This Way Will Prevent Bathroom Fog

3. Say “Sayonara” to Stains

Removing your bedding might reveal old sweat and drool stains on the mattress. To get rid of them, apply a generous amount of shaving cream to the stained area. Then, lightly dab at the shaving cream using a clean cloth, working it into the stain. Let it sit for up to 30 minutes, allowing enough time for the enzymes to work their magic and break down the stain. Finally, take a clean, damp rag and wipe the excess shaving cream away, revealing a fresher, cleaner mattress.

Advertisement
Bennett Kleinman
Staff Writer
Bennett Kleinman is a New York City-based staff writer for Optimism Media, covering topics for several brands including House Outlook and Better Report. He previously contributed to television programs such as "Late Show With David Letterman" and "Impractical Jokers," and digital publications like The Onion. Bennett is also a devoted New York Yankees and New Jersey Devils fan, and thinks plain seltzer is the best drink ever invented.
This article is for general informational purposes only.
Affiliate Disclaimer 
|
Financial Disclaimer
Featured Image Credit:  Prostock-studio/ Adobe Stock | Updated  Apr 1, 2025 |
Advertisement
Organizing 5m read
0

8 Things You Should Never Store in Your Bathroom

Poor ventilation is common in bathrooms, particularly those with a smaller footprint or lacking an exhaust fan. High humidity created by running water can lead to mold and mildew growth. Just as towels benefit from being stored outside the bathroom to prevent funky odors, other items we commonly associate with that space are best kept elsewhere.

All featured products and deals are selected independently and objectively by the author. House Outlook may receive a share of sales via affiliate links in content.

Poor ventilation is common in bathrooms, particularly those with a smaller footprint or lacking an exhaust fan. High humidity created by running water can lead to mold and mildew growth. Just as towels benefit from being stored outside the bathroom to prevent funky odors, other items we commonly associate with that space are best kept…

Although bathroom shelves are convenient for storing things like makeup, medicine, and perfume, they can become breeding grounds for bacteria and pose a health hazard. If you have extra storage space outside the bathroom, it’s best to keep certain items away from the humidity and temperature fluctuations when they’re not in use. If you’re limited on storage space, however, be sure to clean or replace items regularly.

It’s time for a bathroom purge — here are eight items that you should consider relocating.

1. Towels and Linens

It might seem counterproductive to store your bath towels outside the bathroom, but when wet towels are left in a moist environment, they take even longer to dry, making them especially vulnerable to mildew. One solution is to hang your towel on a hook behind your bedroom door, or wherever you see fit, and grab it on your way to the shower. The same goes for linens. Even if you have extra storage space in your bathroom, linens shouldn’t be kept there because they can absorb mildew-causing moisture.

Credit: Hans Isaacson/ Unsplash

2. Makeup

If you go through your makeup products fairly quickly (e.g., every few weeks), storing them in the bathroom is probably fine, as the humidity likely won’t have enough time to cause significant damage. On the other hand, if you spend a lot of money on your collection or value its longevity, that makeup is best stored elsewhere. Liquid and cream products, as well as damp brushes and sponges, are susceptible to bacteria growth, while powder products can become cakey due to moisture absorption.

Credit: Mateusz Dach/ Pexels
Advertisement

3. Extra Toiletries

If you have extra toiletries and bulk products such as toilet paper and cotton swabs, consider keeping them in a closet or elsewhere in the house. When these packages are opened, they can collect mildew, bacteria, and dust. Razor blades and metal shaving cream cans, meanwhile, rust easily, and bars of soap may melt in a hot, humid bathroom. Certain skin care products, such as vitamin C and retinol products, may also lose potency when housed in areas with extreme temperature fluctuations.

Credit: knape/ iStock

4. Perfume and Nail Polish

Humidity affects perfume and nail polish similarly. High humidity and temperatures cause fragrances to change and degrade by breaking down or oxidizing their ingredients. Sunlight in the bathroom can also alter your favorite perfume’s scent — and not for the better.

Related: 15 Items That Should Be in Every Junk Drawer

Nail polish will separate faster when stored in a bathroom than in a dry storage area. It can also become thick and clumpy as the solvents that keep it liquid evaporate in the warm and humid environment.

Credit: pure julia/ Unsplash
Advertisement

5. Medicine

Medication, vitamins, and supplements should always be stored in a cool, dry place. In fact, if you check the label on vitamins, you’ll usually see this exact wording. That’s because wet or damp conditions deteriorate the efficacy of medication, both prescribed and over-the-counter. Its shelf life will be extended if you keep the bottle somewhere else, away from heat sources or direct sunlight. Consider a dresser drawer, a pantry shelf, or a dedicated storage container.

Credit: Kostikova/ iStock

6. Jewelry

To prevent your jewelry from tarnishing, avoid leaving it in the bathroom to bask in the humidity. Your daily jewelry can be taken off and left on a dry countertop while you shower, provided it’s not left there for long periods of time, but store your lesser-worn items in a jewelry box or hanging organizer outside of the bathroom.

Credit: Liudmila Chernetska/ Unsplash+ via Getty Images
Advertisement

7. Electronics

Only waterproof electronics, such as electric toothbrushes and razors or certain Bluetooth speakers, are safe to store in the bathroom. Hairstyling tools such as blow dryers and straighteners are generally OK if they’re tucked away in a drawer or cabinet, but if they come in contact with water, they can short-circuit, permanently break, or worse, cause a fire.

Credit: A. C./ Unsplash+
Related: Appliance Maintenance Tasks You Probably Don’t Do Enough

8. Books, Magazines, and Photos

Reading on the toilet is a favorite pastime for many, but books and magazines should not be stored in the bathroom because they can attract mold and mildew. The same is true for treasured photos and artwork. Even if they’re framed and hung on a wall, moisture can still seep in and cause damage. For that reason, it’s best to display moisture-resistant pieces made of metal or glass, or inexpensive, sealed canvas prints.

Credit: Virginia Marinova/ Unsplash
Advertisement
Jill Layton
Writer
Jill Layton started writing professionally when she realized her emails and texts were kinda funny. She’s an affiliate shopping writer and lifestyle contributor for Scary Mommy, Bustle, Mic, and Best Products. She’s the mom of two alarmingly witty kids and the world’s most perfect dog.
This article is for general informational purposes only.
Affiliate Disclaimer 
|
Financial Disclaimer
Featured Image Credit:  Chastity Cortijo/ Unsplash | Updated  Mar 28, 2025 |
Advertisement
Home Improvement 5m read
0

6 Home Maintenance Tasks You Can’t Afford To Skip

We’ve all been there — spotting a task that needs to be done around the house and then choosing not to take care of it right away. You’re definitely not alone if you’ve put off household chores because you don’t have the time or energy to deal with them in the moment.

All featured products and deals are selected independently and objectively by the author. House Outlook may receive a share of sales via affiliate links in content.

We’ve all been there — spotting a task that needs to be done around the house and then choosing not to take care of it right away. You’re definitely not alone if you’ve put off household chores because you don’t have the time or energy to deal with them in the moment.

Unfortunately, skipping certain home maintenance tasks — whether they’re not urgently threatening or just jobs that need to be taken care of seasonally — can result in much bigger problems down the line. Delaying maintenance for too long can cost you more money, take up even more of your time, and cause more unnecessary frustration than handling them on schedule. Scroll on for six home maintenance tasks you can’t afford to ignore.

1. Water Leaks

Water leaks can cause significant damage to your home. Ignoring them can lead to mold growth, structural issues (including foundation problems), higher water bills, electrical hazards, and costly harm to your home and belongings.

If you notice a leak, call a plumber right away so they can determine the cause and how to repair it before it becomes a bigger issue.

Credit: coldsnowstorm/ iStock

2. Infestations

No one wants to live with infestations of any kind, whether it’s something small like termites or something a bit larger and a lot furrier, like rodents — both of which can cause major issues for your home and safety. The most productive way of dealing with animal intruders is to call your local pest control service. While it’s impossible to manage severe termite infestations without exterminating them, you can find pest control companies that deal with rodents and animals, including possums and raccoons, by capturing and releasing them.

Credit: aquaArts studio/ iStock
Advertisement

3. Cleaning Gutters

The dreaded task of cleaning gutters should be done twice a year unless there’s heavy tree cover around your home, in which case, every three months is advisable. Pine needles and small leaves can clump together, creating blockages that may cause water damage to your roof, siding, foundation, and landscaping.

Related: Little Changes To Help You Save Money on Household Expenses

The best time to tackle the gutters is usually early spring and late fall, so you can clear out debris from the previous season before heavy rains or falling leaves cause obstructions. Signs to look for when your gutters need cleaning include overflowing water, drooping gutters, plant growth inside the gutters, visible clogs, and stains on the exterior walls.

Credit: nattrass/ iStock

4. Tree Trimming

Attempting to trim trees yourself poses risks to your safety and the tree’s health. Instead, call a tree service company to handle it for you. Untrimmed trees can become overgrown, diseased, and dangerous. Dead or broken branches can fall, causing injuries or property damage, and overgrown trees are often messy and unsightly. In general, trees should be trimmed every two to five years, but some may require maintenance more or less frequently. The best time to get them trimmed is late winter (mid-February through early March) when the trees are still dormant.

Credit: John Scott Leigh III/ iStock
Advertisement

5. Checking for Mold

You should inspect your home for mold at least once a year, or more frequently if there are risk factors. Mold risk factors include high humidity, poor ventilation, past water damage, condensation, damp basements, and faulty gutters.  When checking for mold, start with the toilet. If you find mold inside the bowl or under the lid, experts say there’s a good chance you have mold growing elsewhere in the house. A nearby colony could be releasing spores that are attracted to the toilet’s consistently moist environment. If you spot mold, have your home professionally inspected immediately, especially if you’re experiencing unexplained health symptoms or allergies.

Credit: YURY NIKALAYEU/ iStock

6. Changing HVAC Filters

It’s not something most people think about, but it’s important to regularly change the HVAC filter in your home. As a general rule of thumb, you should change the filter every 30 to 90 days — if you can’t remember the last time it was done, you’re probably due for a replacement.

Related: The One Thing You Should Do To Make Your Refrigerator Run More Efficiently

The air filter helps maintain clean indoor air. Switching it out gives you better air quality, increased energy efficiency, and improved temperature control. It can also alleviate allergy symptoms and prevent unnecessary repairs.

Credit: Bill Oxford/ iStock
Advertisement
Jill Layton
Writer
Jill Layton started writing professionally when she realized her emails and texts were kinda funny. She’s an affiliate shopping writer and lifestyle contributor for Scary Mommy, Bustle, Mic, and Best Products. She’s the mom of two alarmingly witty kids and the world’s most perfect dog.
This article is for general informational purposes only.
Affiliate Disclaimer 
|
Financial Disclaimer
Featured Image Credit:  Nadya So/ iStock | Updated  Mar 26, 2025 |
Advertisement
Organizing 5m read
0

7 Overlooked Areas You Could Be Using for Storage

No matter how many donation drop-offs we make, it feels like there’s never enough room for all of our belongings. Even if you’re someone with multiple closets and lots of built-in storage, chances are you’re overlooking some noteworthy nooks that could help keep you organized and rid your space of all the stuff (or at least prevent you from having to look at it).

All featured products and deals are selected independently and objectively by the author. House Outlook may receive a share of sales via affiliate links in content.

No matter how many donation drop-offs we make, it feels like there’s never enough room for all of our belongings. Even if you’re someone with multiple closets and lots of built-in storage, chances are you’re overlooking some noteworthy nooks that could help keep you organized and rid your space of all the stuff (or at…

If you’re ready to get creative with your cleaning and organizing efforts, here are some of the most overlooked areas you could be utilizing for storage. 

1. Behind Doors

You might already have an over-the-door hook in your bathroom for hanging towels and bathrobes, but doors can do so much more for storage throughout your home. In addition to hooks, you can add a hat rack, shoe rack, and toy storage to bedroom doors. In kitchens, look for over-the-door spice racks or pantry organizers. You can also take advantage of over-the-door space in smaller areas such as cabinets, purchasing organizers to corral your baking sheets, cutting boards, food wraps, and more.

Credit: Beeldbewerking/ iStock

2. Blank Walls

A blank wall is intimidating and enticing all at the same time. It’s a great place for displaying works of art, mirrors, and decorative objects, but you can also utilize that space to carve out some extra storage. Whether you want to DIY faux built-ins using IKEA furniture, add an antique medicine cabinet you found at the thrift store, or install shelving for a floor-to-ceiling at-home library, there are so many ways to transform a blank wall into a functional and decorative space.

Credit: Ursula Page/ Adobe Stock
Advertisement

3. Under the Sofa

If you live in a small space with limited storage options, chances are you’ve already utilized the space under your bed for spare linens, luggage, out-of-season clothing, and other items. However, one commonly overlooked space with similar benefits is under the sofa. Sofas with taller legs might be able to accommodate a shallow storage bin that can be filled with board games, art supplies, scented candles, and other items you may reach for in your living space.

Credit: draganab/ iStock
Related: Create a Clutter-Free Home With These 10 Amazon Organizers

4. Under Your Dresser

The space under your dresser can also be utilized if you’re lacking storage. Use this area to store seasonal accessories (think scarves, beanies, and your collection of thick wool socks that you’d normally have to cram into your dresser drawer) in a low-profile storage container. You can also use the space under your dresser for your jewelry collection, especially those items you don’t wear as often and want to keep stowed away safely in a jewelry box

Credit: Clay Banks/ unsplash
Advertisement

5. Above Your Desk

The area above your desk is great for displaying framed photos of you and your loved ones, inspirational quotes, and other popular office decor items. But if you don’t have enough storage, save space on the wall for some. You can opt for shelves with cute cubby bins and baskets, such as this rustic design with wire baskets and hooks or this contemporary piece with woven baskets. This will give you some much-needed space for office supplies and other frequently reached-for items.

Credit: Eva-Katalin/ iStock
Related: Unexpected Uses for an Over-The-Door Shoe Organizer

6. Side of the Couch

The side of your couch is another untapped storage opportunity. If you have space for a side table, look for styles with built-in storage, such as a mini cabinet, cubby, or shelf. You can also use stackable lidded baskets, such as this woven one made of natural water hyacinth, to create a mini storage moment. It’s perfect for housing smaller items, or that knitting project you pick up while binging your favorite TV shows. A storage ottoman is another excellent addition to the side of your couch since you can stow items inside of it and use it for extra seating when needed.

Credit: KatarzynaBialasiewicz/ iStock

7. TV Stand

Even if you hang your TV on the wall, having a piece of furniture under the screen can help ground your space and provide valuable storage. Instead of a traditional TV stand with open shelving, opt for something more storage-forward, such as a credenza, buffet table, or sideboard cabinet. Alternatively, consider upcycling a cool vintage dresser, which will provide you with a ton of storage space. It’s a great place to hide your holiday decor, tablescape essentials, out-of-rotation pet toys, and more.

Credit: captainsecret/ iStock
Advertisement
Jessie Quinn
Writer
Jessie Quinn is a Los Angeles-based lifestyle journalist with words published in PEOPLE, StyleCaster, Apartment Therapy, The Spruce, Byrdie, and more. She has a Bachelor's Degree in fashion journalism from Academy of Art University and her work spans across many categories, including style, beauty, home, health, crafts, and more.
This article is for general informational purposes only.
Affiliate Disclaimer 
|
Financial Disclaimer
Featured Image Credit:  Andrea Davis/ Unsplash | Updated  Mar 25, 2025 |