Advertisement
Food & Drink 4m read
0

The Secret Code To Understanding Costco Price Tags

People love Costco because they can find amazing deals on thousands of items for everyday needs, the prices stay relatively stable, and the return policies are fair, if not generous. What most shoppers don’t realize is that the retailer’s price tags contain hidden information beyond an item’s cost. The secret? It’s in the numbers.

People love Costco because they can find amazing deals on thousands of items for everyday needs, the prices stay relatively stable, and the return policies are fair, if not generous. What most shoppers don’t realize is that the retailer’s price tags contain hidden information beyond an item’s cost. The secret? It’s in the numbers.

We scoured Reddit posts authored by current and former Costco employees, in addition to content from personal finance creators such as @ecommjess and @financeunfolded, to crack the retailer’s price tag code. Keeping just a few of these tips in mind can help you understand when to jump on a deal, when to wait, and when an item is saying “farewell” forever.

1. Full-Priced Items Always End in .99

If a price tag ends in .99, you’re looking at a full-priced item. The price tag means that this is the best deal Costco was able to get from the supplier, and there haven’t been any further markdowns. You’re still getting a great deal compared to other supermarkets with less leveraging power, but as far as Costco goes, you aren’t seeing added savings on top of the already-low price.

Related: The Best Costco Finds To Stock Your Freezer With

2. Other 9s Are Discounted by Manufacturers

Products ending in .49, .59, .69, and so on (up to .89) represent special offers from manufacturers. This is done for a variety of reasons, from trial runs on new items to attempts to boost low sales. It’s not guaranteed that these products will stay at that price — they could go up if sales do well and the manufacturer sees a need for more, or they could drop even lower if they don’t fly off the shelves. If it’s a product you’re interested in, it’s a good idea to grab it now, in case the price goes up later.

Advertisement

3. 8s Mean Manager Discounts

You’re likely to see full-priced items sold at a discount if you can wait to make your purchase. Costco managers will mark certain products down for faster sales before they replenish their inventory, and these decisions are reflected right on the price tag. You’ll sometimes see price tags ending in an 8, which means an item has been reduced for quick sale.

4. .00 Also Means Low Stock for Quick Sale

You’ll also notice price tags ending in .00, which signals that a product has been marked down to get it off the shelves fast. Tags that end in an 8 or .00 generally represent discounts on a local level, which are, again, determined by management to get products out of the store as quickly as possible. If you spot tags ending in these numbers, those items are nearly out of stock and probably won’t be there if you come back for them later.

5. Great Deals End in a 7

If you see a tag ending in the number 7, such as .97, you’re looking at a fantastic offer that won’t last long. These tags represent clearance or markdown items that didn’t sell well, and management wants them off the shelves to make space for something fresh. These discounts may include perishable goods that are about to expire or overstocked items.

Advertisement

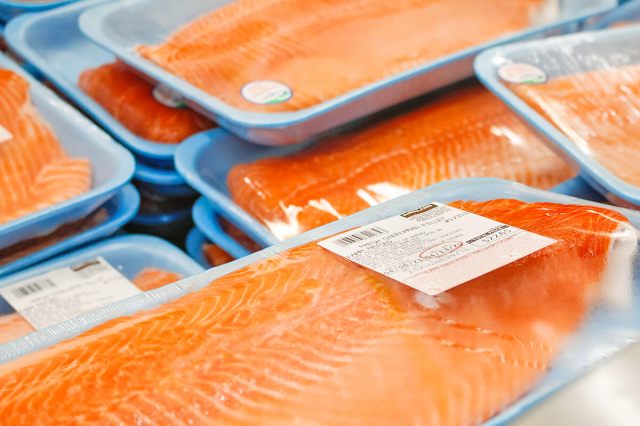
6. Check the Upper Right Corner for an Asterisk

An asterisk on a price tag, regardless of the number, means the item number is pending delete in the system, according to a Costco employee’s Reddit post. This happens for a few reasons — either an item is being discontinued, they’re changing the packaging (the most common cause), or it’s only available seasonally. The item won’t be restocked in its current form, however, so if it’s something you really love, you may want to ask a manager for clarification.

Related: Who Actually Makes Your Favorite Kirkland Products?

7. Don’t Overlook the Bottom Corner

Already-fluent Costco tag readers will want to keep this tip in mind — look for the date listed on the tag. You’ll see it in the bottom right corner, and it will tell you in an instant when the price was last changed. If it’s been weeks without any movement, the item may be set for a price drop soon.  

Advertisement
Krissy Howard
Writer
Krissy Howard is a New Mexico-based writer. Her work has appeared in Byrdie, Hunker, and Simplemost, and she is the former managing editor of music satire website, The Hard Times.
This article is for general informational purposes only.
Affiliate Disclaimer 
|
Financial Disclaimer
Featured Image Credit:  dennizn/ Alamy Stock Photo | Updated  Mar 25, 2025 |
Advertisement
Decorating 3m read
0

The Mirror-Hanging Mistake Almost Everyone Makes

Mirrors are essential to home decor, perfect for entryways and bedrooms — and, of course, for every bathroom, too. They’re not just pretty; they’re also practical. Whether you nab a full-length one for outfit checks or hang a wall mirror near your front door for a last-second “Do I have lipstick on my teeth?” moment, mirrors — of all shapes and sizes — are a home must-have. Plus, they help brighten things up and create the illusion of a larger space.

All featured products and deals are selected independently and objectively by the author. House Outlook may receive a share of sales via affiliate links in content.

Mirrors are essential to home decor, perfect for entryways and bedrooms — and, of course, for every bathroom, too. They’re not just pretty; they’re also practical. Whether you nab a full-length one for outfit checks or hang a wall mirror near your front door for a last-second “Do I have lipstick on my teeth?” moment,…

But a poorly placed mirror can have the opposite effect, turning a room’s highlight into an eyesore. The most common mirror-hanging mistake? Not checking what the mirror will reflect. Before grabbing a hammer, have someone hold the mirror in place as you take a step back. Look at the reflection from all angles. Do you see a blank wall or a TV? A cluttered corner or an awkward sightline into a private area? A mirror should enhance a space, not draw attention to its flaws. Sometimes, shifting it just a few inches makes all the difference.

Related: Cleaning Your Mirrors This Way Will Prevent Bathroom Fog

Hang a mirror where it reflects something beautiful, such as a piece of art, a view from a window, or a styled vignette. Remember: It’s not just about where a mirror is placed, but also about what it shows.

Bonus Tip

Another mirror must: Consider scale. A mirror should be sized proportionally to the wall on which it will hang, and to the furniture in the room as well. A too-small mirror will look puny, and one that’s too large will overwhelm the space.

Advertisement

Mirror, Mirror on the Wall: 5 Mirrors Worth Adding to Your Cart

Delma Full Length Standing Mirror, $39.99: A full-length mirror is a necessity, but paying a ton of money for one isn’t.

WallBeyond Round Mirror With Wood Frame, $63.65: No matter your interior design style, this classic round mirror will fit right in.

Frameless Wall Mirror, $99.99: Mirrors don’t need to be serious — get fun and funky with this frameless full-length option featuring a wavy silhouette.

Hearth & Hand With Magnolia Arched Metal Frame Wall Mirror, $39.99: An arched shape, a brass finish, and an affordable price point — what’s not to like?

Harritpure Irregular Wall Mirror, $62.99: Casually prop this asymmetrical mirror on a console in an entryway or a dresser in a bedroom.

Advertisement
Megan McCarty
Writer
Megan McCarty is a Los Angeles-based writer who covers the fun stuff: design, travel, wellness, beauty, and fashion. She has written for publications including Domino, The Spruce, MyDomaine, Bustle, and Rue Magazine. Her life rules include, but are not limited to, zipper when merging, contribute to your IRA, and do the nice thing.
This article is for general informational purposes only.
Affiliate Disclaimer 
|
Financial Disclaimer
Featured Image Credit:  Mesut çiçen/ Unsplash+ | Updated  Mar 25, 2025 |
Advertisement
Organizing 3m read
0

How To Get Rid of Annoying Hanger Bumps

Some people call them “hanger bumps,” others refer to them as “shoulder horns,” and a shockingly high number of internet articles use the term “sweater nipples.” No matter the name, these pesky fabric bulges are an unsightly downside to storing shirts and sweaters on a hanger. Thankfully, there are a few methods to prevent these bumps from ever forming, plus some tips for getting rid of them after they appear.

All featured products and deals are selected independently and objectively by the author. House Outlook may receive a share of sales via affiliate links in content.

Some people call them “hanger bumps,” others refer to them as “shoulder horns,” and a shockingly high number of internet articles use the term “sweater nipples.” No matter the name, these pesky fabric bulges are an unsightly downside to storing shirts and sweaters on a hanger. Thankfully, there are a few methods to prevent these…

Use Padded or Velvet Hangers

Smooth plastic and wooden hangers don’t provide enough support for heavier garments, which can easily slide down the shoulders and stretch out. Padded hangers, however, are designed to distribute the weight of a shirt or sweater more evenly, offering added support to keep their natural shape intact. Another option: velvet hangers, which create friction to hold fabric in place, helping to prevent slipping, creases, and unattractive bumps.

Avoid Hanging Heavy or Bulky Sweaters

It’s best to avoid hanging your heavy or bulky sweaters, as the extra weight can ruin their shape, leading to shoulder bumps and overstretched necklines. Instead, neatly fold your sweaters and tuck them into deep drawers or stackable storage bins to maintain their form.

Of course, we understand that not everyone has enough drawer space for large, folded sweaters, and often there’s no choice but to hang them. If this is the case for you, try this no-crease hack: On a flat surface, fold the sweater in half lengthwise, aligning the sleeves. Then, position the hanger diagonally on top of the sweater, with the hook in the armpit area, facing outward. Fold both sleeves over one shoulder of the hanger, followed by the torso, creating a crisscross shape. (If you’re a visual learner, here’s a video tutorial.) Hang it in your closet, and say goodbye to shoulder bumps.

Advertisement

Dab Water on the Bumps

Nothing is worse than noticing hanger bumps right before you head out the door. Rather than change your entire outfit, go to the sink, wet your fingers, and rub them along the bumps to flatten them. Alternatively, you can do this with an ice cube. Dampening the hanger bumps resets the fibers, and the shirt will dry noticeably flatter within 10 minutes. Another option is to spray a bit of Downy Wrinkle Release onto the affected areas to eliminate any bumps or wrinkles.

Related: Stop Clothes From Slipping Off Hangers With This Simple Trick

Though hanger bumps may seem inevitable, there are simple solutions to avoid or even remove them. Just follow these guidelines and you’ll get rid of those unsightly “sweater nipples” in no time at all.

Advertisement
Bennett Kleinman
Staff Writer
Bennett Kleinman is a New York City-based staff writer for Optimism Media, covering topics for several brands including House Outlook and Better Report. He previously contributed to television programs such as "Late Show With David Letterman" and "Impractical Jokers," and digital publications like The Onion. Bennett is also a devoted New York Yankees and New Jersey Devils fan, and thinks plain seltzer is the best drink ever invented.
This article is for general informational purposes only.
Affiliate Disclaimer 
|
Financial Disclaimer
Featured Image Credit:  Andreas von Einsiedel/ Alamy Stock Photo | Updated  Mar 25, 2025 |
Advertisement
Decorating 4m read
0

The Best Home Deals From Amazon’s Big Spring Sale

The days are getting longer, the weather is getting warmer, and Amazon’s Big Spring Sale is blooming with home deals. Taking place from March 25 to 31, the weeklong sales event offers discounts on a wide range of home essentials, including furniture and decor, kitchenware, cleaning supplies, organizing solutions, gardening gear, and home improvement products.

All featured products and deals are selected independently and objectively by the author. House Outlook may receive a share of sales via affiliate links in content.

The days are getting longer, the weather is getting warmer, and Amazon’s Big Spring Sale is blooming with home deals. Taking place from March 25 to 31, the weeklong sales event offers discounts on a wide range of home essentials, including furniture and decor, kitchenware, cleaning supplies, organizing solutions, gardening gear, and home improvement products.

Unlike Amazon Prime Day, which typically happens twice a year, the Big Spring Sale doesn’t require you to be a Prime member to access most deals. Exclusive deals marked “Prime Spring Deal” will be available for Prime members only, but you can take advantage of them by signing up for a free 30-day trial.

Get ready for fresh deals all week long, including:

• Up to 40% off select outdoor furniture and garden supplies

• Up to 35% off select lawn and grilling equipment

• Up to 35% off select home storage and bedding

We’ve rounded up the best home deals, many of which are products that have been previously reviewed by the House Outlook team. Whether you’re looking to refresh your living space, start your first garden, or dive into spring cleaning and organizing, there are thousands of ways to save on what you need during Amazon’s Big Spring Sale.

The Best Cleaning Deals

Photo of a LEVOIT air purifier against a beige background.
LEVOIT Air Purifier
Price: $69.99
$89.99
BUY NOW
TINA&TONY Reusable Mop Pads in purple, 4-pack
TINA&TONY Reusable Mop Pads
Price: $12.74
$14.99
BUY NOW
Purriko Refrigerator Deodorizer shown in stainless steel against a beige background.
Purriko Refrigerator Deodorizer
Price: $22.39
$27.99
BUY NOW
PULIDIKI Car Cleaning Gel shown in someone's hand. The gel is light blue.
PULIDIKI Car Cleaning Gel
Price: $6.24
$8.99
BUY NOW
Photo of a metal magnetic lint bin and the included brush.
SUBEKYU Magnetic Lint Bin and Brush
Price: $22.94
$27.99
BUY NOW
Tineco iFLOOR 3 Breeze Complete Wet Dry Vacuum
Price: $179.90
$259.99
BUY NOW
Dyson V8 Cordless Vacuum Cleaner against a beige background.
Dyson V8 Plus Cordless Vacuum Cleaner
Price: $329.99
$469.99
BUY NOW
SXhyf Crevice Cleaning Brushes, Three-Pack
Price: $7.99
$9.99
BUY NOW
Bomves Electric Spin Scrubber
Price: $39.97
$59.99
BUY NOW
Advertisement

The Best Organizing Deals

HuggieGems Four-Pack Magnetic Organizers for Fridge
Price: $16.99
$19.99
BUY NOW
Yecaye Four-Pack Bedsheet Organizer
Price: $27.99
$37.99
BUY NOW
Yasonic Corner Adhesive Shower Caddy
Price: $17.99
$21.99
BUY NOW
Mudeela 8-Tier Adjustable Pan Organizer Rack
MUDEELA 8-Tier Heavy Duty Adjustable Pan Organizer Rack
Price: $26.34
$30.99
BUY NOW
REALINN Under Sink Organizer, Two-Pack
Price: $39.08
$45.99
BUY NOW
TIDYME Wall Mounted Garden Tool Organizer
Price: $42.46
$69.90
BUY NOW
Lanteful 10-Tier Shoe Rack
Price: $24.99
$29.99
BUY NOW
Spospo Water Bottle Organizer
Price: $12.74
$14.99
BUY NOW
Vtopmart 25-Piece Clear Plastic Drawer Organizers Set
Price: $16.14
$21.99
BUY NOW
Advertisement

The Best Kitchenware Deals

Fullstar Vegetable Chopper and Spiralizer
Fullstar Vegetable Chopper and Spiralize
Price: $24.87
$49.99
BUY NOW
Alpha Grillers Meat Thermometer
Price: $12.52
$19.99
BUY NOW
FLAIROSOL OLIVIA reusable oil spritzer
FLAIROSOL OLIVIA
Price: $18.39
$22.99
BUY NOW
PGYARD Meat Chopper
PGYARD Meat Chopper
Price: $7.99
$9.99
BUY NOW
DASH Mini Rice Cooker, 2-Cup Capacity
Price: $17.99
$21.99
BUY NOW
Our Place Wonder Oven in beige finish.
Our Place Wonder Oven
Price: $145.00
$175.00
BUY NOW
Instant Pot Duo 7-in-1 Electric Pressure Cooker
Price: $69.99
$99.99
BUY NOW
Instant Pot Vortex Plus 6-Quart XL Air Fryer
Price: $89.99
$139.95
BUY NOW
Overmont Enameled Cast Iron Dutch Oven, 5.5 Quarts
Price: $47.49
$69.99
BUY NOW
Advertisement

The Best Home Decor Deals

WEILAILUX Outdoor Battery-Operated Table Lamp
Price: $33.99
$39.99
BUY NOW
Bedsure Satin Pillowcases, Two-Pack shown in champagne color.
Bedsure Satin Pillowcases, Two-Pack
Price: $8.49
$12.99
BUY NOW
Heleze 39-Inch Artificial Olive Branch Stems
Price: $20.39
$23.99
BUY NOW
Wazakura Japanese Ikebana Tool Kit
Price: $33.99
$39.99
BUY NOW
Conviv Ceramic Jewelry Tray in off-white
Conviv Ceramic Jewelry Tray
Price: $8.49
$9.99
BUY NOW
Marycele Candle Warmer Lamp With Timer
Price: $29.99
$45.99
BUY NOW
Busaurus Storage Ottoman Bench in white boucle fabric.
Busaurus Storage Ottoman Bench
Price: $149.98
$269.99
BUY NOW
Allewie King-Size Lift Up Storage Bed
Price: $339.60
$429.00
BUY NOW
Beckham Hotel Collection Bed Pillows
Price: $45.00
$79.99
BUY NOW
Pinkpum 20-Inch Eucalyptus Wreath
Price: $19.79
$29.99
BUY NOW
Sweetcrispy 9.8-Foot Offset Patio Umbrella in beige.
Sweetcrispy 9.8-Foot Offset Patio Umbrella
Price: $69.97
$99.99
BUY NOW
Walsunny 43-Inch Outdoor Propane Fire Pit
Price: $149.99
$225.99
BUY NOW
Advertisement

The Best Gardening Deals

TONULAX Solar Garden Lights, 2-Pack
Price: $11.98
$15.98
BUY NOW
Click & Grow Indoor Herb Garden Kit With Grow Light in white
Click & Grow Indoor Herb Garden Kit With Grow Light
Price: $76.46
$89.95
BUY NOW
Winpull Raised Garden Bed Kit, 4x2x1 Feet
Price: $39.95
$49.99
BUY NOW
Bamworld Indoor Plant Stand
Price: $18.61
$32.99
BUY NOW
HARYMOR Bird Feeder With Camera and AI Identify
Price: $94.99
$189.99
BUY NOW
Onlysuki Repotting Mat
Price: $5.62
$7.44
BUY NOW
WOSIBO Hummingbird Feeder in red
WOSIBO Hummingbird Feeder
Price: $19.19
$39.99
BUY NOW
FCMP Outdoor Dual Chamber Tumbling Composter
Price: $72.79
$99.95
BUY NOW
Grenebo Nine-Piece Gardening Tool Set
Price: $31.99
$41.99
BUY NOW
Advertisement

The Best Home Improvement Deals

BesLowe Outdoor Wall Light Fixtures, Two-Pack
Price: $34.16
$49.99
BUY NOW
Jackery Explorer 1000 v2 Portable Power Station
Price: $449.00
$799.00
BUY NOW
WOLFMEN Cordless Electric Leaf Blower
Price: $69.98
$99.99
BUY NOW
eufy Security Video Doorbell
Price: $114.99
$179.99
BUY NOW
Govee Smart Outdoor String Lights
Price: $99.99
$169.99
BUY NOW
Toolasin 50-Foot Garden Hose
Price: $29.99
$49.99
BUY NOW
Karcher Pressure Washer
Price: $104.99
$199.99
BUY NOW
Duracell Coppertop AA Batteries, 20-Pack
Price: $9.68
$18.99
BUY NOW
POCALAND Ultra-Slim Bidet Attachment 2PCS
POCALAND Ultra-Slim Bidet Attachment
Price: $54.99
$189.99
BUY NOW
Advertisement
Kelsey Morrison
Staff Editor
Kelsey Morrison is the Staff Editor of House Outlook. She has been covering all things home-related for over a decade, including real estate, interior design, commerce, and a slew of other lifestyle topics. Kelsey previously worked as a commerce editor for World of Good Brands (eHow.com and Cuteness.com) and as an associate editor for Livabl.com. She describes her personal design style as 1970s ski chalet-chic and has a thing for latch-hook tapestries.
This article is for general informational purposes only.
Affiliate Disclaimer 
|
Financial Disclaimer
Featured Image Credit:  FabrikaCr/ iStock | Updated  Mar 25, 2025 |
Advertisement
Food & Drink 2m read
0

Do This After Cutting Hot Peppers To Avoid the Burn

If you’ve ever seen a rom-com, you know what it means when the leads are bickering and firing off zingers at each other. They might look like they’re trying to drive each other away, but we know what’s really behind all of those “sick burns.” They’re feeling the love, and it scares them. This may not be the smoothest analogy, but it says a lot about our love for hot peppers. We crave them (or at least some of us do), but there’s always that moment when the heat goes from pleasure to pain.

All featured products and deals are selected independently and objectively by the author. House Outlook may receive a share of sales via affiliate links in content.

If you’ve ever seen a rom-com, you know what it means when the leads are bickering and firing off zingers at each other. They might look like they’re trying to drive each other away, but we know what’s really behind all of those “sick burns.” They’re feeling the love, and it scares them. This may…

You probably already know how to quell the burning in your mouth (milk helps, and so does chocolate), but what about the burn on your skin from cutting peppers? Here’s the hack you need to keep hot peppers from irritating your skin.

Beating the Capsaicin Pain From Hot Peppers

The active ingredient in hot peppers is an alkaloid called capsaicin, which activates sensors in your mouth and on your skin that would ordinarily respond to physical heat. Some people actually like this sensation, and find that capsaicin relieves pain from ailments such as arthritis (it’s used in topical creams for that exact purpose). Unfortunately, capsaicin can cause irritation if you’re sensitive to it, and if you absentmindedly rub your nose or eyes while it’s on your hands, you’ll be in a world of hurt.

Advertisement

But you know that saying “fat equals flavor”? Well, there’s a scientific reason behind it: Many flavor compounds, including capsaicin, are lipophilic, which means they bond with fats.

Related: 3 Proven Hacks for Cutting Onions Without Crying

That’s the key to this hack: Instead of just washing with soap and water, pour a little vegetable oil onto your hands and rub it in thoroughly, as you would hand sanitizer. (If you don’t have vegetable oil on hand, any cooking oil will work.) At this point, most of the capsaicin will bond to the oil. Now, wash your hands with dish soap, not hand soap, because dish soap is specially formulated to cut through and remove fat. The oil will wash away, and take the capsaicin along with it.

Advertisement
Fred Decker
Writer
Fred Decker is a trained chef and former restaurateur. Since closing his restaurants over a decade ago he has been a prolific freelance writer, publishing several thousand articles on dozens of high-volume websites including Taste Of Home, Hunker, Tasting Table, Week&, eHow, and GOBankingRates. He lives on a rural acreage shared with a big garden, chickens, rabbits, and grandkids.
This article is for general informational purposes only.
Affiliate Disclaimer 
|
Financial Disclaimer
Featured Image Credit:  AtnoYdur/ iStock | Updated  Mar 24, 2025 |
Advertisement
Food & Drink 7m read
0

The Best Costco Finds To Stock Your Freezer With

The great thing about Costco is the potential to save big by buying in bulk. The frustrating thing about Costco is that you can only buy in bulk quantities. This can be irritating if you have a small household, or see a great deal on something you only use sporadically. While bulk buying works for dry goods and pantry items, it’s less practical for meats, produce, or baked goods. But here’s the good news: With a freezer, you can leverage the best deals at Costco to keep it full and your grocery budget down. Scroll on for a curated selection of Costco products that lend themselves to freezing.

All featured products and deals are selected independently and objectively by the author. House Outlook may receive a share of sales via affiliate links in content.

The great thing about Costco is the potential to save big by buying in bulk. The frustrating thing about Costco is that you can only buy in bulk quantities. This can be irritating if you have a small household, or see a great deal on something you only use sporadically. While bulk buying works for…

Pesto and Garlic

Pesto’s bright color and aroma make it summertime in a jar, and you can’t go wrong keeping it in your fridge. That said, the Kirkland Signature basil pesto is much bigger than its supermarket equivalent — a whopping 22 ounces — and it’s often hard to finish before mold develops. The answer? Get it into your freezer.

You could simply place one of the plastic jars in your freezer, as pesto maintains a firm, yet scoopable consistency when frozen. However, packaging it into zip-seal freezer bags is even more convenient because they can be stored flat and take up minimal space. When you want to use the pesto, just open the bag, break off a piece, and drop it into your pan.

You can use the same freezing technique with those 3-pound bags of peeled garlic cloves. Put them through your food processor in small batches, with just enough oil to help them puree to a smooth paste. Scoop the puree into zip-seal bags, press them flat to squeeze out any air, freeze them, and break off a spoonful as needed.

Credit: Edgar Espe/ Alamy Stock Photo

Shrimp

Frozen shrimp are a supremely versatile ingredient. Unless you’re fortunate enough to live in a place where fresh-caught shrimp are readily available, individually quick-frozen (IQF) shrimp aren’t a compromise; they’re your top-quality option. The shrimp are commercially blast-frozen immediately after harvest, so they stay super fresh.

Related: Who Actually Makes Your Favorite Kirkland Products?

To extend their shelf life in your freezer, open up the bulk bag and separate the shrimp into meal-sized portions. Use a vacuum sealer, if you have one, to maintain freshness; otherwise, use zip-seal bags and suck out as much air as possible with a straw. Pull out the preportioned bags and cook as needed for stir-fries, salads, or grilling. 

Credit: David Tonelson/ Alamy Stock Photo
Advertisement

Baked Goods

Costco’s in-store bakery stocks some delicious items, albeit in “feeding an army” quantities that can be intimidating to smaller households. Most of these baked goods lend themselves to freezing, in their respective ways. Let’s look at a few, and how they should be frozen. 

Credit: KKStock/ Alamy Stock Photo

Breads and Rolls

Freeze sliced loaves whole, then separate them into portions that make sense to you (from a half-loaf to two slices), and bag them for freezing. Rolls can be frozen, then wrapped individually, or bagged in small groups. Portion baguettes and other unsliced loaves before freezing and bagging.

Pies and Pastries

Costco’s oversized pies, sweet or savory, are excellent candidates for freezing. Portion them into halves, quarters, or slices; freeze on a parchment-lined sheet pan; then wrap or bag the portions. Danishes and other pastries can be wrapped individually or divided into smaller bags; freeze them first if bagging together to avoid sticking.

Muffins and Cakes

Muffins and cakes are some of the most easily squished baked goods, so they need to be frozen before you package them. If you find Costco’s jumbo muffins too big, halve them before freezing. Cakes can be frozen whole or in smaller portions down to the individual slice, whichever works for you. Just remember to freeze them on a sheet pan first, and if you’re putting multiple slices in the same bag, separate them with parchment paper.

Advertisement

Meats, Fish, or Poultry

A Costco-sized pack of meat, fish, or poultry will often rival the price of a loss leader at your local supermarket and typically offers superior quality, making it a better deal. Here’s how best to freeze these protein sources.

Credit: David Tonelson/ Alamy Stock Photo

Steaks and Chops

Divide the steaks or chops into meal-sized portions, or wrap or bag them individually. If bagging multiple pieces, freeze them first and put parchment paper in between.

Roasts and Large Cuts

Roasts can be frozen whole, or broken down into smaller roasts, stew meat, stir-fry strips, or individual steaks and chops. Once the pieces are cut, wrap and freeze them individually.

Whole Fish or Fillets

Large fillets can be frozen whole for a big meal or cut up for several smaller ones. Bulk packs of smaller fillets can be divided and frozen, similar to steaks or chops. Whole fish can be frozen individually or filleted, depending on your needs and expertise. Skin-on portions will usually be scaled when you buy them, but you should always double-check. They’re easier to scale (or skin) before portioning.

Rotisserie Chickens

Costco’s famous rotisserie chickens are so popular and well priced that recipes calling for the leftovers are practically an industry in their own right. Shredding and portioning the chicken into freezer bags ensures you’ll always be able to knock out one of those quick meals. Plus, you can use the carcass to make delicious broth.

Advertisement

Butter

When Costco offers butter at a good price, it’s definitely worth it to stock up. Butter freezes beautifully and is already portioned, so it’s no fuss. If you plan to use it within a month or two, there’s no need for wrapping; for longer storage, a bag or storage container can prevent it from developing off flavors.

Credit: David Tonelson/ Alamy Stock Photo

Fresh Produce

Finally, let’s look at which produce items are best suited for freezing. Scoring a deal on a large quantity of fruits or vegetables is an excellent way to stretch your grocery budget, but not all candidates are ideal for freezing. Certain items freeze better than others, and some (looking at you, potatoes) just aren’t worth it, because they’re cheap and plentiful. 

Related: 10 Chef-Approved Storage Hacks To Make Food Last Longer

A quick online search, or a look through your supermarket’s frozen section, reveals the best vegetables to freeze. But this raises another question: Are you better off just buying them frozen? Commercially blast-frozen produce is often higher quality than home-frozen, so if a bag of prefrozen vegetables is comparable to the price of fresh, you’re usually better off skipping the extra work.

Credit: Mira/ Alamy Stock Photo

How To Freeze Vegetables

Most vegetables freeze better if you blanch them first in boiling water for 30 seconds or more, and then cool them rapidly in ice water. (Refer to the National Center for Home Food Preservation for detailed instructions.) Drain the vegetables thoroughly before freezing them on a parchment-lined sheet pan and bagging them. Some vegetables, such as bell peppers or mushrooms, are best if sliced, briefly sautéed, then frozen in single-serving portions.

How To Freeze Fruits

Unlike vegetables, most fruits don’t require blanching, but those that are prone to browning, such as bananas, peaches, or apples, should be dunked in diluted lemon juice or a commercial anti-browning solution first. Your best bet for most fruits is cutting them into bite-sized pieces and freezing them on a sheet before bagging. Berries should also be frozen this way, though only the largest will need to be cut.

Tip: If you’re freezing apples or peaches for a pie, you can sweeten them, add the starch and spices, bag the mixture, and freeze it in your pie plate so the fruit assumes the right shape. 

Advertisement
Fred Decker
Writer
Fred Decker is a trained chef and former restaurateur. Since closing his restaurants over a decade ago he has been a prolific freelance writer, publishing several thousand articles on dozens of high-volume websites including Taste Of Home, Hunker, Tasting Table, Week&, eHow, and GOBankingRates. He lives on a rural acreage shared with a big garden, chickens, rabbits, and grandkids.
This article is for general informational purposes only.
Affiliate Disclaimer 
|
Financial Disclaimer
Featured Image Credit:  David Tonelson/ Alamy Stock Photo | Updated  Mar 17, 2025 |
Advertisement
Decorating 2m read
0

A Quick Fix for Leaning Taper Candles

Taper candles are a fun way to add some flair to your tablescape. You can opt for more traditional solid-color candles or try some of the trendy twisted taper candles, handpainted candles, and kitschy styles, such as these carrot or asparagus-shaped candles from Anthropologie.

All featured products and deals are selected independently and objectively by the author. House Outlook may receive a share of sales via affiliate links in content.

Taper candles are a fun way to add some flair to your tablescape. You can opt for more traditional solid-color candles or try some of the trendy twisted taper candles, handpainted candles, and kitschy styles, such as these carrot or asparagus-shaped candles from Anthropologie.

But whether you’ve thrifted your candlestick bases or splurged on a unique candelabra for your table centerpiece, you’ll likely run into one decor woe: leaning taper candles.

Related: How To Prevent and Fix Tunneling Candles

In some cases, leaning taper candles are caused by exposure to heat or sunlight — that’s why it’s important to store them in a cool, dry place. But most of the time, they simply don’t fit in the candlestick base. Luckily, there’s a free and easy fix for that. 

How To Fix Leaning Taper Candles

To fix leaning taper candles and ensure they fit securely in your candlestick base, TikToker Maggie Marsh (aka @maggssmarsh) recommends reaching for a lighter and running it back and forth at the base of your candle to warm up the wax and encourage some drippage.

Advertisement

Once the wax starts to melt a little, allow a few drops to land inside the candlestick base, then reinsert the candle while the end is still warm and pliable. The softened wax around the base of the taper candle will ensure a snug fit in the candlestick base, while the drops of wax will act almost like glue to reinforce and stabilize it. You can also use Fox Run Stick-Um Candle Adhesive if you don’t want to deal with the potential mess of dripping wax or are concerned about wax buildup in the candlestick base.

If you don’t use real candles and experience this same issue with flameless candlesticks, you can create a similar effect by applying candlestick stickers or glue dots to the plastic bases. This will secure the tapers and prevent them from leaning.

Advertisement
Jessie Quinn
Writer
Jessie Quinn is a Los Angeles-based lifestyle journalist with words published in PEOPLE, StyleCaster, Apartment Therapy, The Spruce, Byrdie, and more. She has a Bachelor's Degree in fashion journalism from Academy of Art University and her work spans across many categories, including style, beauty, home, health, crafts, and more.
This article is for general informational purposes only.
Affiliate Disclaimer 
|
Financial Disclaimer
Featured Image Credit:  Andrej Lišakov/ Unsplash+ | Updated  Mar 14, 2025 |
Advertisement
Decorating 3m read
0

Use This Designer Paint Trick To Fake Higher Ceilings

Many of us dream of having lofty, 10-foot ceilings throughout our homes. But if you’re stuck with shorter ceilings, you don’t have to settle for squat-looking rooms. The difference between a cramped-feeling space and an expansive one may come down to a simple, designer-approved trick.

All featured products and deals are selected independently and objectively by the author. House Outlook may receive a share of sales via affiliate links in content.

Many of us dream of having lofty, 10-foot ceilings throughout our homes. But if you’re stuck with shorter ceilings, you don’t have to settle for squat-looking rooms. The difference between a cramped-feeling space and an expansive one may come down to a simple, designer-approved trick.

For an instant lift, paint your ceiling a lighter shade than the walls. This creates an optical illusion, drawing the eye upward and giving the impression of a higher ceiling. Choose a shade 20% lighter than the wall color, or — when in doubt — simply paint it white.

It all comes down to science. “Lighter colors have a higher light reflective value (LRV), which measures the percentage of light a color reflects,” says Austin, Texas-based interior designer Alicia Hassen Roche of Brooklinteriors. “Whites, with the highest LRV, help keep a room feeling open and bright by reflecting more light rather than absorbing it. When applied to a ceiling, these high-LRV colors naturally draw the eye upward, enhancing the sense of space and airiness.”

Related: This Paint Finish Promotes Better Sleep

Whether you opt for a white ceiling or a different paint hue, keep this in mind: Darker colors tend to absorb light, which makes surfaces feel closer. Lighter colors reflect light, creating an airy feeling.

Other Optical Illusions To Make a Room Feel Taller

Beyond using paint to fake higher ceilings, Hassen Roche also suggests applying these tricks:

Advertisement

Install wall sconces to direct light upward. “Their low-profile design not only helps draw the eye upward but also keeps the space feeling open without bulky fixtures,” Hassen Roche says.

Don’t hang too many things on the walls. Keep walls clean of clutter to prevent a room from feeling crowded.

Avoid heavy crown molding. It adds the perception of weight to the top of the room, making it feel shorter.

Place curtain rods close to the ceiling. This elongates the walls, offering the illusion of height.

Paint the ceiling color 12 to 18 inches down the walls. Finish with picture rail molding.

 Add trim or paneling details to the bottom half of the room in a darker color. This creates more contrast between the high LRV color on your walls and ceiling.

The Best White Paint Colors for a Ceiling

Choosing any paint color can be a daunting task, but perhaps the hardest of all is finding the perfect shade of white. Here are Hassen Roche’s recommendations:

Benjamin Moore’s Simply White

Portola Paints’ Crisp

Farrow & Ball’s All White

Advertisement
Megan McCarty
Writer
Megan McCarty is a Los Angeles-based writer who covers the fun stuff: design, travel, wellness, beauty, and fashion. She has written for publications including Domino, The Spruce, MyDomaine, Bustle, and Rue Magazine. Her life rules include, but are not limited to, zipper when merging, contribute to your IRA, and do the nice thing.
This article is for general informational purposes only.
Affiliate Disclaimer 
|
Financial Disclaimer
Featured Image Credit:  supersizer/ iStock | Updated  Mar 14, 2025 |
Advertisement
Cleaning 3m read
0

A Natural Cleaning Hack for Your Cast-Iron Skillet

If you’ve ever bought or inherited a cast-iron skillet, you’ve surely been told two things about it: that it’s the best way to cook, and that proper cleaning is of the utmost importance. The problem is, you’re usually told what not to do: Don’t soak it in water, don’t use too much soap, and whatever you do, never put it in the dishwasher.

All featured products and deals are selected independently and objectively by the author. House Outlook may receive a share of sales via affiliate links in content.

If you’ve ever bought or inherited a cast-iron skillet, you’ve surely been told two things about it: that it’s the best way to cook, and that proper cleaning is of the utmost importance. The problem is, you’re usually told what not to do: Don’t soak it in water, don’t use too much soap, and whatever…

Skip the Soap

You’d think this supposedly essential piece of cookware was a Fabergé egg from the way some of its proponents talk about it, but it’s actually quite hardy — as long as you know what to do with it. The secret, as with many of the dishes you’ll be cooking with your cast-iron skillet, is salt.

Related: Stop Scrubbing Your Oven Racks in the Sink — Do This Instead

That might sound counterintuitive, as salt is hard and coarse, but because it’s softer than your pan, there’s no risk of scratching the cookware. The process is simple and requires 2 to 3 tablespoons of kosher salt. It needs to be coarse; otherwise, there won’t be enough abrasion to effectively clean the pan.

Cleaning Cast Iron With Salt

After cooking, and while the skillet is still warm, use a damp, nonscratch scrub pad or a scrub brush with stiff bristles to gently scour it, rinsing away any loose food particles with a bit of warm water.

Advertisement

Dry your skillet, then pour 2 to 3 tablespoons of kosher salt onto the cooking surface. Using a folded-up paper towel or a dry kitchen towel, rub the salt into the pan, targeting any stubborn spots. When the skillet is sufficiently clean, toss the salt in the trash.

Rinse the skillet again with warm water and dry it thoroughly. Place it on the stovetop, and heat it on medium-low for about five minutes — until you see a bit of smoke rising from it. This will get rid of any remaining moisture, keeping your skillet rust-free.

Turn off the burner and allow the pan to cool. When it’s safe to handle, pour ¼ teaspoon of cast-iron seasoning oil — or another cooking oil with a high smoke point such as vegetable or canola oil — onto the cooking surface. Take a paper towel or a clean kitchen towel and rub the oil all over the skillet to coat it without leaving behind any excess. After that, store it in your preferred spot and look forward to your next meal with less cooked-on residue.

Advertisement
Michael Nordine
Staff Writer and Editor
Michael Nordine is a writer and editor living in Los Angeles. He has two cats and wishes he had more. His film criticism has appeared in Variety, The Los Angeles Times, and The Village Voice, among others.
This article is for general informational purposes only.
Affiliate Disclaimer 
|
Financial Disclaimer
Featured Image Credit:  Monika Grabkowska/ Unsplash+ | Updated  Mar 14, 2025 |
Advertisement
Food & Drink 3m read
0

Say Goodbye to Dry, Clumpy Reheated Rice With This Hack

Rice is the ultimate pantry staple. It’s inexpensive even in times of high prices, endlessly versatile thanks to its multiple varieties, and readily available everywhere. And as with other staples, cooking extra rice to use for later meals saves valuable time. This brings us to the problem of reheating, which can be tricky with leftover rice. Cold rice clumps together into a hard lump and doesn’t always reheat evenly in the microwave. Fortunately, there’s a way to reheat it without a microwave, yielding fluffy, steamed rice that tastes just as good as the day it was made.

All featured products and deals are selected independently and objectively by the author. House Outlook may receive a share of sales via affiliate links in content.

Rice is the ultimate pantry staple. It’s inexpensive even in times of high prices, endlessly versatile thanks to its multiple varieties, and readily available everywhere. And as with other staples, cooking extra rice to use for later meals saves valuable time. This brings us to the problem of reheating, which can be tricky with leftover…

The Rice Reheating Hack for Fresh-Tasting Leftovers

So, how does this work? It’s pretty straightforward. All you need is cold, leftover rice, a wire mesh strainer, a serving spoon or spoonula, and hot water. A kettle and mixing bowl are optional but helpful. 

1. Scoop the quantity of rice you want to reheat into the wire mesh strainer, whether it’s a single portion or a family-sized serving. 

2. Place the mixing bowl (if you’re using it) under the strainer in your sink. 

3. Pour boiling water from a kettle, or the hottest water your tap can put out, over the rice. 

4. Use your spoon or spoonula to stir the warm, damp rice to break up any clumps.

5. Remove the mixing bowl from under the strainer, and pour the hot water over the rice a second time, now that it’s broken up. This step is optional but will result in hotter rice. 

6. Let the rice drain for a moment, then serve immediately or transfer to a serving bowl and cover to keep warm.

Advertisement

Is Reheating Rice Really This Easy?

It sounds improbable, but yes, it’s true. The rice softens up nicely and heats evenly, two things you don’t always get with the microwave. The hot water from your tap usually tops out at 140 degrees Fahrenheit, for energy conservation and safety reasons (anything hotter poses a scalding risk), so you may find that boiling water works better, but hot tap water will do the job in a pinch.

Related: A Foolproof Method for Perfectly Crispy Fish Skin

If you find that the rice isn’t quite as hot as you’d like, even after pouring the water over it a second time, 30 seconds or so in the microwave will usually fix that. The newly moistened and separated grains of rice will microwave much better and more evenly than cold rice.

Advertisement
Fred Decker
Writer
Fred Decker is a trained chef and former restaurateur. Since closing his restaurants over a decade ago he has been a prolific freelance writer, publishing several thousand articles on dozens of high-volume websites including Taste Of Home, Hunker, Tasting Table, Week&, eHow, and GOBankingRates. He lives on a rural acreage shared with a big garden, chickens, rabbits, and grandkids.
This article is for general informational purposes only.
Affiliate Disclaimer 
|
Financial Disclaimer
Featured Image Credit:  Anon_Pichit/ iStock | Updated  Mar 13, 2025 |