Advertisement
Gardening 3m read
0

Why You Should Always Drop a Penny in Your Flower Vase

Imagine you’ve just returned from the Sunday farmers market with an armful of cut flowers. The only problem is you need them to last until Friday, when you’re hosting a dinner party. So, how do you ensure your blooms stay fresh and perky for the next five days? You may have heard that adding a few drops of bleach or a shot of vodka can help flowers last longer in a vase. But if you don’t have either of these items on hand, a solution can likely be found in your wallet (or potentially the crevices of your couch).

Imagine you’ve just returned from the Sunday farmers market with an armful of cut flowers. The only problem is you need them to last until Friday, when you’re hosting a dinner party. So, how do you ensure your blooms stay fresh and perky for the next five days? You may have heard that adding a…

How a Copper Penny Keeps Flowers Fresh

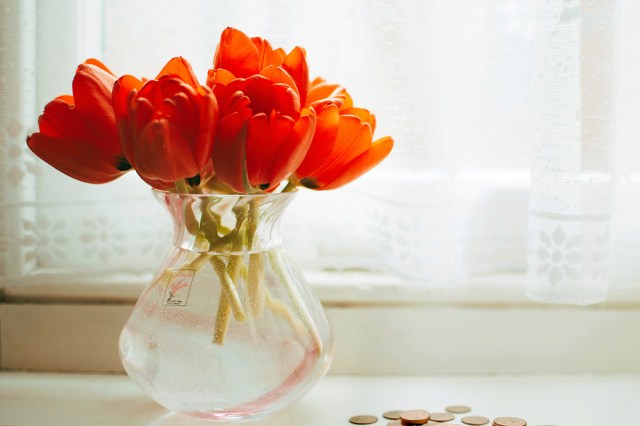
Adding a penny to a vase helps protect fresh flowers from bacteria, as copper is a natural fungicide. However, it’s important to use pennies minted before 1982, which contain 95% copper. Pennies minted in more recent years are made of 97.5% zinc and only 2.5% copper to retain the coins’ reddish-brown color.

Although it’s not scientifically proven, many people (florists included) believe old copper pennies prevent the growth of bacteria, fungi, and algae. A stem clogged with algae will have difficulty absorbing water, causing it to wilt and wither. With fewer bacteria swimming around in the vase, your lilies will have a better chance of surviving the week. 

Related: Bobby Pins Are the Secret to Fuller, Healthier Houseplants

Tulips, in particular, benefit from a copper coin as it encourages them to stand upright in their vessel. The exact science behind this phenomenon is also murky, but it’s theorized that the tulips absorb some of the copper, an essential nutrient, causing them to perk up.

Advertisement

Practice Proper Flower Care for a Long-Lasting Arrangement

One penny isn’t enough to keep cut flowers looking their best. Follow these care instructions for long-lasting blooms:

1. Sterilize your vase by cleaning it with warm water and dish soap. If the opening is too narrow to reach into, you can use one or two denture tablets to remove stubborn residue and kill bacteria.

2. Cut about 1 to 2 inches from the bottom of each stem at a 45-degree angle. Repeat this process every two to three days until it’s time to toss the arrangement. Remove any lower leaves that may come into contact with the water, as this can cause contamination.

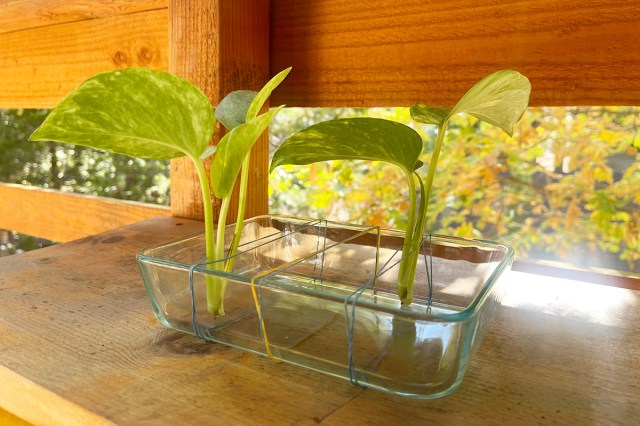
3. Fill the vase two-thirds full with lukewarm water and add a copper penny for good measure. You may want to top up your vase with fresh water the following day as the flowers will be especially thirsty. After that, you should replace the water every two to three days.

4. Avoid placing flowers in direct sunlight or exposing them to extreme temperatures. Keep your arrangement away from heat sources, cooling systems, or even drafty doors and windows.

5. Remove any dead flowers from the arrangement to protect those that are still healthy. Mold spreads easily from stem to stem, so this should be done daily.

While dropping an old copper penny into a flower vase is more of an old wives’ tale than scientific fact, it’s a low-cost trick worth trying. Pair your farmers market blooms with a crushed aspirin tablet to lower the water’s pH level or a spoonful of vodka to slow ethylene production, and they may last even longer.

Advertisement
Kelsey Morrison
Staff Editor
Kelsey Morrison is the Staff Editor of House Outlook. She has been covering all things home-related for over a decade, including real estate, interior design, commerce, and a slew of other lifestyle topics. Kelsey previously worked as a commerce editor for World of Good Brands (eHow.com and Cuteness.com) and as an associate editor for Livabl.com. She describes her personal design style as 1970s ski chalet-chic and has a thing for latch-hook tapestries.
This article is for general informational purposes only.
Affiliate Disclaimer 
|
Financial Disclaimer
Featured Image Credit:  Lisa Fotios/ Pexels | Updated  Nov 5, 2024 |
Advertisement
Organizing 3m read
0

5 Helpful Hacks for Maximizing Fridge Space

Organizing the refrigerator can be like a game of Tetris, as every ounce of free space matters. You may find yourself precariously balancing a jar of pasta sauce atop a box of leftover pizza with a bottle of ketchup shoved in between, all to maximize your total storage capacity. But these haphazard arrangements can make it difficult to reach food far in the back, leaving you no choice but to take everything out, grab what you need, and then put the rest back in a jumbled mess. It’s time to fix that. Here are five helpful hacks for maximizing fridge space.

All featured products and deals are selected independently and objectively by the author. House Outlook may receive a share of sales via affiliate links in content.

Organizing the refrigerator can be like a game of Tetris, as every ounce of free space matters. You may find yourself precariously balancing a jar of pasta sauce atop a box of leftover pizza with a bottle of ketchup shoved in between, all to maximize your total storage capacity. But these haphazard arrangements can make…

Clean the Fridge Regularly

An organized fridge begins with a regular cleaning routine, which should be done once a month. Dispose of any items past their expiration dates or foods you know you’ll never actually eat. It’s also a good idea to clean out the refrigerator ahead of any major holidays or events where you know there will be tons of prep and leftovers. By being proactive, you won’t be left struggling to find room for all the post-dinner Tupperware you’ll inevitably end up with.

Related: 6 Often-Overlooked Spaces in Your Home To Declutter Right Now

Place Food on Cooling Racks

Premade dishes need room in the fridge without the risk of getting smushed; cooling racks are an excellent way to achieve this. Purchase a few cooling racks (such as those made for quarter-sheet baking pans) and place them on top of your food storage containers. This effectively creates another shelf, maximizing vertical space. If you’re storing anything delicate, like pies or mashed potatoes, avoid placing it on the bottom “shelf,” unless the container has adequate space between the food and rim or comes with a rigid lid.

Advertisement

Utilize Lazy Susans

Lazy Susans and other rotating organizers can help you reach condiments, jars, and sauces that would otherwise be hidden in the back of the fridge. Place a lazy Susan on a shelf with enough clearance and fill it up with any items that you expect to use regularly. (Tip: A rectangular lazy Susan, such as this one, can squeeze into corners and pulls forward for easy access.)

Add Pull-Out Drawers

Installing pull-out drawers that attach to the bottom of existing shelves is a great way to reclaim some of the vertical fridge space you may not be fully utilizing. These drawers are easy to install, and are also excellent for sorting food items into different categories such as dairy, meats, fruits, vegetables, and more.

Install Clear Stacking Drawers

Stackable drawers are another way to ensure you’re using all of the available vertical space. These clear bins are much like pull-out drawers, but they sit on top of shelves rather than hang. They’re perfect for fruits and vegetables, yogurt cups, deli meat, or anything else you wish to organize. Best of all, they come in multiple sizes and will stack as high as your refrigerator allows.

With a few organizers and a regular cleaning schedule, you won’t have to struggle to find room in the fridge any longer. Just be proactive and the results will pay off immediately — you’ll have no reason to pass up that extra-large jar of pickles from Costco.

Advertisement
Bennett Kleinman
Staff Writer
Bennett Kleinman is a New York City-based staff writer for Optimism Media, covering topics for several brands including House Outlook and Better Report. He previously contributed to television programs such as "Late Show With David Letterman" and "Impractical Jokers," and digital publications like The Onion. Bennett is also a devoted New York Yankees and New Jersey Devils fan, and thinks plain seltzer is the best drink ever invented.
This article is for general informational purposes only.
Affiliate Disclaimer 
|
Financial Disclaimer
Featured Image Credit:  Cavan-Images/ Shutterstock | Updated  Nov 6, 2024 |
Advertisement
Organizing 3m read
0

How To Create More Bookshelf Space With an Egg Carton

Growing your book collection is a fun way to incorporate your interests into your home decor and display some of the most meaningful stories on your Goodreads list (or, if you’re anything like us, the endless pile of books you haven’t gotten to yet). While there aren’t many drawbacks to curating a personal library, shelf space is the main issue many bookworms face.

Growing your book collection is a fun way to incorporate your interests into your home decor and display some of the most meaningful stories on your Goodreads list (or, if you’re anything like us, the endless pile of books you haven’t gotten to yet). While there aren’t many drawbacks to curating a personal library, shelf…

When it comes to organizing our bookshelves, we’ve tried many space-saving hacks. At some point, we always hit a wall (or, in this case, the end of our bookshelf) and are left to stack piles on our coffee tables or double up the display and risk hiding dozens of our favorite titles. But when we saw this bookshelf hack that uses egg cartons to elevate a book collection (literally!), we were pretty impressed. 

Related: This Hack for Labeling Moving Boxes Is a Total Game Changer

Egg cartons are useful for all sorts of DIY projects, from seed-starting trays to perfectly crispy baked meatballs. And if your bookshelf is bursting at the seams, you can use egg cartons to maximize space and put your favorite stories on display.  

Advertisement

Make the Most of Your Bookshelf Space

Start by removing all of the books and other knickknacks from your shelf so you can start with a blank canvas. (Now is a great time to dust your bookshelf, too.) From there, reach for an empty egg carton, make sure it’s closed securely, and place it toward the back of the bookshelf. A 12-egg carton — paper or foam works best as plastic tends to be slippery — has enough structural support to act as a riser to elevate the books on the back row of your shelf. This effectively doubles your storage while allowing you to see and access your entire collection.

Play around with different display methods. You can line the entire back row with egg cartons and place books on top, then cover them up with another row of books in the front. Or you can add just one carton to the back corner and mix and match display styles by lining books on top and in front of it, then stacking books vertically next to the carton for added visual interest. (Tip: This arrangement looks great with larger art and coffee table books.) You can also leave space in between some of these clusters — or on top of the stacked books — for decorative items such as framed pictures, small potted plants, and trinkets. 

Advertisement
Jessie Quinn
Writer
Jessie Quinn is a Los Angeles-based lifestyle journalist with words published in PEOPLE, StyleCaster, Apartment Therapy, The Spruce, Byrdie, and more. She has a Bachelor's Degree in fashion journalism from Academy of Art University and her work spans across many categories, including style, beauty, home, health, crafts, and more.
This article is for general informational purposes only.
Affiliate Disclaimer 
|
Financial Disclaimer
Featured Image Credit:  Daniel Álvasd/ Unsplash | Updated  Mar 5, 2025 |
Advertisement
Cleaning 2m read
0

Cleaning Your Mirrors This Way Will Prevent Bathroom Fog

There’s nothing better than luxuriating in a hot shower on a chilly morning. The only downside is when a cool mirror meets the warm steam of the shower, creating condensation and fog — a potential disruption to your post-shower skin care routine. Over time, letting condensation build up on your bathroom mirrors can damage them, causing unsightly brown edges from a process known as desilvering. If you want to keep fog at bay, try this quick and easy hack involving glass cleaner and shaving cream (yes, shaving cream).

All featured products and deals are selected independently and objectively by the author. House Outlook may receive a share of sales via affiliate links in content.

There’s nothing better than luxuriating in a hot shower on a chilly morning. The only downside is when a cool mirror meets the warm steam of the shower, creating condensation and fog — a potential disruption to your post-shower skin care routine. Over time, letting condensation build up on your bathroom mirrors can damage them,…

Say Goodbye to Mirror Fog

You’ll want to begin with a spotless mirror. Spray it with glass cleaner and use a microfiber cloth to wipe the mirror in a side-to-side pattern. After the mirror is clean and dry, break out the shaving cream. Choose one with a thick and foamy consistency, such as Barbasol. Lather it onto your bathroom mirror in a thin and even layer. Let it sit for 10 minutes.

Related: 5 Unexpected Ways To Clean With Denture Tablets

You can use those 10 minutes to wipe down frequently touched surfaces, such as the toilet handle, sink, light switches, and more. You might even have time to give the floor a quick sweep or vacuum, and dust any light fixtures or open shelves. 

When the 10 minutes are up, lightly dampen a microfiber cloth. Use it to wipe the shaving cream off the bathroom mirror. Once it’s completely removed, use another clean cloth to dry the surface, if needed.

Advertisement

Thanks to the shaving cream, your mirror will stay clear and fog-free the next time you shower. The effect should last for a few weeks. Once your mirror starts fogging up again, you’ll know it’s time to reapply.

If you want to test out the hack, run a hot shower and let steam fill the room. Like magic, you’ll see how fog-resistant your bathroom mirror can be. Pro tip: You can use this trick to keep shower glass fog-free, too.

Advertisement
Pauline Lacsamana
Writer
Pauline Lacsamana is a freelance writer and editor who specializes in commerce, home, design, and lifestyle. She has bylines in The Spruce, Business Insider, U.S. News & World Report, Hunker, MyDomaine, Parade, and more.
This article is for general informational purposes only.
Affiliate Disclaimer 
|
Financial Disclaimer
Featured Image Credit:  Kristina Savelieva/ Shutterstock | Updated  Oct 29, 2024 |
Advertisement
Gardening 3m read
0

Save Space With This Hack for Plant Propagation

If you collect and care for houseplants, chances are you’ve propagated a few cuttings to grow your pack of pothos or gift a jade plant to a friend. This is the process of cutting a stem or a leaf from an existing plant to create an entirely new one. Many houseplants — philodendrons, spider plants, African violets, and spiderwort, to name just a few — can be easily propagated in fresh water.

All featured products and deals are selected independently and objectively by the author. House Outlook may receive a share of sales via affiliate links in content.

If you collect and care for houseplants, chances are you’ve propagated a few cuttings to grow your pack of pothos or gift a jade plant to a friend. This is the process of cutting a stem or a leaf from an existing plant to create an entirely new one. Many houseplants — philodendrons, spider plants,…

While there are countless vessels you could use for propagation (think: test tubes, tall shot glasses, upcycled jelly jars, etc.), one larger container may be more suitable if you’re attempting to grow many different cuttings at once. That’s where this space-saving plant hack comes into play.

How To Propagate Multiple Cuttings at Once

Grab a square or rectangular waterproof container. (A shallow food storage container or storage bin would work well. We used a 7.5-by-5.5-inch glass Pyrex dish with a depth of 2 inches.) Get a pack of rubber bands and stretch two of them over the opening of the container, positioning them side by side so they are touching. The tighter the rubber bands, the better; this will ensure the cuttings stay upright. Repeat this step, leaving about an inch of space between each pair of rubber bands, until you reach the end.

Related: Bobby Pins Are the Secret to Fuller, Healthier Houseplants

Secure a houseplant cutting between a single pair of rubber bands, stem side down. Depending on how taut your rubber bands are and the weight of your cuttings, you can place multiple stems in the same row or just stick to one cutting per rubber band set.

Advertisement

Fill the container with enough fresh water to submerge the bottom of the stem or node. Some houseplants naturally release hormones to help them root, so avoid using too much water as this could dilute the growth environment. We used a half-inch of water in our container.

Change the water once a week, or more frequently if it becomes cloudy or smelly. After a few weeks, once the cuttings’ roots have grown 1 to 2 inches, you can plant them in potting soil and water until moist. Alternatively, you can continue to grow your cuttings in water.

Propagating houseplants is a great way to grow your collection while saving money. (We won’t tell if you pocket a fallen leaf or two from your local home improvement store.) Using a larger container instead of multiple smaller ones can free up counter space and help you stick to your watering schedule. Plus, it reduces the risk of a rare plant cutting going missing and drying out.

Advertisement
Kelsey Morrison
Staff Editor
Kelsey Morrison is the Staff Editor of House Outlook. She has been covering all things home-related for over a decade, including real estate, interior design, commerce, and a slew of other lifestyle topics. Kelsey previously worked as a commerce editor for World of Good Brands (eHow.com and Cuteness.com) and as an associate editor for Livabl.com. She describes her personal design style as 1970s ski chalet-chic and has a thing for latch-hook tapestries.
This article is for general informational purposes only.
Affiliate Disclaimer 
|
Financial Disclaimer
Featured Image Credit:  Kelsey Morrison/ House Outlook Editor | Updated  Oct 29, 2024 |
Advertisement
Food & Drink 3m read
0

This Potato-Peeling Hack Is a Holiday Time-Saver

Peeling potatoes is a mundane yet time-consuming task that often results in wayward peels finding their way into the nooks and crannies of your kitchen. Although boiled potatoes can be enjoyed year-round — no summer cookout is complete without a classic potato salad — peeling an entire sack of potatoes is particularly burdensome when preparing an elaborate holiday meal with multiple dishes.

All featured products and deals are selected independently and objectively by the author. House Outlook may receive a share of sales via affiliate links in content.

Peeling potatoes is a mundane yet time-consuming task that often results in wayward peels finding their way into the nooks and crannies of your kitchen. Although boiled potatoes can be enjoyed year-round — no summer cookout is complete without a classic potato salad — peeling an entire sack of potatoes is particularly burdensome when preparing an…

The next time you’re handed a 5-pound bag of russet potatoes and told, “Here, peel these for me,” remember this time-saving hack that yields fluffy mashed potatoes without the skin. (We’ll share a bonus hack for those, too.)

Related: 3 Proven Hacks for Cutting Onions Without Crying
What You’ll Need

Cooling rack

Spatula

Mixing bowl

Tongs

Advertisement

No-Peel Potato Hack

Put down your trusty swivel peeler and leave the potato skin intact. Cut the raw potatoes into halves or 2-inch cubes, depending on their original size. (Cutting potatoes before boiling helps ensure even cooking and removes excess starch.) Next, place your spuds in a pot of generously salted boiling water and cook until fork-tender. Drain the water and store your boiled potatoes in a large bowl.

Here’s where the hack comes into play: Grab a wire cooling rack with a grid pattern and place it over a mixing bowl. Use a pair of tongs to transfer a few hot potatoes to the cooling rack. With a spatula (we recommend this turner-style one with a soft silicone head), press down gently on the potatoes to push them through the grates. The skins will stick to the cooling rack, while the rest of the potato slides into the bowl. You can then use the spatula to remove the skins, placing them in a separate bowl.

Now, some people might say cleaning a cooling rack is harder than cleaning a vegetable peeler. But if you give the cooling rack a quick scrub and run it through the dishwasher, you should have no problem at all. For some, it’s a price worth paying to avoid accidentally dropping a potato into the depths of the garbage can.

Don’t Toss Those Potato Skins

If you’re looking to reduce food waste, there are several delicious ways to reuse those potato skins. Toss them in oil, add your favorite spices, and air fry them at 425 degrees Fahrenheit for about 10 minutes. Now you have a crispy topping for a salad, or a savory snack to pair with dip. 

Advertisement
Kelsey Morrison
Staff Editor
Kelsey Morrison is the Staff Editor of House Outlook. She has been covering all things home-related for over a decade, including real estate, interior design, commerce, and a slew of other lifestyle topics. Kelsey previously worked as a commerce editor for World of Good Brands (eHow.com and Cuteness.com) and as an associate editor for Livabl.com. She describes her personal design style as 1970s ski chalet-chic and has a thing for latch-hook tapestries.
This article is for general informational purposes only.
Affiliate Disclaimer 
|
Financial Disclaimer
Featured Image Credit:  DonNichols/ iStock | Updated  Oct 29, 2024 |
Advertisement
Decorating 3m read
0

A Designer’s Trick for Choosing the Right Nightstands

Nightstands are small but mighty. They’re also an essential piece of furniture in any bedroom. Nightstands balance pretty with practical, providing an opportunity to show off your interior design style while also offering a place to set a glass of water, that book you’ve been meaning to read, and — let’s face it — probably your phone.

All featured products and deals are selected independently and objectively by the author. House Outlook may receive a share of sales via affiliate links in content.

Nightstands are small but mighty. They’re also an essential piece of furniture in any bedroom. Nightstands balance pretty with practical, providing an opportunity to show off your interior design style while also offering a place to set a glass of water, that book you’ve been meaning to read, and — let’s face it — probably…

How Tall Should a Nightstand Be?

According to interior decorator and TikTok creator Kiva Brent (@kivabrent), there’s one key to nailing the look of a nightstand. It must reach a certain height in relation to your bed, or your whole bedroom’s design will feel off. In a recent TikTok, Brent shared a simple trick for balancing bed-to-nightstand proportions: Choose an option that’s the same height as your mattress (when it’s on your bed), with a little wiggle room in either direction — plus or minus 4 inches. 

This is as much for practicality as it is for aesthetics. If your nightstand is too low, you may struggle to reach your blaring alarm each morning. A nightstand that’s too tall presents a similar problem; reaching up is equally uncomfortable. In either case, a nightstand that’s too short or too tall will also look out of place.

Advertisement

Width Matters, Too

The wider your bed, the wider your nightstands should be. This will ensure they feel proportional to your bed, not dinky or overpowering. Follow these general width guidelines:

• Twin bed: 17 to 21 inches wide

• Full or queen bed: 21 to 28 inches wide

• King bed: 24 inches wide and up

How To Make Your Current Nightstand Work

If a furniture shopping spree isn’t in your near future, there are plenty of easy and inexpensive ways to revamp your current nightstands. A too-short nightstand could be raised with the addition of feet. Another option is to top a petite nightstand with a stone slab, which is an elegant way to give it additional height and a totally new look. However, the easiest way to elevate a nightstand’s surface is to style it with a stack of books, topped with a catchall tray to organize everyday items such as lip balm and jewelry.

Related: How To Use the Rule of Three To Decorate Like an Interior Designer

If your bed is so tall you’re having trouble finding a nightstand that reaches, try a three-drawer dresser instead. A dresser will provide height and storage. And can you ever really have enough storage?

Advertisement
Another Helpful Tip

When browsing nightstand options, consider how much surface area you’ll need. What will live on your nightstand — an alarm clock, a lamp, a framed family photo? You’ll want a nightstand with enough surface area to accommodate all of those bedside essentials.

Advertisement
Megan McCarty
Writer
Megan McCarty is a Los Angeles-based writer who covers the fun stuff: design, travel, wellness, beauty, and fashion. She has written for publications including Domino, The Spruce, MyDomaine, Bustle, and Rue Magazine. Her life rules include, but are not limited to, zipper when merging, contribute to your IRA, and do the nice thing.
This article is for general informational purposes only.
Affiliate Disclaimer 
|
Financial Disclaimer
Featured Image Credit:  Hans Isaacson/ Unsplash+ | Updated  Oct 28, 2024 |
Advertisement
Food & Drink 3m read
0

This Thanksgiving Leftovers Hack Is Borderline Genius

Hosting the big holiday feast is a rite of passage that most of us experience sooner or later. Getting everything prepped and on the table can be a real challenge, especially the first time. Then you’re faced with a second challenge: what to do with all those leftovers.

All featured products and deals are selected independently and objectively by the author. House Outlook may receive a share of sales via affiliate links in content.

Hosting the big holiday feast is a rite of passage that most of us experience sooner or later. Getting everything prepped and on the table can be a real challenge, especially the first time. Then you’re faced with a second challenge: what to do with all those leftovers.

Some cooks consider leftovers, and the dishes made from them, to be the best part of Thanksgiving. For others, especially in small households, coping with leftovers feels more like a chore. (“Yes, we’re eating turkey again … ”) Sending home food with your guests is a good way to minimize that task, but it usually means also sending away your food storage containers and hoping to get them back one day. That’s why the viral muffin pan hack for Thanksgiving leftovers is so clever.

What Is the Muffin Pan Hack?

Like many of the best ideas, this one is simple. Instead of giving out your reusable food storage containers, pick up a stack of inexpensive disposable foil muffin or cupcake pans. The individual cups in a standard muffin pan have a capacity of 1/2 cup, which is a good single serving size. For those with bigger appetites or more mouths to feed, jumbo muffin pans hold closer to 1 cup per space.

Related: 7 Fixes for Common Thanksgiving Dinner Problems

Set out your disposable muffin pans at one end of the table, and encourage your guests to each fill a pan to take away. Place a roll of aluminum foil, or better yet, precut lengths of foil, at the other end of the table. Guests can use those to cover and seal the muffin pans so they don’t spill on the way home.

Advertisement

Why the Muffin Pan Hack Is the Gift That Keeps on Thanks-Giving

Sending leftovers away in muffin pans isn’t just convenient — it has a lot of real advantages. First, of course, you get to keep your reusable containers. But the pans also encourage commonsense portion control, allowing leftovers to be split equally among your friends and family.

It’s also better for your guests. Slopping all of the leftovers into a single container often results in an unappetizing mess by the time the food gets home. In a muffin pan, everything stays neat and separate. Finally, a muffin pan provides an easy option for reheating the leftovers. The pan can simply slide right into a low oven or toaster oven, to warm gently until the food reaches the USDA’s recommended food-safe temperature of 165 degrees.

Advertisement
Fred Decker
Writer
Fred Decker is a trained chef and former restaurateur. Since closing his restaurants over a decade ago he has been a prolific freelance writer, publishing several thousand articles on dozens of high-volume websites including Taste Of Home, Hunker, Tasting Table, Week&, eHow, and GOBankingRates. He lives on a rural acreage shared with a big garden, chickens, rabbits, and grandkids.
This article is for general informational purposes only.
Affiliate Disclaimer 
|
Financial Disclaimer
Featured Image Credit:  Lisa J. Goodman/ Moment via Getty Images | Updated  Oct 24, 2024 |
Advertisement
Food & Drink 3m read
0

The Only Hack You Need To Thaw a Turkey Quickly

Getting ready for the holidays takes a bit of organization and preparation. One often-overlooked aspect of Thanksgiving planning is making room in your refrigerator for a frozen turkey to thaw. It takes a long time for your bird to defrost this way, a full 24 hours for every 4 to 5 pounds of turkey weight.

All featured products and deals are selected independently and objectively by the author. House Outlook may receive a share of sales via affiliate links in content.

Getting ready for the holidays takes a bit of organization and preparation. One often-overlooked aspect of Thanksgiving planning is making room in your refrigerator for a frozen turkey to thaw. It takes a long time for your bird to defrost this way, a full 24 hours for every 4 to 5 pounds of turkey weight.

It’s the safest method, and the one the USDA recommends, because your turkey is never exposed to temperatures above 40 degrees Fahrenheit. However, it’s rather inconvenient, because you probably need that refrigerator space for make-ahead dishes and other ingredients for the big feast. Fortunately, there’s a hack that lets you defrost your turkey safely, but in a matter of hours, rather than days. Here’s how it works.

Cold Plunge Your Turkey

The secret is thawing the meat in water. It relies on basic physics, or more specifically, the second law of thermodynamics. If you put a frozen turkey into not-frozen water, thermal energy from the warmer thing (the water) passes into the colder thing (the turkey) and raises its temperature. Water transfers thermal energy more effectively than air does, which is why you can put your hand into an oven at 200 degrees Fahrenheit without harm, but you’ll be scalded badly if you put it into 200-degree water. It’s also why a turkey thaws significantly faster in cold water than in the air of your refrigerator.

Related: 7 Fixes for Common Thanksgiving Dinner Problems

How much faster? As previously mentioned, a turkey thawing in the fridge takes 24 hours for each 4 to 5 pounds. Call it four days for a 16-pound turkey. When you thaw in cold water instead, it takes about 30 minutes per pound or 8 hours total for the same bird. That’s a huge difference, and it’s a game changer if you were late buying your turkey.

Advertisement

How To Safely Thaw a Frozen Turkey in Water

Knowing how to quick-thaw a turkey in water is one thing, but doing it safely (while avoiding food poisoning) is quite another. The key is temperature management: Your fridge is a safe place to thaw your bird because it stays below 40 degrees Fahrenheit, and out of the food safety “danger zone.” To thaw your bird safely in water, you’ll want to ensure the bath stays at 40 degrees or lower.

Do that by adding ice to the water, changing the water every half-hour or so, and monitoring its temperature with an instant-read thermometer. Some thermometers, like this one from GoveeLife, can even sound an alert or send you a push notification when the water temperature starts to rise, so you don’t have to check manually.

Advertisement
Fred Decker
Writer
Fred Decker is a trained chef and former restaurateur. Since closing his restaurants over a decade ago he has been a prolific freelance writer, publishing several thousand articles on dozens of high-volume websites including Taste Of Home, Hunker, Tasting Table, Week&, eHow, and GOBankingRates. He lives on a rural acreage shared with a big garden, chickens, rabbits, and grandkids.
This article is for general informational purposes only.
Affiliate Disclaimer 
|
Financial Disclaimer
Featured Image Credit:  Robin Gentry/ iStock | Updated  Oct 24, 2024 |
Advertisement
Gardening 2m read
0

Bobby Pins Are the Secret to Fuller, Healthier Houseplants

Are you a financially savvy plant parent who prefers to propagate rather than buy new? Is your beloved pothos balding, leaving few leaves in the pot and many more on the vine? If you answered “yes” to either of these questions, this simple hack can help you grow denser, bushier houseplants.

All featured products and deals are selected independently and objectively by the author. House Outlook may receive a share of sales via affiliate links in content.

Are you a financially savvy plant parent who prefers to propagate rather than buy new? Is your beloved pothos balding, leaving few leaves in the pot and many more on the vine? If you answered “yes” to either of these questions, this simple hack can help you grow denser, bushier houseplants.

What Causes Plant Balding?

According to plant shop owner and TikTok creator @TannerThePlanter, the oldest leaves on a vining plant are located closest to the soil. As these leaves naturally die, the plant continues to grow downward, sprouting new leaves. This results in long, bare vines toward the top of the plant, and denser foliage near the bottom.

This phenomenon is commonly seen in varieties of vining houseplants, such as pothos, philodendron, scindapsus, and monstera. Unfortunately, you can’t just apply a few drops of minoxidil to the soil and call it a day. But there’s an inexpensive way to make your houseplant look fuller and encourage future growth.

Advertisement

How To Properly Pin Your Houseplants

The only thing you’ll need for this hack is a handful of bobby pins or plant pins. (These U-shaped bobby pins are particularly useful, but whatever you have on hand will do.) Stretch out the bobby pins so they’re looser and don’t snap back together when you release one end. Identify the nodes along the barren vines — the little knobs where new leaves, stems, and aerial roots eventually grow from the main stem.

Wind one or more vines around the top of the pot, laying them in the soil. Use a few stretched-out bobby pins or plant pins to pin the nodes into the soil. You want to make sure the bobby pins aren’t squeezing the stems too tightly. This hack will instantly make your houseplant appear fuller, and the nodes will eventually root in and produce new leaves.

Advertisement
Kelsey Morrison
Staff Editor
Kelsey Morrison is the Staff Editor of House Outlook. She has been covering all things home-related for over a decade, including real estate, interior design, commerce, and a slew of other lifestyle topics. Kelsey previously worked as a commerce editor for World of Good Brands (eHow.com and Cuteness.com) and as an associate editor for Livabl.com. She describes her personal design style as 1970s ski chalet-chic and has a thing for latch-hook tapestries.
This article is for general informational purposes only.
Affiliate Disclaimer 
|
Financial Disclaimer
Featured Image Credit:  Stephanie Ho/ Pexels | Updated  Oct 25, 2024 |