Advertisement
Cleaning 3m read
0

The Fix for Unpleasant Upholstery Odors Is in Your Liquor Cabinet

Stinky sneakers, stale wool suits, mystery smells on thrift store finds — one sniff of these items will have you searching for an odor-killing cleaning solution. Good news: There’s a quick, easy fix, and it’s not where you’d think to look.

All featured products and deals are selected independently and objectively by the author. House Outlook may receive a share of sales via affiliate links in content.

Stinky sneakers, stale wool suits, mystery smells on thrift store finds — one sniff of these items will have you searching for an odor-killing cleaning solution. Good news: There’s a quick, easy fix, and it’s not where you’d think to look.

Next time you have an upholstery odor to eliminate, skip rifling through your cleaning supply closet and head to your liquor cabinet or bar cart instead. There you’ll find a simple, inexpensive cleaning solution that’ll tackle those smells in mere moments. The trick? A bottle of vodka. 

That’s right — a spritz of straight vodka can deodorize clothing, furniture, upholstery, and even mattresses. It can also be used for many of the same tasks as vinegar, such as degreasing and disinfecting, since vodka’s high alcohol content instantly kills germs and smelly molecules. Vodka works on both clothing and upholstery, which is especially helpful if you have pillows that can’t be machine-washed or sneakers that smell like a locker room. 

Related: Why Throwing a Tennis Ball in the Dryer Is the Ultimate Laundry Hack

All you need are two things: a spray bottle and vodka. Save the top-shelf stuff for your martinis — any inexpensive, unflavored bottle of vodka will work. (Flavored vodkas may produce a sticky residue, so leave those on the liquor store shelves and in the memories of your college years, where they belong.) As for the spray bottle, any size or shape will do, as long as it has a mist setting — you don’t want it shooting a straight spray of vodka.

Advertisement

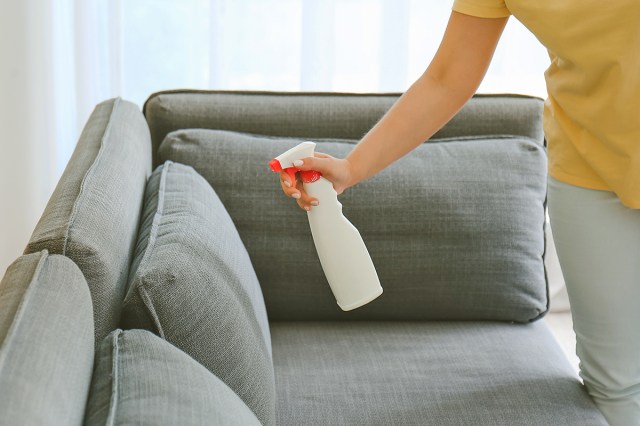
Step 1: After you’ve filled a spray bottle with straight vodka, hold it about 18 inches away from the trouble spot. Spritz in a sweeping motion, lightly misting the clothing or upholstery without soaking it. On clothing, focus on the areas that collect the most bacteria, and therefore odor. (Ahem, armpits.)

Step 2: Air dry the item, hanging clothing, if possible. The vodka will kill odor-causing bacteria, and then evaporate without a trace.

Don’t worry — your clothes and couch won’t smell like a dive bar. Vodka has little to no scent, and any trace of it will disappear once it dries. That makes the liquor a great cleaning solution for anyone sensitive to smell. It’ll also inevitably save you big bucks at the dry cleaners.

Advertisement

One important note: While vodka can work magic on many fabrics, don’t use it on silk, velvet, or leather. Those fabrics may stain or alter texture when in contact with liquids. Before spraying vodka on any fabric, test a small hidden area to ensure it doesn’t react poorly, whether through discoloration or damage. Chances are, it’ll work like a charm. 

Cheers to that!

Advertisement
Megan McCarty
Writer
Megan McCarty is a Los Angeles-based writer who covers the fun stuff: design, travel, wellness, beauty, and fashion. She has written for publications including Domino, The Spruce, MyDomaine, Bustle, and Rue Magazine. Her life rules include, but are not limited to, zipper when merging, contribute to your IRA, and do the nice thing.
This article is for general informational purposes only.
Affiliate Disclaimer 
|
Financial Disclaimer
Featured Image Credit:  Pixel-Shot/ Shutterstock | Updated  Nov 1, 2024 |
Advertisement
Cleaning 3m read
0

3 Simple Hacks for Removing Stubborn Price Stickers

We’ve all suffered through the removal of a price sticker that seems like it was adhered with super glue. (A discount home decor store that shan’t be named comes to mind for its especially stubborn labels.) You could pick at the sticker with your nails, potentially breaking one in the process, but that method often leaves behind a tacky residue. You might even be tempted to leave the price sticker on to avoid fighting a losing battle with your new ceramic vase.

All featured products and deals are selected independently and objectively by the author. House Outlook may receive a share of sales via affiliate links in content.

We’ve all suffered through the removal of a price sticker that seems like it was adhered with super glue. (A discount home decor store that shan’t be named comes to mind for its especially stubborn labels.) You could pick at the sticker with your nails, potentially breaking one in the process, but that method often…

Fortunately, there are several ways to remove price stickers using common household items. We’ve seen everything from packing tape to citrus peels to peanut butter, but these three methods have proved to be the most effective:

Use a Hair Dryer

This hairstyling tool can be used to remove price stickers on a variety of materials, including delicate packaging and paper products. Simply plug in your hair dryer, set it to low or medium speed, and warm the sticker for about 15 to 30 seconds. Move the hair dryer back and forth to distribute the heat evenly, and the sticker should peel off easily without leaving behind any residue.

Related: Remove Water Stains From Wood Furniture With This One Ingredient

Apply Glass Cleaner

The solvents in glass and window cleaners can dissolve price stickers in mere minutes. However, this method is not recommended for items made from absorbent materials, such as unframed artwork, woven baskets, or coffee table books. The first step is to spray the price sticker with Windex or any generic glass cleaner. Take a paper towel and place it over the sticker, spraying it a few more times so it’s fully saturated. After about 15 minutes, you should be able to effortlessly wipe away the price sticker with zero residue.

Advertisement

Try Nail Polish Remover

An acetone-based nail polish remover will strip that pesky price sticker as quickly as it strips your manicure. It even works on car window decals and novelty stickers on water bottles and laptops. That said, this method is best suited for nonporous materials such as glass, plastic, or metal. Do a spot test if you’re concerned the acetone will damage the finish. 

If it doesn’t, take a cotton ball, cotton round, or paper towel and let it soak up some of the polish remover. Place it on top of the sticker and set a timer for five to 10 minutes. When time’s up, rub the sticker with a microfiber cloth or something mildly abrasive to easily remove it.

The next time you need to peel a sticker off a birthday gift or a brand-new acrylic organizer, try one of these quick fixes for a residue-free removal. The days of blacking out the price in permanent marker are over.

Advertisement
Kelsey Morrison
Staff Editor
Kelsey Morrison is the Staff Editor of House Outlook. She has been covering all things home-related for over a decade, including real estate, interior design, commerce, and a slew of other lifestyle topics. Kelsey previously worked as a commerce editor for World of Good Brands (eHow.com and Cuteness.com) and as an associate editor for Livabl.com. She describes her personal design style as 1970s ski chalet-chic and has a thing for latch-hook tapestries.
This article is for general informational purposes only.
Affiliate Disclaimer 
|
Financial Disclaimer
Featured Image Credit:  FabrikaSimf/ Shutterstock | Updated  Sep 23, 2024 |
Advertisement
Cleaning 3m read
0

Keep Your Ceiling Fan Dust-Free With This Easy Trick

Whether you use your ceiling fan every day, only turn it on during the summer, or let it sit motionless year-round, the tops of the blades will accumulate dust over time. And unless you want that dust to go flying throughout your home, you’ll need to clean the fan regularly.

All featured products and deals are selected independently and objectively by the author. House Outlook may receive a share of sales via affiliate links in content.

Whether you use your ceiling fan every day, only turn it on during the summer, or let it sit motionless year-round, the tops of the blades will accumulate dust over time. And unless you want that dust to go flying throughout your home, you’ll need to clean the fan regularly.

Unfortunately, that’s easier said than done: The blades are often hard to reach, making them a challenge to keep clean. But before you go out to the store and purchase an extendable duster or some microfiber rags, it’s worth noting that you probably already have the perfect cleaning tool lying around the house: a pillowcase.

That’s right — the humble pillowcase is an excellent mechanism for tackling the plethora of dust mites atop your ceiling fan. It’s even better than a duster or a rag, which could just scatter dust onto the floor, or worse, your soft furnishings. Pillowcases effectively trap the dust inside and prevent it from falling onto your freshly made bed and other furniture.

Advertisement

Upcycle an Old Pillowcase Into a Powerful Cleaning Tool

First, you’ll need to gather the proper supplies. Grab an old pillowcase with an opening at one end. (Don’t use a fresh one that you still sleep on.) You’ll also need a step stool or something else you can stand on so you can easily reach the fan.

Once you have everything ready, turn off the fan and wait until it comes to a complete stop. Carefully slide the pillowcase over the first blade. Once it’s fully covered, pull the fabric back toward you to capture all of the dust inside. Repeat the process with each blade at least once or as many times as necessary to ensure no speck of dust is left behind.

Advertisement

When you’re done, head straight for the trash can. Hold the open end of the pillowcase over the bin and dump out the dust. You can also take the pillowcase outside, turn it inside out, and shake out any remaining dust. Once you’ve gotten rid of most of the dust, wash the pillowcase as normal.

Related: The Secret to Supersoft, Fluffy Towels

If you don’t have any old pillowcases lying around, consider purchasing an inexpensive new one, like this microfiber option. The material does a particularly good job of trapping dust, and it comes in a two-pack so you’ll always have a cleaning cloth in rotation. Just be sure to keep your dust-removing pillowcases separated from the ones you sleep on, or you might wake up with red, itchy eyes.

Advertisement
Bennett Kleinman
Staff Writer
Bennett Kleinman is a New York City-based staff writer for Optimism Media, covering topics for several brands including House Outlook and Better Report. He previously contributed to television programs such as "Late Show With David Letterman" and "Impractical Jokers," and digital publications like The Onion. Bennett is also a devoted New York Yankees and New Jersey Devils fan, and thinks plain seltzer is the best drink ever invented.
This article is for general informational purposes only.
Affiliate Disclaimer 
|
Financial Disclaimer
Featured Image Credit:  Jamie Trinh/ Unsplash | Updated  Feb 13, 2025 |
Advertisement
Cleaning 3m read
0

Why Throwing a Tennis Ball in the Dryer Is the Ultimate Laundry Hack

There are plenty of reasons to have tennis balls lying around the house. Maybe you like to hit the court with friends or your local tennis club, or perhaps you just like playing fetch with the dog in the backyard. You might even use them as massage tools or to stabilize outdoor furniture. In any case, it’s also worth keeping a couple of tennis balls in the laundry room — they’re the surprising key to fresher, fluffier clean clothes.

All featured products and deals are selected independently and objectively by the author. House Outlook may receive a share of sales via affiliate links in content.

There are plenty of reasons to have tennis balls lying around the house. Maybe you like to hit the court with friends or your local tennis club, or perhaps you just like playing fetch with the dog in the backyard. You might even use them as massage tools or to stabilize outdoor furniture. In any…

The next time you do a load, get a new tube of tennis balls and throw two or three in the dryer with your wet laundry. Skip the dryer sheets, which can leave behind an unpleasant residue. The power from the tennis balls bouncing around will break up clumps of clothing, which, in turn, improves the overall airflow and helps your laundry dry quicker and more efficiently than it would otherwise. The force from the tennis balls can also help pound out wrinkles, leaving your garments smooth and ready to wear, no ironing board required.

Tennis balls are especially useful for bulkier items such as comforters and pillows. Much like hitting a pillow helps fluff it up, the force from the bouncing balls helps distribute the material to keep it evenly fluffed.

Advertisement

They’re similarly helpful when it comes to washing down jackets. Putting your down jacket through the wash will likely cause it to lose some of its puffiness. To restore its original shape, put the jacket in the dryer with two or three tennis balls. Then set the temperature to the lowest heat setting or, if possible, no heat at all. As you run the dryer, the balls will pound away at the jacket and evenly disperse the down filling, helping to revive the jacket’s volume and fluffiness.

If you’d rather not use tennis balls for any reason, wool dryer balls are another excellent option. Though they’re lighter and thus lack the force of tennis balls — meaning they’re less effective at pounding down jackets and comforters back into shape — wool dryer balls can help reduce wrinkles and static electricity. They’ll also work to separate tangled clothing and cut down drying time. As a bonus, this means lower energy bills each month, as you’ll end up running the dryer for shorter periods.

Advertisement
Bennett Kleinman
Staff Writer
Bennett Kleinman is a New York City-based staff writer for Optimism Media, covering topics for several brands including House Outlook and Better Report. He previously contributed to television programs such as "Late Show With David Letterman" and "Impractical Jokers," and digital publications like The Onion. Bennett is also a devoted New York Yankees and New Jersey Devils fan, and thinks plain seltzer is the best drink ever invented.
This article is for general informational purposes only.
Affiliate Disclaimer 
|
Financial Disclaimer
Featured Image Credit:  Mannvi65/ Shutterstock | Updated  Oct 31, 2024 |
Advertisement
Cleaning 3m read
0

How To Use a Balloon To Clean Up Dust

Sweeping up dust is a lot like throwing a boomerang — it always comes back. In part because of that, getting rid of pesky dust mites is one of the most annoying chores around the house. And if dusty floors weren’t bad enough, dust also clings to curtains and finds its way into cracks and crevices, where it’s even more of a hassle to clean up. That being said, there are several clever cleaning hacks that can make tackling dust easier. One such trick utilizes an item you may have lying in a drawer somewhere: a balloon.

Sweeping up dust is a lot like throwing a boomerang — it always comes back. In part because of that, getting rid of pesky dust mites is one of the most annoying chores around the house. And if dusty floors weren’t bad enough, dust also clings to curtains and finds its way into cracks and…

Balloons are so much more than just festive decorations; it turns out, they’re also incredibly useful for getting rid of dust. It has to do with the static electricity that’s created when you rub a balloon against some hair or wool fabric. This static electricity can be used to attract oppositely charged dust particles, which stick to the balloon much like they would to a handheld duster or microfiber rag.

Here’s how to do it: Blow up a balloon with your mouth or an air pump, tie the end closed, and then vigorously rub it against fabric (wool is best, but polyester, cotton, or fleece will also do the trick) or hair to generate static electricity. Then take the statically charged balloon and lightly run it along any dusty surfaces. The gentle nature of the balloon makes it particularly useful for objects that may be damaged if you use a vacuum cleaner, such as wall art or sensitive electronics. Once you’re done, just throw the dusty balloon in the garbage and pop it. (Make sure to do this in or over the trash bin so the dust doesn’t go flying everywhere again.)

Advertisement

Another useful tip is to blow up a few balloons, rub them to generate static, and then place them around a particularly dusty room. If you’ve ever seen natural sunlight shining into a room, you may have noticed all the dust floating in the air. This trick can help trap those particles before they end up on the floor or all over the furniture. After a while, you should notice the balloons have collected some of that dust.

You can also utilize the air inside the balloon to help dislodge dust particles from hard-to-reach areas. This includes the cracks of a computer keyboard, the charging port of a cellphone, and anywhere else that would be impossible to reach with a standard duster. Fill up a balloon with air and then hold the end closed with your fingers. Angle the end toward the dust and slowly release the air by loosening your grip. The slow release of air should help dislodge any annoying dust mites.

Advertisement
Bennett Kleinman
Staff Writer
Bennett Kleinman is a New York City-based staff writer for Optimism Media, covering topics for several brands including House Outlook and Better Report. He previously contributed to television programs such as "Late Show With David Letterman" and "Impractical Jokers," and digital publications like The Onion. Bennett is also a devoted New York Yankees and New Jersey Devils fan, and thinks plain seltzer is the best drink ever invented.
This article is for general informational purposes only.
Affiliate Disclaimer 
|
Financial Disclaimer
Featured Image Credit:  Yavdat/ Shutterstock | Updated  Sep 16, 2024 |
Advertisement
Gardening 3m read
0

Revive Dying Flowers With This Simple Trick

When it comes to home decor, few things bring a smile to our faces quite like a beautiful bouquet of fresh flowers. Inevitably, though, those lovely blooms start to wilt. You might feel compelled to toss an arrangement at the first sign that it’s on the outs, but in some cases, there’s a way to revive the flowers and keep them going for a few days longer. It has to do with recutting the stems in a way that allows the flowers to soak up water more efficiently.

When it comes to home decor, few things bring a smile to our faces quite like a beautiful bouquet of fresh flowers. Inevitably, though, those lovely blooms start to wilt. You might feel compelled to toss an arrangement at the first sign that it’s on the outs, but in some cases, there’s a way to…

Stems are often cut straight across, which results in a limited amount of surface area for them to absorb water. Furthermore, those flat cuts may cause the base of the flower to rest squarely against the bottom of the vase, which obstructs water from flowing up the stem. It’s also worth noting that dead tissue begins to form the moment you cut a stem. Over time, that tissue builds up to a point where it prevents water from getting in, which is why it’s useful to regularly recut the stems in a bouquet — at an angle or otherwise.

Florists recommend recutting your flowers before you put them in a vase for the first time, and then every two to three days after that. A good rule of thumb is to recut the stems when you swap out the water. Using a sharp knife or scissors, cut each stem about an inch above the current base at around a 45-degree angle. This accomplishes two things: Not only does the angled cut create a larger amount of exposed surface area for the flower to absorb water, but it also prevents the bottom of the stem from resting flat against the bottom of the vase.

Advertisement

If you haven’t already, remove any leaves along the stem that fall below the waterline. This will prevent the leaves from looking soggy and discolored, and it will also reduce bacteria growth that could limit the flower’s ability to take up water.

While these tips won’t make your flowers immortal, they’ll definitely add a few days or even weeks to the life of that lovely bouquet. Within a few hours after recutting the stems, you should notice those wilting flowers start to perk up again.

Advertisement
Bennett Kleinman
Staff Writer
Bennett Kleinman is a New York City-based staff writer for Optimism Media, covering topics for several brands including House Outlook and Better Report. He previously contributed to television programs such as "Late Show With David Letterman" and "Impractical Jokers," and digital publications like The Onion. Bennett is also a devoted New York Yankees and New Jersey Devils fan, and thinks plain seltzer is the best drink ever invented.
This article is for general informational purposes only.
Affiliate Disclaimer 
|
Financial Disclaimer
Featured Image Credit:  Karolina Kaboompics/ Pexels | Updated  Sep 16, 2024 |
Advertisement
Cleaning 2m read
0

This Genius Laundry Hack Can Significantly Reduce Drying Time

While most washing machines offer a quick wash option, dryers typically lack this time-saving feature. It can take anywhere from 40 minutes to an hour and a half to dry a standard-size load of laundry, but when you’re in a hurry or looking to save money on your energy bill, you need another solution. Fortunately, there’s a hack for that: Add a dry bath towel to a wet load in the dryer.

While most washing machines offer a quick wash option, dryers typically lack this time-saving feature. It can take anywhere from 40 minutes to an hour and a half to dry a standard-size load of laundry, but when you’re in a hurry or looking to save money on your energy bill, you need another solution. Fortunately,…

When a clean, dry towel is tossed into your wet laundry, it absorbs some of the moisture, speeding up the drying time. Since the towel will absorb water, however, the trick is to remove it after five to 15 minutes, depending on the size of the load. If the towel becomes too damp, it will have the opposite effect and slow down drying time. Think of it like a wet sponge sitting on top of drying dishes. The dishes won’t completely dry until the sponge is taken away or dries itself. After you remove the damp towel, hang it up and let it air dry while your clothes finish drying.

Related: Why You Should Have Two Different Laundry Hampers

Adding a fresh towel to the dryer is also beneficial when laundering bulky items such as bedding, outerwear, and other towels. It helps keep items separated and allows for better air circulation. You know when a load is so heavy, it just clunks around in a big wad? A dry towel will help prevent that.

Advertisement

Quicker drying time also means less power used, ultimately saving you money. And saving money is always a good thing.

Bonus Laundry Tip

Throwing a damp towel in the dryer can remove wrinkles in your clothes by creating steam to release them, although it won’t speed up drying time. If you want to get the wrinkles out of a small load, a damp washcloth will do.

When you need a freshly laundered T-shirt dried in a hurry, try this low-effort hack to cut drying time in half — just don’t forget to remove the bath towel after 10 minutes or so.

Advertisement
Jill Layton
Writer
Jill Layton started writing professionally when she realized her emails and texts were kinda funny. She’s an affiliate shopping writer and lifestyle contributor for Scary Mommy, Bustle, Mic, and Best Products. She’s the mom of two alarmingly witty kids and the world’s most perfect dog.
This article is for general informational purposes only.
Affiliate Disclaimer 
|
Financial Disclaimer
Featured Image Credit:  nopponpat/ iStock | Updated  Sep 23, 2024 |