Advertisement
Cleaning 2m read
0

This Unexpected Tool Is a Pet Hair Magnet

We all love our pets, but we don’t love cleaning up their fur. It gets everywhere from the couch to our clothes, but no spot is more stubborn than the rug. Fur embeds itself in the fibers, especially the high-pile variety, and replenishes itself on a daily basis. If you’re tired of vacuuming to no avail as your cat or dog looks on in terror, oblivious to the fact that they’re the reason you’re performing this chore, try a squeegee.

All featured products and deals are selected independently and objectively by the author. House Outlook may receive a share of sales via affiliate links in content.

We all love our pets, but we don’t love cleaning up their fur. It gets everywhere from the couch to our clothes, but no spot is more stubborn than the rug. Fur embeds itself in the fibers, especially the high-pile variety, and replenishes itself on a daily basis. If you’re tired of vacuuming to no…

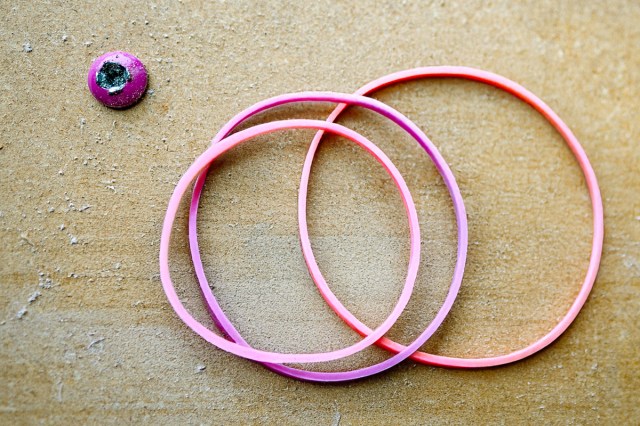
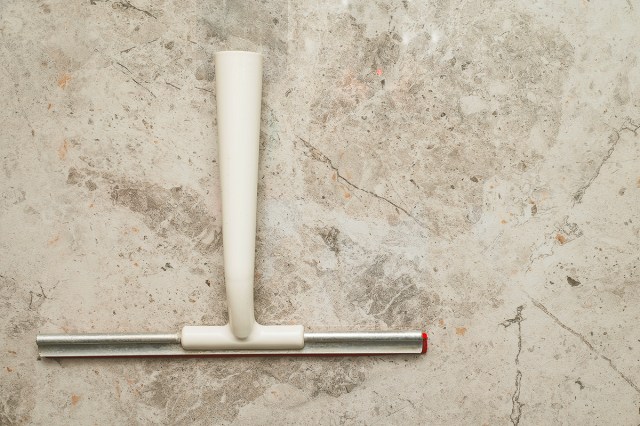
In addition to being gentle on the rug (or carpet, for that matter), a squeegee is a veritable magnet for pet hair. Use it the same way you would on anything else: Run the rubber blade along the rug’s surface in a sweeping motion, allowing you to easily lift and gather the pet hair. From there, use the vacuum as you normally would — only now, it’ll get rid of all the fur, not just surface-level debris.

Related: The Carpet Cleaning Hack That Could Damage Your Vacuum
Advertisement

Below the Surface

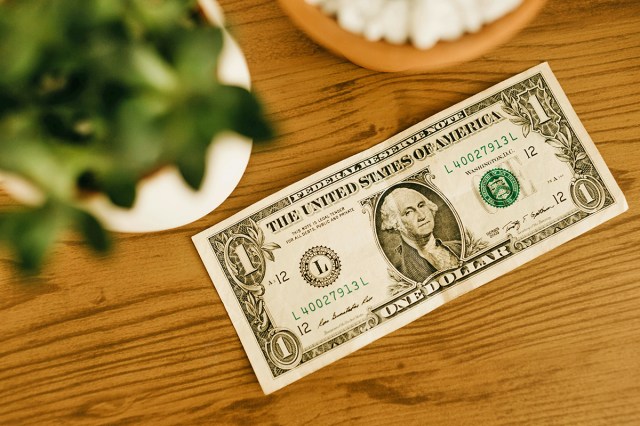
You may need to squeegee every other day or once a week, depending on how many pets you have, how much they shed, and your rug or carpet type. The good news is that a squeegee is just as effective on upholstery, car interiors, bedding, and even hardwood. They’re sold online and at most big-box stores, usually for around $10.

You can also prevent buildup by regularly brushing your furry friend. A good brush will also set you back $10 or so, and many pets love it. Regular brushing is proven to have many benefits beyond ensuring your rugs and carpets stay clean: keeping your pet’s skin healthy, their coat shiny, and even strengthening your bond with them.

Advertisement
Michael Nordine
Staff Writer and Editor
Michael Nordine is a writer and editor living in Los Angeles. He has two cats and wishes he had more. His film criticism has appeared in Variety, The Los Angeles Times, and The Village Voice, among others.
This article is for general informational purposes only.
Affiliate Disclaimer 
|
Financial Disclaimer
Featured Image Credit:  vikasi_bc/ Shutterstock | Updated  Mar 5, 2025 |
Advertisement
Gardening 2m read
0

Going on Vacation? Don’t Forget This Plant Care Trick

Traveling and plant parenting don’t typically mix. But with a few tips and tricks, you can ensure your plants stay healthy and happy while you’re on vacation — even if you’re gone for weeks at a time.

All featured products and deals are selected independently and objectively by the author. House Outlook may receive a share of sales via affiliate links in content.

Traveling and plant parenting don’t typically mix. But with a few tips and tricks, you can ensure your plants stay healthy and happy while you’re on vacation — even if you’re gone for weeks at a time.

The key to taking care of your plants while traveling is to plan ahead. While your houseplants can last without nutrients when you’re away, they still need water to survive. For some plants, you can opt for accessories such as water globes, self-watering spikes, ollas, and watering wicks. For others, you can try something called the bathtub method.

Related: This Is the Best Way To Dust Delicate Plant Leaves

This method requires a little bit of planning but is one of the best ways to water plants while you’re out of town. And according to Jacintha Webster, a plant expert and creator of Pass That Plant, you can leave plants for upwards of 25 days with this self-watering trick.

Advertisement

How To Care for Plants While on Vacation

The bathtub method is a type of bottom watering that nourishes multiple plants simultaneously and creates an environment where they won’t just survive, but thrive. Simply fill your bathtub with 2 to 3 inches of water and use a trusty drain stopper to keep it filled (for reinforcement, you can try a silicone suction stopper over top). Then, place your plants in the bathtub as close together as possible so they can bottom feed and share the moisture they naturally release into the air. This hack is just as effective with only a couple of plants, but if you have a growing collection, don’t be afraid to pack them in there.

To ensure this plant hack works best, check that all of your plant pots have a drainage hole so the water can get in (it’s also worth removing any drainage trays). If you have plants that are prone to root rot — think cacti, succulents, snake plants, ferns, pothos, and peace lilies — it’s best to leave those out of the bath. Instead, utilize a different plant self-watering method, such as water globes or ollas. Also, make sure your bathroom receives enough sunlight, as that’s how your plants make food and get the energy they need.

Advertisement
Jessie Quinn
Writer
Jessie Quinn is a Los Angeles-based lifestyle journalist with words published in PEOPLE, StyleCaster, Apartment Therapy, The Spruce, Byrdie, and more. She has a Bachelor's Degree in fashion journalism from Academy of Art University and her work spans across many categories, including style, beauty, home, health, crafts, and more.
This article is for general informational purposes only.
Affiliate Disclaimer 
|
Financial Disclaimer
Featured Image Credit:  SolStock/ iStock | Updated  Mar 5, 2025 |
Advertisement
Organizing 2m read
0

Stop Clothes From Slipping Off Hangers With This Simple Trick

When it comes to doing laundry, washing your clothes is only half the battle. The real challenge is putting everything away once it’s clean and dry. Some items can be folded and tucked in a drawer, while others can be hung up in a closet. Both storage methods have their advantages, but hanging clothes helps to prevent wrinkles, maintain a garment’s shape, and provide greater visibility. Without nonslip hangers, though, those benefits may be lost.

All featured products and deals are selected independently and objectively by the author. House Outlook may receive a share of sales via affiliate links in content.

When it comes to doing laundry, washing your clothes is only half the battle. The real challenge is putting everything away once it’s clean and dry. Some items can be folded and tucked in a drawer, while others can be hung up in a closet. Both storage methods have their advantages, but hanging clothes helps…

Some hangers and clothes simply don’t mix, and a slippery garment can easily slide off, making a mess in your closet. Fortunately, there’s a trick to make any hanger nonslip, and all it takes is a few rubber bands.

What You’ll Need

Hangers

2–4 rubber bands (preferably wide ones) per hanger

Advertisement

An Easy DIY Nonslip Hanger Hack

First, grab any clothes hanger with a crossbar. Take a rubber band — a wide, heavy-duty option is best — and wrap it around one of the shoulder supports until it’s secure, placing it about 2 inches in. For extra grip, add a second rubber band. Repeat on the other shoulder support, then hang the clothing item as you normally would. Instead of falling off, the fabric will catch on the rubber, keeping the garment in place. With this quick hack, you can upgrade the hangers you already have and tidy your closet at the same time.

Related: This Jean-Hanging Hack Will Make Your Closet Look Like a Boutique

Extra Nonslip Tips

Don’t love the look of rubber band-wrapped hangers? There are other ways to make them nonslip. You can use a hot glue gun to add hot glue dots to the shoulders of your hangers, enhancing their grip, or you can buy hanger grips, such as these ones on Amazon. Made of soft rubber, they have a finlike design that prevents clothes from sliding. The strips are backed with a clear adhesive and are compatible with wood or plastic hangers.

Advertisement
Pauline Lacsamana
Writer
Pauline Lacsamana is a freelance writer and editor who specializes in commerce, home, design, and lifestyle. She has bylines in The Spruce, Business Insider, U.S. News & World Report, Hunker, MyDomaine, Parade, and more.
This article is for general informational purposes only.
Affiliate Disclaimer 
|
Financial Disclaimer
Featured Image Credit:  Aviv Rachmadian/ Unsplash | Updated  Mar 5, 2025 |
Advertisement
Home Improvement 3m read
0

No Measuring Tape? Just Reach for Your Wallet

Have you ever needed to measure something on the go, but your ruler is in your toolbox back home? Maybe you’re at the thrift store trying to determine how tall a bookshelf is, or at the local deli wondering if their foot-long sandwiches are truly as long as advertised. Whatever the case may be, here’s a quick tip that’ll help you roughly estimate the size of anything, using something you probably have in your wallet.

All featured products and deals are selected independently and objectively by the author. House Outlook may receive a share of sales via affiliate links in content.

Have you ever needed to measure something on the go, but your ruler is in your toolbox back home? Maybe you’re at the thrift store trying to determine how tall a bookshelf is, or at the local deli wondering if their foot-long sandwiches are truly as long as advertised. Whatever the case may be, here’s…

Got a Dollar?

According to the U.S. Currency Education Program, the standard length of a paper U.S. bill is 6.14 inches, whether it’s a dollar bill, a fiver, or even a cool hundo. So if you need to roughly estimate the length of something to the nearest half-foot, you’re in luck. Grab a dollar — or several — and lay it (or them) along the item you need to measure. If all you need is a rough number, round down to 6 inches. For a more accurate reading, use 6.14 inches per dollar and multiply accordingly.

Related: How To Choose the Right Size Drill Bit Every Time

It’s also worth noting that U.S. dollars measure 2.61 inches from top to bottom. This may be helpful knowledge when trying to measure something smaller. Keep in mind, though, that this is only the case for modern currency introduced after 1929. Older U.S. banknotes measured 7.375 by 3.125 inches, though it’s highly unlikely you’d have any of those in your wallet. (They are, however, valuable collectibles.)

Advertisement

Word to the Wise

While U.S. dollars measure 6.14 inches by 2.61 inches when freshly minted, those exact dimensions may slightly decrease over time. The edges of the bill will likely wear away with repeated use, as the money gets repeatedly folded into wallets and stuffed into tills. This erosion won’t change the numbers much, but it may knock off a few decimal points.

The Dimensions of Foreign Currency

Foreign currency doesn’t adhere to the same dimensions as U.S. currency, and may be slightly longer or shorter than 6.14 inches. The Canadian dollar, for example, measures 6 inches on the nose — a perfectly round number that provides a nice template to measure off of. British pounds, however, vary in length from 4.92 inches to 5.75 inches, depending on the denomination, so using them for measurement can be confusing. At the end of the day, it’s best to stick to currencies you know the dimensions of.

Advertisement
Bennett Kleinman
Staff Writer
Bennett Kleinman is a New York City-based staff writer for Optimism Media, covering topics for several brands including House Outlook and Better Report. He previously contributed to television programs such as "Late Show With David Letterman" and "Impractical Jokers," and digital publications like The Onion. Bennett is also a devoted New York Yankees and New Jersey Devils fan, and thinks plain seltzer is the best drink ever invented.
This article is for general informational purposes only.
Affiliate Disclaimer 
|
Financial Disclaimer
Featured Image Credit:  Jonathan Borba/ Pexels | Updated  Feb 27, 2025 |
Advertisement
Food & Drink 3m read
0

The Secret to a Perfectly Crunchy, Golden-Brown Grilled Cheese

Making the perfect grilled cheese isn’t exactly magic, but one wrong move and poof — the entire kitchen fills up with smoke. Far too often, people end up burning their sandwiches while trying to achieve that crunchy, golden-brown crust we all crave. But making grilled cheese doesn’t have to be difficult, especially with one key ingredient and a few simple techniques. Here’s a hack to help you achieve a crispy crust with a common condiment.

All featured products and deals are selected independently and objectively by the author. House Outlook may receive a share of sales via affiliate links in content.

Making the perfect grilled cheese isn’t exactly magic, but one wrong move and poof — the entire kitchen fills up with smoke. Far too often, people end up burning their sandwiches while trying to achieve that crunchy, golden-brown crust we all crave. But making grilled cheese doesn’t have to be difficult, especially with one key…

Move Over, Butter, It’s Mayo Time

When making grilled cheese, it’s traditional to spread butter or margarine on the outside of the bread before cooking. But those ingredients aren’t ideal. Cold butter can be difficult to spread, and it’s prone to burning quickly. Plus, you’ll likely end up needing to use a few tablespoons of butter, which is high in fat and calories.

Mayonnaise, on the other hand, is a game changer when it comes to making grilled cheese, and all you need is about 1 tablespoon. Not only is it a suitable substitute for butter, but it’s also likely to improve the snack in ways you never imagined. First, mayo is far easier to spread than butter, and you don’t even need to bring it up to room temperature. Mayo also has a higher smoke point than butter, so the sandwich is less likely to burn quickly. Lastly, mayo has a lighter flavor than butter, allowing the cheese inside your sandwich to really shine through. All of these benefits make mayonnaise the perfect choice over butter for a top-notch grilled cheese.

Advertisement

Don’t Skimp on the Fat

One important caveat: You won’t achieve a crispy crust without using full-fat mayonnaise. Reduced-fat spreads have a higher water content than full-fat versions, so they won’t produce as crispy a result. We’ll leave the brand of mayo up to you, though, whether you prefer Hellmann’s (aka Best Foods), Duke’s, or another option.

Steps To Achieve Golden-Brown Goodness

Outside of swapping butter for mayo, there are no changes to how you should cook your grilled cheese sandwich. Of course, everyone has their own process, but we suggest using a cast-iron skillet, low to medium heat, and cooking for two to three minutes on each side. Also, cover the pan with a lid to keep the heat in and help the cheese melt.

Related: How To Make Any Cheese Melt Like American Cheese

One last tip is to consider boosting the flavor of the mayo-coated exterior by sprinkling a bit of parmesan cheese so it sticks to the mayo and cooks into the crust. Or, use garlic aioli instead of traditional mayo if you’re looking to add some depth of flavor to the sandwich. Consider the mayonnaise a blank canvas for your culinary creativity.

Advertisement
Bennett Kleinman
Staff Writer
Bennett Kleinman is a New York City-based staff writer for Optimism Media, covering topics for several brands including House Outlook and Better Report. He previously contributed to television programs such as "Late Show With David Letterman" and "Impractical Jokers," and digital publications like The Onion. Bennett is also a devoted New York Yankees and New Jersey Devils fan, and thinks plain seltzer is the best drink ever invented.
This article is for general informational purposes only.
Affiliate Disclaimer 
|
Financial Disclaimer
Featured Image Credit:  sumnersgraphicsinc/ Adobe Stock | Updated  Feb 27, 2025 |
Advertisement
Home Improvement 3m read
0

A Fast Fix for Stripped Screws

Stymied by stripped screws and fishing for a fast fix? Well, we’re here to offer a whole lot more than just whimsical alliteration. Stripped screws are a headache to remove, as a screwdriver alone lacks sufficient traction. Thankfully, a rubber band can change all that, helping you remove stripped screws with ease.

All featured products and deals are selected independently and objectively by the author. House Outlook may receive a share of sales via affiliate links in content.

Stymied by stripped screws and fishing for a fast fix? Well, we’re here to offer a whole lot more than just whimsical alliteration. Stripped screws are a headache to remove, as a screwdriver alone lacks sufficient traction. Thankfully, a rubber band can change all that, helping you remove stripped screws with ease.

Why Do Screws Get Stripped?

Before diving into this hack, it’s worth knowing what stripped screws are and why they happen. A stripped screw is one on which the head’s slots are worn down, making it nearly impossible for you to insert a screwdriver and maintain a tight grip.

Related: How To Choose the Right Size Drill Bit Every Time

Stripped screws happen, in part, because of the low-quality metals used to make many cheap screws. These screws wear down easily if you apply too much force, especially when using a power drill. Once a screw gets stripped, it’s not a huge deal so long as you leave it there. But trying to remove it is a far more challenging ordeal.

Advertisement

Rubber Band, You’re the One

To get rid of a stripped screw, all you’ll need is a wide rubber band that covers the width of the head, plus a screwdriver that would normally fit the screw. Place the rubber band flat against the screw head before firmly pressing the screwdriver against the rubber and into the damaged slots. Turn the screwdriver counterclockwise, and after a few twists, you should notice the screw start to loosen and eventually pop out.

The logic behind this trick has to do with the extra traction a rubber band provides. While the original slots of the screw head may be worn out, the rubber band fills every available crevice, creating a new, firmer surface for the screwdriver to grip. This provides the additional traction needed to remove the stripped screw.

How To Prevent Stripped Screws

Now that you’ve removed that pesky stripped screw, here are some helpful tips you can use to reduce the likelihood of it happening again. First, always use a screwdriver that fits, rather than one that’s too big or small; an improperly sized tool can easily slide out and damage the screw head. Hold the screwdriver straight rather than at an angle, as the latter increases the risk of slippage and damage. Lastly, apply downward pressure before ever twisting the screw, or you’ll cause the screwdriver to come loose.

Advertisement
Bennett Kleinman
Staff Writer
Bennett Kleinman is a New York City-based staff writer for Optimism Media, covering topics for several brands including House Outlook and Better Report. He previously contributed to television programs such as "Late Show With David Letterman" and "Impractical Jokers," and digital publications like The Onion. Bennett is also a devoted New York Yankees and New Jersey Devils fan, and thinks plain seltzer is the best drink ever invented.
This article is for general informational purposes only.
Affiliate Disclaimer 
|
Financial Disclaimer
Featured Image Credit:  Lost_in_the_Midwest/ Shutterstock | Updated  Feb 25, 2025 |
Advertisement
Gardening 3m read
0

This Is the Best Way To Dust Delicate Plant Leaves

Just like the novels and knickknacks on your bookshelves, houseplants collect dust over time. This dust not only may be harmful to your health — especially if you have respiratory issues, allergies, or asthma — but also impacts your plant’s vitality.

All featured products and deals are selected independently and objectively by the author. House Outlook may receive a share of sales via affiliate links in content.

Just like the novels and knickknacks on your bookshelves, houseplants collect dust over time. This dust not only may be harmful to your health — especially if you have respiratory issues, allergies, or asthma — but also impacts your plant’s vitality.

Unfortunately, dusting plant leaves isn’t as easy as taking your feather duster to the affected areas. This can cause the particles to go everywhere and potentially damage the delicate leaves if you aren’t careful. And wiping them down with a damp paper towel is both tedious and wasteful. Instead, the best tool for dusting plant leaves might be hiding in your dresser drawer.

Why Do You Need To Dust Plants?

Getting rid of the dust that accumulates on top of your plant’s leaves can create a better environment for your houseplants to thrive. Dust gets in the way of plants’ ability to absorb sunlight, hindering photosynthesis, and consequently, nutrient production. Keeping the leaves clean helps ensure they get the nutrients they need to thrive.

Advertisement

The Best Way To Remove Dust From Plant Leaves

Fuzzy socks — you know, those plush, microfiber pairs that keep your feet toasty in the cold — can be an effective way to remove dust from plant leaves. Just slip a fuzzy sock over your hand and gently wipe away the dust buildup. The particles get trapped between the sock’s tiny fibers, and the material is soft and gentle on the leaves, so you don’t have to worry about damage. You can also opt for cheap microfiber dusting gloves, which allow you to get into all the nooks and crannies.

Related: Bobby Pins Are the Secret to Fuller, Healthier Houseplants

To cut down on how often you need to dust, you can spritz your houseplants with a dust-repellent solution. In a spray bottle, combine 1 quart of water with 1 teaspoon of neem oil and a few drops of liquid dish soap, then shake it up. Spraying this solution onto the leaves not only keeps them clean (the oily residue makes it harder for dust to hang on), but also doubles as a pest repellent since neem oil is a contact insecticide that can kill pests instantly.

Advertisement
Jessie Quinn
Writer
Jessie Quinn is a Los Angeles-based lifestyle journalist with words published in PEOPLE, StyleCaster, Apartment Therapy, The Spruce, Byrdie, and more. She has a Bachelor's Degree in fashion journalism from Academy of Art University and her work spans across many categories, including style, beauty, home, health, crafts, and more.
This article is for general informational purposes only.
Affiliate Disclaimer 
|
Financial Disclaimer
Featured Image Credit:  Liudmila Chernetska/ iStock | Updated  Feb 25, 2025 |
Advertisement
Food & Drink 3m read
0

The Hard-Boiled Egg Peeling Hack That’s Better Than All the Rest

Keeping hard-boiled eggs in the fridge is one of the best ways to ensure you’ll always have a protein-rich snack on hand. Boiling hard-boiled eggs is easy, but peeling them can be a pain, especially if you have sensitive fingertips or mobility issues in your hands. Looking for an easy way to get those eggs peeled in just a matter of seconds? Check out this helpful hack that promises peeled eggs with little mess or hassle.

All featured products and deals are selected independently and objectively by the author. House Outlook may receive a share of sales via affiliate links in content.

Keeping hard-boiled eggs in the fridge is one of the best ways to ensure you’ll always have a protein-rich snack on hand. Boiling hard-boiled eggs is easy, but peeling them can be a pain, especially if you have sensitive fingertips or mobility issues in your hands. Looking for an easy way to get those eggs…

How To Peel a Hard-Boiled Egg

The only item you need to peel hard-boiled eggs in under 30 seconds is a clear Mason jar. If you don’t already have one, you can find endless options online or at your local thrift store. We recommend using a clear jar so you can see when the eggs are fully peeled. 

Now comes the fun part: Fill the Mason jar halfway with water, then use a spoon to gently drop your hard-boiled egg inside. Secure the lid tightly, give the jar a good shake, and watch as the shell chips away. You want to shake it hard enough to crack those shells, but not so hard that the egg explodes.

Related: How To Peel Potatoes Effortlessly When You Don’t Have a Peeler

When most of the shell has been removed — this should take around 10 seconds or so — retrieve the egg with your spoon. You may need to use your fingers to remove any remaining bits of shell, but they should slide right off. You can now enjoy perfectly peeled hard-boiled eggs, without worrying about dropping one into the trash can mid-peel (we’ve all been there).

Advertisement

Practical Tips To Make Egg-Peeling Easier

If you don’t have a Mason jar at your disposal, you can try any of these quick and easy tips to make peeling the old-fashioned way a little easier. The first thing we recommend is to cool your freshly boiled eggs in a bath of ice water. This will not only prevent your eggs from overcooking, but also help separate the egg white from the shell, resulting in larger chips and an easier peel.

You can also try adding a little distilled white vinegar (about 2 teaspoons) to the water while you’re boiling the eggs, which could help dissolve the hard outer layer of the shell and separate the egg white from the shell membrane.

Advertisement
Krissy Howard
Writer
Krissy Howard is a New Mexico-based writer. Her work has appeared in Byrdie, Hunker, and Simplemost, and she is the former managing editor of music satire website, The Hard Times.
This article is for general informational purposes only.
Affiliate Disclaimer 
|
Financial Disclaimer
Featured Image Credit:  Nebasin/ iStock | Updated  Feb 25, 2025 |
Advertisement
Cleaning 2m read
0

Tired of Dingy Socks? This Hack Will Whiten Them

Much like death and taxes, owning a pair of white tube socks is inevitable. Although they’re not the most stylish accessories, they’re surprisingly versatile — perhaps you sport a pair with your Chelsea boots or rely on them for heatless curls.

All featured products and deals are selected independently and objectively by the author. House Outlook may receive a share of sales via affiliate links in content.

Much like death and taxes, owning a pair of white tube socks is inevitable. Although they’re not the most stylish accessories, they’re surprisingly versatile — perhaps you sport a pair with your Chelsea boots or rely on them for heatless curls.

The one major downside is that white socks, regardless of the style, easily show sweat and dirt and become dingy over time. But there’s no need to throw them out and buy a new pair because we have a hack to help you whiten even the yellowest pair of old socks.

What You’ll Need

Large bucket

Powdered laundry detergent

Dish soap

Sodium percarbonate (e.g., OxiClean)

Boiling water

Advertisement

How To Whiten Your Socks

Place your dirty socks in a large bucket, or any other basin you have on hand. Then add a small squirt of dish soap — “small” being the key word. (Too much will result in excess foam.) Next, cover the socks with boiling water, and add one scoop (or about 2 tablespoons) each of powdered laundry detergent and OxiClean. Stir the mixture together and let it sit for at least an hour, though preferably overnight. The final step is to remove the socks, place them in the washing machine, and launder them as normal. Once the laundry cycle is complete, your socks should look as white and fresh as they did the day you bought them.

What About White Shirts?

While we wouldn’t advise this method for delicates, it can be used for white undershirts that have developed yellowing collars or unsightly pit stains. While it may take a few attempts, it’s the perfect solution for refreshing any durable, white undergarments.

So don’t feel blue just because your clothing has turned yellow. With this helpful hack, you can make your socks and shirts last longer without feeling embarrassed about how dingy they may look.

Advertisement
Bennett Kleinman
Staff Writer
Bennett Kleinman is a New York City-based staff writer for Optimism Media, covering topics for several brands including House Outlook and Better Report. He previously contributed to television programs such as "Late Show With David Letterman" and "Impractical Jokers," and digital publications like The Onion. Bennett is also a devoted New York Yankees and New Jersey Devils fan, and thinks plain seltzer is the best drink ever invented.
This article is for general informational purposes only.
Affiliate Disclaimer 
|
Financial Disclaimer
Featured Image Credit:  S847/ iStock | Updated  Feb 24, 2025 |
Advertisement
Organizing 3m read
0

Why You Should Keep a Dry Erase Marker in Your Laundry Room

When you think of laundry room essentials, items such as laundry detergent, wool dryer balls, hampers, and fabric softener probably come to mind. But an item missing from that list can completely upgrade the way you do laundry, and it’s probably one of the last things you’d expect. Dry erase markers may take you back to your school days, but they’re surprisingly useful in a laundry room, particularly for multiperson households.

All featured products and deals are selected independently and objectively by the author. House Outlook may receive a share of sales via affiliate links in content.

When you think of laundry room essentials, items such as laundry detergent, wool dryer balls, hampers, and fabric softener probably come to mind. But an item missing from that list can completely upgrade the way you do laundry, and it’s probably one of the last things you’d expect. Dry erase markers may take you back…

So, how do you make the most of a dry erase marker in the laundry room? By treating the washing machine like your very own dry erase board. Most washing machine lids have an enamel finish similar to whiteboards, making them perfect for writing down important laundry reminders. Dry erase markers are generally safe to use on nonporous surfaces, including metals, porcelain, melamine, and glass, but we recommend testing a small area first.

Related: Why Throwing a Tennis Ball in the Dryer Is the Ultimate Laundry Hack

It’s also easy to remove the marker with a damp paper towel or microfiber cloth when the laundry is done. (If you’re worried about smudges, keep a spray bottle filled with a cleaning solution of one part isopropyl alcohol to three parts water.) Still need convincing? Here’s how a dry erase marker can ease some common laundry day headaches.

Advertisement

Jot Down Laundry Notes

When it comes to laundry, there’s nothing worse than accidentally shrinking your favorite sweater or tossing a “dry clean only” item in the dryer. A garment’s care instructions might call for cold water instead of hot, the delicate cycle, or air drying. In any case, you can write those reminders on your washing machine lid so you, or others in your household, don’t forget them.

Plan Your Laundry Days

Creating a laundry schedule is a total game changer, especially when you live with multiple people. Whether you have a partner, kids, or roommates, a well-planned schedule can make laundry days run more smoothly. Designate laundry days for each person or specific items you need to wash, such as delicates and bedding. You can even take it one step further by color-coding your schedule with different dry erase markers.

If this is a hack you’re eager to try, here’s a tip to keep in mind when shopping for this underrated laundry room essential. Dry erase markers with magnets on them are especially useful, as you can stick them to the washing machine to keep them organized and within arm’s reach.

Advertisement
Pauline Lacsamana
Writer
Pauline Lacsamana is a freelance writer and editor who specializes in commerce, home, design, and lifestyle. She has bylines in The Spruce, Business Insider, U.S. News & World Report, Hunker, MyDomaine, Parade, and more.
This article is for general informational purposes only.
Affiliate Disclaimer 
|
Financial Disclaimer
Featured Image Credit:  LightField Studios/ Shutterstock | Updated  Feb 24, 2025 |